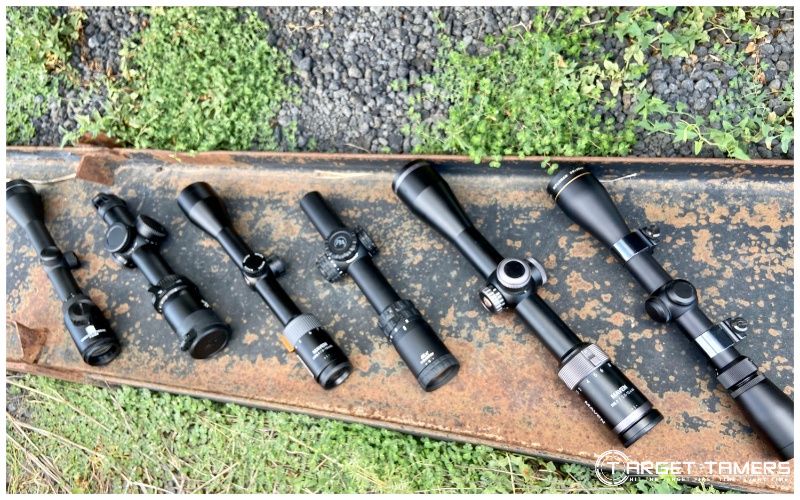
There are many different parts to a riflescope and various adjustments that can be made. These adjustments can affect the sight picture, magnification, accuracy, how you see the reticle, and more.
In general, riflescope adjustments manipulate internal scope components such as the magnification lenses, reticle assembly, turret system, and more. To make a scope adjustment, an external, movable mechanism is provided to make incremental, internal changes that impacts scope performance.
Fortunately, making the actual adjustments are not that complicated. I cover riflescope adjustments from the diopter to the turrets to an adjustable objective.
If you need to tighten your groups, sharpen up the reticle, or stop the crosshairs from apparent floating, scope adjustments are required.
How to Adjust a Riflescope
There are at least four scope adjustments that can be made. To make a magnification adjustment, simply rotate the magnification/power ring. To sharpen up the reticle for one’s vision, dial out the diopter as necessary. To bring groups up, dial up in elevation.
These are just a few examples. Before we dive into them, we must get the basics down first…
Riflescope Anatomy & Terminology
When scope adjustments are understood, you can troubleshoot some scope problems yourself. With that said, brief scope anatomy and terminology relevant to scope adjustments are provided.
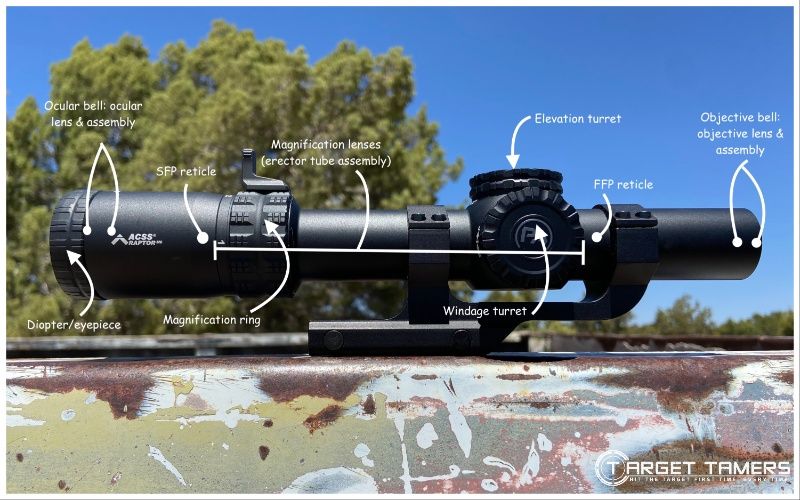
Ocular Lens & Ocular Bell
The ocular bell is the slightly larger end of the scope that houses the ocular lens assembly. The ocular lens is the eyepiece. The diopter is located on the rear of the ocular bell.
Diopter
This is the adjustable mechanism at the ocular lens (eyepiece) that brings the reticle into sharp focus for your vision.
Magnification Assembly
The external magnification ring governs the power setting with the magnification assembly located between the turret system and the ocular bell. As power is increased, the magnification assembly moves forward towards the front of the scope. As power is decreased, the magnification assembly moves rearwards towards the ocular lens.
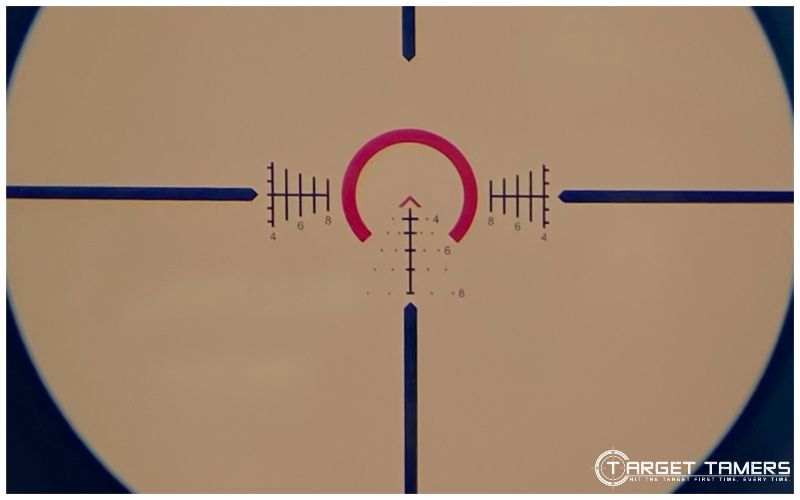
Reticle
The reticle is the aiming point as seen through the riflescope. This is made of wire or is glass-etched onto a lens and can also be illuminated. The reticle is also referred to as the “crosshairs.”
Whether it’s a first focal plane or second focal plane reticle is determined by its physical location in the main scope tube body. If it’s behind the magnification assembly, it’s an SFP reticle. If it’s in between the turret system and the objective bell, it’s a FFP reticle.
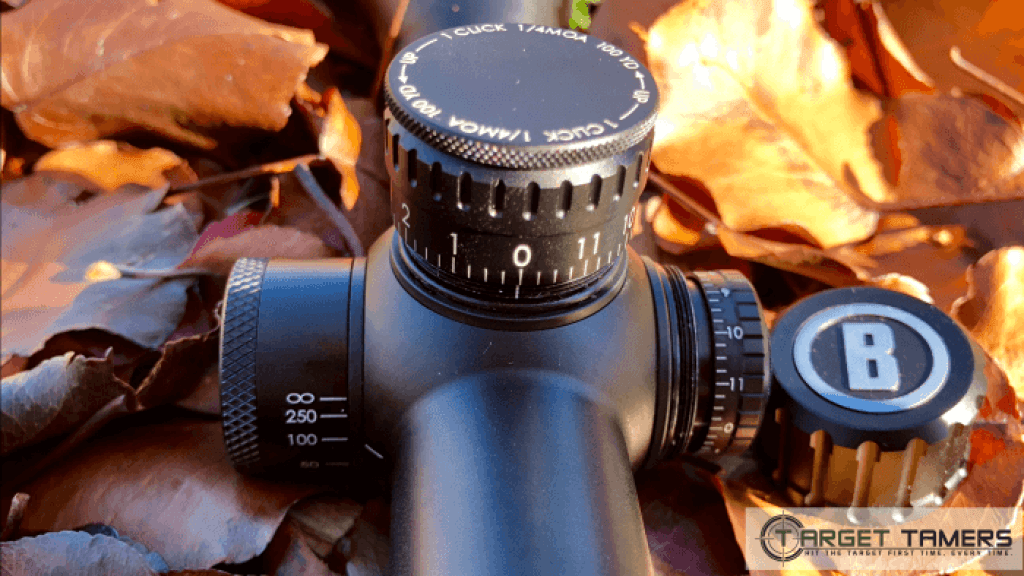
Turret System
The turret system is easy to spot. They’re the protruding knobs on the top and right side of the scope body situated near the center of the tube. The knob on top is called the elevation turret and the knob on the right is called the windage turret.
The turrets are used to change the point of impact downrange in the vertical and horizontal planes.
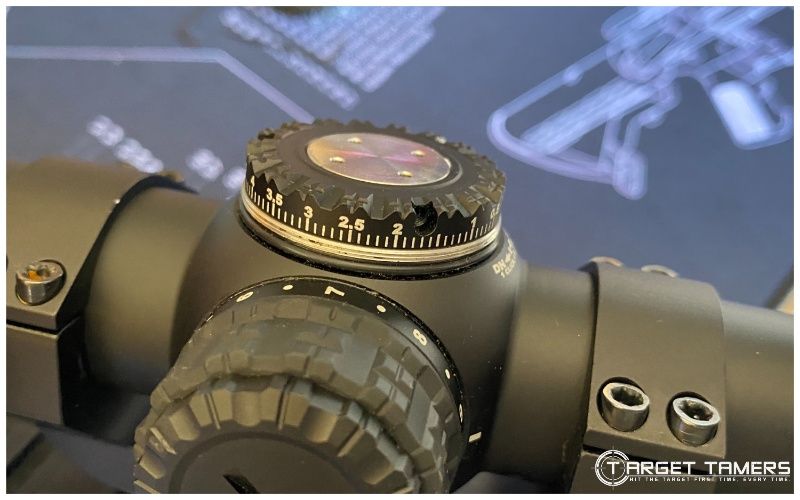
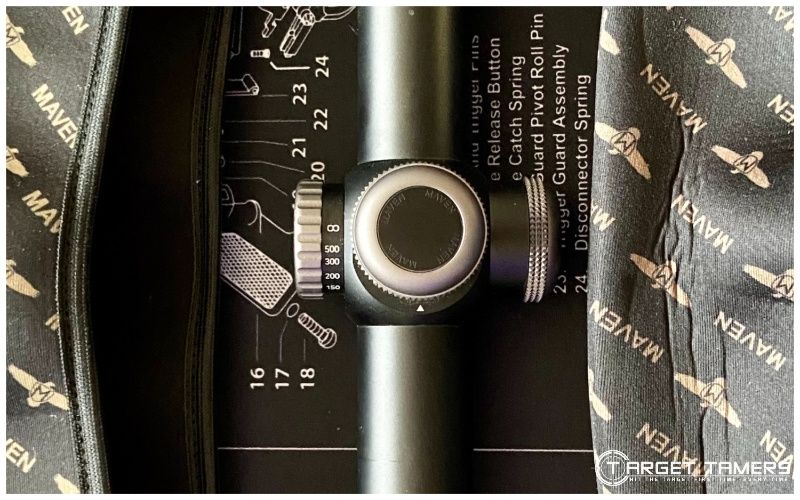
Side Focus (SF)
The side focus is also called the third turret. It’s the protruding knob that is on the left side of the scope body directly opposite the windage turret. Most scopes with more than 10x magnification have a SF or an adjustable objective. Adjusting the SF can correct for parallax and focus the image for the target distance.
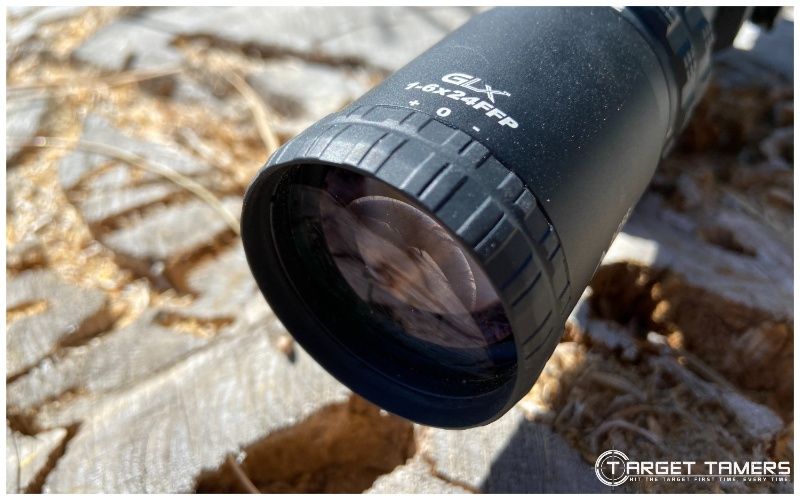
Objective Lens & Objective Bell
The objective bell is the large end at the front of the scope that houses the objective lens assembly. The glass lens is called the objective lens and is the first point of contact for light. If there is an adjustable objective, it will be located here on the end of the objective bell.
Adjustable Objective (AO)
The very front end of the objective bell has a moving part. This is the adjustable objective and provides the same benefits as a side focus. Scopes with greater than 10x power will feature either a side focus or adjustable objective. It is redundant to have both a side focus and AO. Not all scopes with 10x magnification or more will have an AO.
1. Adjusting the Diopter (Eyepiece Lens)
This is one of the first adjustments that is required when you have a scope. It’s usually done once for your vision. It might need to be done again if there are unintentional adjustments to the diopter, if someone else uses your scope, or if you’ve had changes in your vision like aging eyes.
- Dial out the diopter
- Point the scope towards a blank wall
- Make incremental adjustments (usually clockwise)
- Look away in between small adjustments
- Stop when the reticle is sharp and focused
The benefits to making diopter adjustments is that it brings the reticle into focus for your eyes. Since everyone’s visual acuity is different, this is an essential adjustment to properly use a scope and maximize its performance.
Tip:
If you wear glasses while shooting, keep your glasses on during diopter adjustments. For those who are near or far sighted, the scope may have enough dioptric adjustment to compensate for your vision. You might not have to wear your glasses at all.
This adjustment is a priority if you need to troubleshoot a blurry reticle.
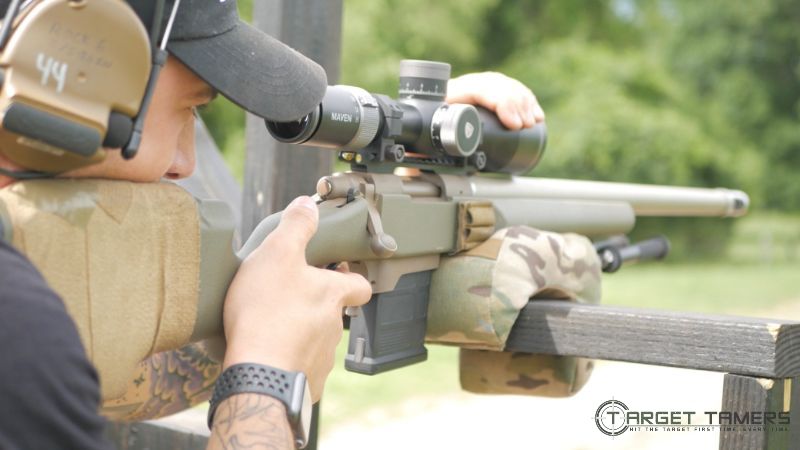
2. Adjusting Magnification
The magnification assembly is responsible for providing magnification regardless of if it’s a fixed power or variable power riflescope. Making magnification changes is universal and easy. There is a ring around the ocular bell that can be rotated left and right to adjust magnification.
- Grip the magnification ring
- Rotate left/right to desired magnification
The benefits to making magnification adjustments is that you can zoom in for a closer look or zoom out for a wider field of view. Unfortunately, zooming in doesn’t always mean that you will have better clarity or resolution.
Tip:
Some riflescopes allow for installing a power throw lever. This makes it easy to make magnification adjustments quickly. Some scopes have visual or numerical references to mark every power setting while others may only offer intermittent references.
For more info on whether or not you can have too much magnification, check out our explanation on this very topic here!
3. Adjusting the Elevation Turret
Adjusting the elevation turret will physically move the reticle up or down depending on the direction in which you rotate the turret. When elevation adjustments are made, the point of impact downrange will also change vertically.
Nearly all riflescope turrets have visual references displaying the direction to make UP adjustments along with the value of each adjustment described as a click. The value of each click will be different between scopes, but they follow standard values such as, 1/8 MOA, 1/4 MOA, 1/2 MOA, 1 MOA, 0.1 MIL/MRAD, etc.
Standard elevation adjustments are usually made with UP adjustments made in the anti-clockwise direction and DOWN adjustments in the clockwise direction.
- If groups are low, dial UP to bring the group up
- Do this by rotating the elevation turret in the anti-clockwise direction
- If groups are high, dial DOWN to bring the group down
- Do this by rotating the elevation turret in the clockwise direction
The benefits to making elevation adjustments is that you can acquire consistent and predictable point of impact shots downrange. This improves accuracy and allows you to sight-in/zero your scope and compensate for bullet drop.
Tip:
Avoid chasing groups and guessing adjustments by learning the measuring system your scope uses. If it’s in MOA, we explain that here. If it’s in MIL/MRAD, we explain that too. If you’re looking to zero your scope at 100 yards, we can show you how that’s done as well.
4. Adjusting the Windage Turret
Adjusting the windage turret will physically move the reticle left or right depending on the direction in which you turn the turret. When windage adjustments are made, the point of impact downrange will also change horizontally.
Making adjustments to the windage turret is the same as making adjustments to the elevation turret. The value of each click of the windage turret should be the same as the value of each click of the elevation turret.
Standard windage adjustments are usually made with RIGHT adjustments made in the anti-clockwise or DOWN direction. LEFT adjustments are usually made in the clockwise or UP direction.
- If groups are to the right, dial LEFT to bring the group left
- Do this by rotating the windage turret in the upwards direction (away from you)
- If groups are to the left, dial RIGHT to bring the group right
- Do this by rotating the windage turret in the downwards direction (towards you)
The benefits to making windage adjustments is that you can acquire more consistency and predictable horizontal shots to sight in and zero your scope. Another benefit is that you can compensate for wind drift too.
Tip:
Formulas used to calculate how much adjustment you need to bring your point of impact to the point of aim is explained in detail in our MOA Explained and MIL Explained guides. If you want a step-by-step guide to get zeroed in at 100 yards, check out the instructions here.
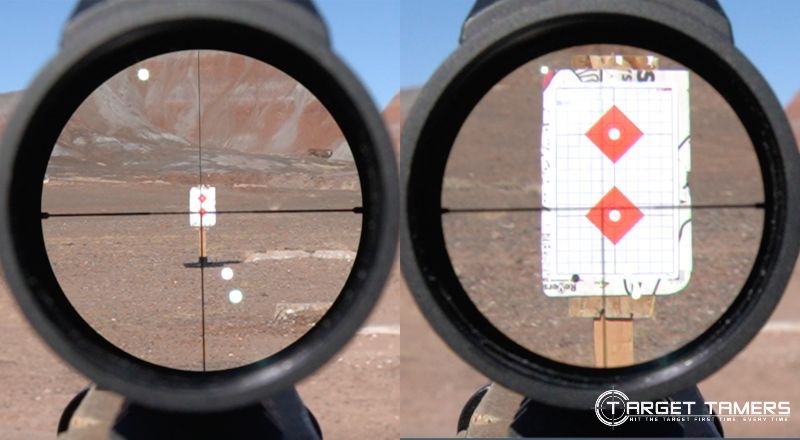
5. Adjusting for Parallax
You mightn’t have noticed parallax before if you’re shooting inside a few hundred yards. But the further out you go or the more your eye is off the optical plane, parallax will interfere with the accuracy of your shot.
What does parallax look like? It can look like the crosshairs are moving or floating and not staying on target. It’s also likely that the sight picture is slightly blurry and unfocused at the same time.
How do you fix parallax? The fastest way is to get your eye directly down the center of the optical plane. This really stems from having a consistent and good cheekweld.
However, sometimes a large scope or an awkward, but unavoidable, shooting position may interfere with a perfect alignment with the optical axis of the scope. Though that should be addressed, a side focus or adjustable objective can help with that.
Side Focus
- Dial the SF upwards to the target distance
- If the target is at a distance further than the references on the SF, dial to the infinity sign
- If the target is at a closer distance than what the SF is currently set to, dial all the way down to 0 (zero) and dial up to the target distance
Adjustable Objective
- Rotate the AO in the left or right direction to acquire the target distance
- If the target is at a distance further than the marked references provide, dial to the infinity sign
- If the target is at a closer distance than what the AO is currently set to, dial down to 0 and then dial up to the target distance
The benefits of making a parallax correction with a SF or AO include a focused image of the target that is in the same optical plane as the reticle. This provides many advantages with improved accuracy being the first.
Tip:
If a scope has fixed parallax, the image is really only focused for and removes parallax at the set distance which is usually somewhere between 50-150 yards on many scopes. However, parallax can still be removed with a fixed scope. We address everything in our Parallax Adjustments guide.
6. Adjusting the Eye Relief
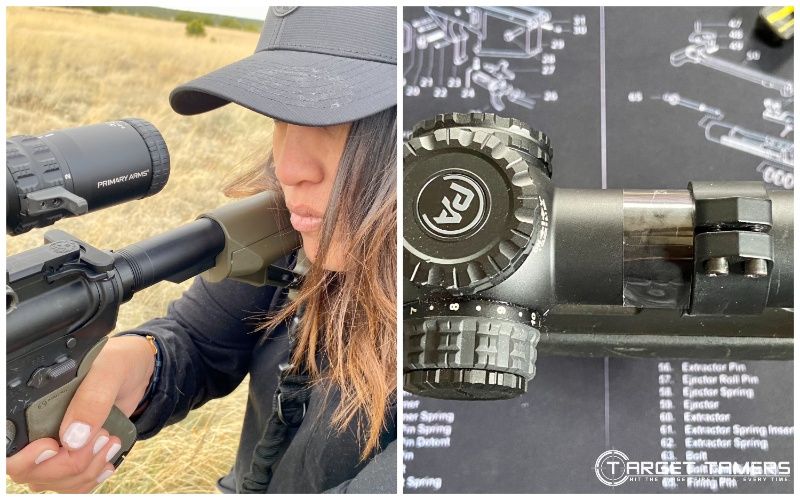
Unlike many scope adjustments that have a knob or a ring that is manipulated to make an internal change in the scope, making an eye relief adjustment is different. The eye relief is a measurement that indicates how far the eyepiece needs to be from the human eyes to acquire a full image of the field of view without aberrations.
Setting or finding the eye relief is done during the process of mounting a riflescope. The scope is placed into mounted base rings and the top rings loosely mounted so that the scope can move freely within them.
- Shoulder the empty rifle into your natural position
- While looking through the scope, move it forwards and backwards within the rings until you can see the FOV
- Make small adjustments until you can see the FOV in its entirety with no aberrations
The benefits of adjusting and setting the eye relief include seeing the entire sight picture without any vignetting or aberrations. Proper eye relief also ensures that the scope doesn’t cause injury to the shooter from recoil.
Tip:
When mounting a scope and setting eye relief, it can be helpful to use a small strip of masking tape to mark the scope’s position along the rings. This helps to ensure you have the right eye relief if the scope is moved during leveling and when torquing down the rings.
FAQ's
The adjustment knobs are the turrets. The knob on top of the riflescope is the elevation turret and the knob on the right side is the windage turret. A scope may have a third turret or knob located on the left side. This is the side focus which also serves as the illumination knob on some scopes.
Making up or down adjustments on a scope is done via the elevation turret. Making elevation adjustments affects the vertical POI. Making up adjustments raises the POI while making down adjustments lowers the POI.
In general, if groups are shooting high, adjustments to the elevation turret are made. To bring groups lower, dial down by rotating the turret in the clockwise direction. The user manual should confirm in what direction the turret system affects point of impact.
Overall, everything from lens placement in a scope, quality glass, and fixed or adjustable parallax to proper use of the diopter can affect image quality at max magnification. Generally, set the diopter and focus for the target distance with the side focus or adjustable objective.
Cranking up the magnification to max power results in loss of resolution and brightness. The optical system is maxed out for the scope’s focusing capacity. This is a reason why some will opt for higher magnification even though they intend to ‘max’ out at a few settings below the actual maximum power of the scope.
On average, seeing black, shadows, or a clipped sight picture is indicative of incorrect eye relief. The scope is not at an appropriate distance from the eye to see the full field of view without aberrations. To adjust eye relief, the scope must be remounted with eye relief properly set.
With the scope set loosely within the mounting rings, the rifle must be shouldered and head in your natural position. Move the scope forwards and backwards to acquire proper eye relief. You’ll know you have it when you’re not creeping the stock and there are no shadows or aberrations in the sight picture.
Scope Adjustments: Universal but Personal
Overall, whether one is adjusting the diopter or making adjustments to the turrets, it’s a standard and universal process. Everyone must do it to correctly use a riflescope. However, the settings that are used and how many adjustments are made are of a personal matter.
How sharply you can see the reticle, or how focused your target image is, will be dependent on scope adjustments. When you know your basic scope anatomy and how to make these kinds of adjustments, you can troubleshoot for yourself.
Further Reading


Best rifle scope article ever! Very knowledgeable authority.
Thanks Ray! Glad you enjoyed it!
Very good information and helpful
I'm glad it was useful Henry! Thanks for the comment.
This the best treatise on scope adjustment I've ever had the pleasure to read. I have been teaching firearms handling, shooting and reloading for more than fifty years. During that time, I've built, repaired and and mounted scopes on
hundreds of rifles.
Your article on scope adjustment will be a great help when I'm explaining and teaching others about scopes and how to deal with their idiosyncrasies. You should consider writing a book at some point. I'll be one of your first buyers. Thank you.
That's too kind of you Fred! Thank you for the nice feedback.