Saving money when you're in the market for a new rifle scope starts with taking an in-depth look at additional scope features.
With so many tempting and seemingly necessary features on high-end rifle scopes, you can't always be sure which ones you need and which ones you can go without.
Scope Parallax adjustment is nearly always on the top of that "undecided" list. So, to help you narrow down your options we've put together some how-to's and tips to inform you of whether or not parallax adjustment is for you.
Plus, these tips will help you master the art of parallax adjustments if you decide a scope with this feature is for you.
Rifle Scope Parallax Explained
What is Rifle Scope Parallax?
Do you want the jargon-filled, complicated, and incomprehensible twaddle or do you want it straight in layman's terms? Since we're hunters, not pedagogues, let's go over parallax in the simplest way possible.
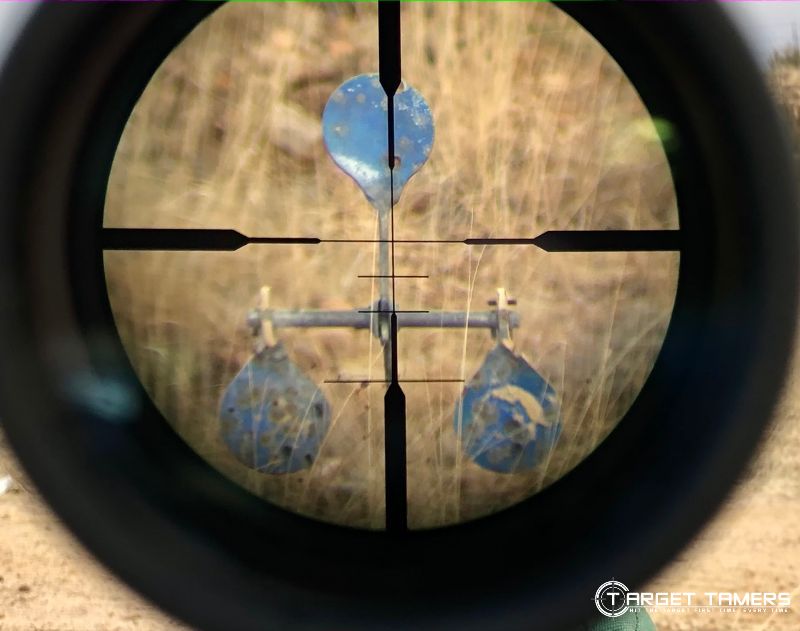
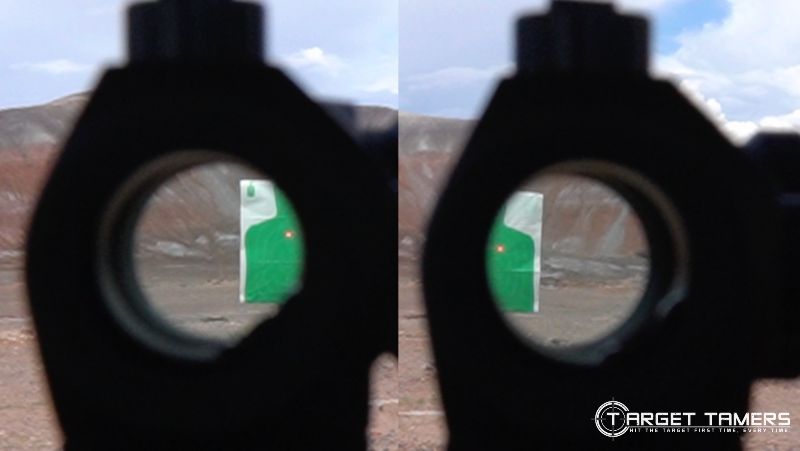
Parallax is the apparent movement, swimming, or cross hair travel when you move your head and eyes in a different position. This occurs when the image is not in focus or is not on the same optical plane as the reticle.
So, what's the goal of parallax correction?
For you, it's to get that darn cross hair to sit still and stay on target so you can make your shot where you want it to go.
For the scope, it's to get the image you're seeing to be on the same focal plane as the reticle. This means, making sure that light rays cross, refract, and fall precisely on the reticle focal plane.
If you want a little more on parallax, see the video and explanation in our article How to Mount and Sight Your New Rifle Scope. Since I promised this should be as easy to understand as possible. Let's quickly go over some basic rifle scope lens anatomy.
Rifle Scope Internal Anatomy
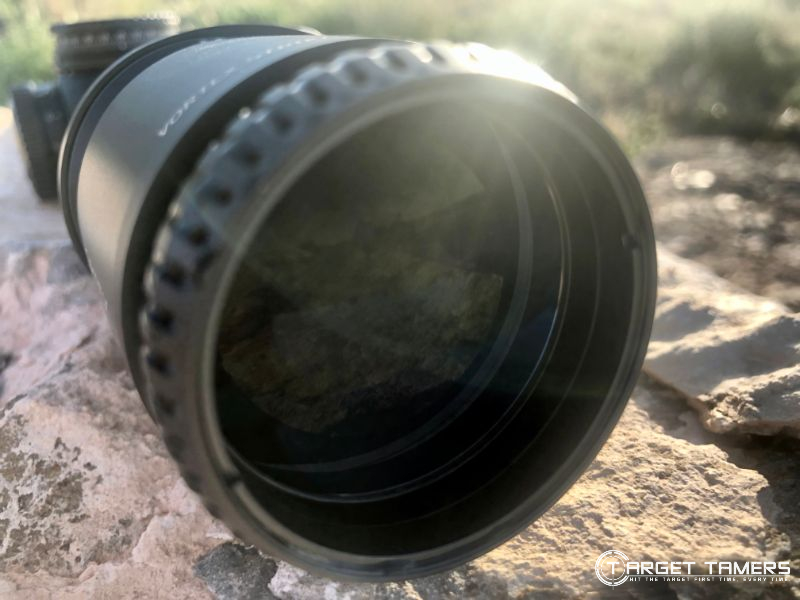
Firstly, there are four lens assemblies in a rifle scope. From front to back, you have the objective lens, focus lens, magnifying lens, and lastly the ocular lens. The position of the lens in the rifle scope are important.
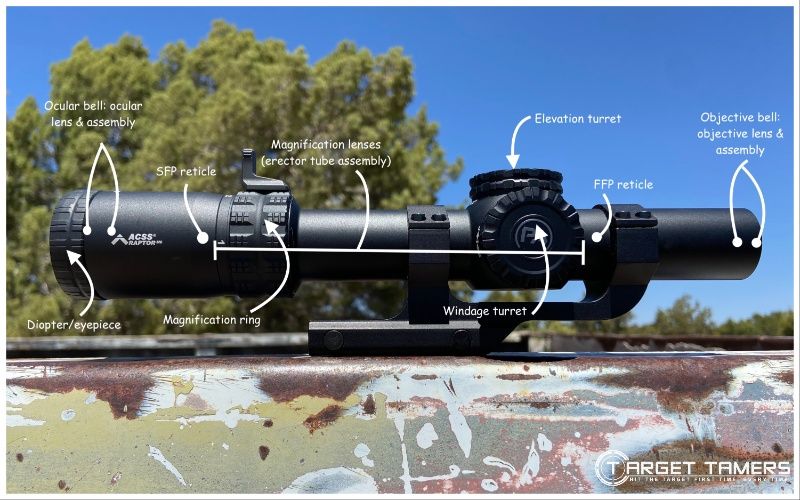
Secondly, the erector tube houses the reticle. If your rifle scope is a front/first focal plane (FFP) unit, then the reticle is going to be located in front of the magnifying lens. If your rifle scope is a second/rear focal plane (SFP) unit, the reticle is going to be located behind the magnifying lens.
Now knowing this, let's take a peek at how this whole lens system works in relation to parallax.
- Focus lens - the focus lens assembly's position is adjusted when a side focus is used to correct for parallax. As you turn the side focus knob to a higher distance reference (marked on the knob) towards infinity, the entire focus assembly shifts closer to the objective lens assembly. If you turn the side focus knob to a lower distance, it will shift closer in the direction of the ocular lens assembly.
- Objective lens - the objective lens assembly's position is what's adjusted to correct for parallax when using an adjustable objective (AO). By turning the AO to the appropriate distance referenced on the outer surface, it will shift the objective lens assembly until your reticle and image are in the same focal plane.
Now that I've got you up to speed on your internal anatomy, let's uncover why you may have never heard of or dealt with parallax until now.
Why Have I Never Noticed Parallax Before?
Unless you're a precision shooter, long distance hunter, or a very close varmint hunter or pellet gun enthusiast, you may not have noticed parallax issues. And, parallax may not have presented too much of a problem for your style shooting.
The truth is, for big game hunters sticking to normal hunting distances, say between 75 to 250 yards, parallax isn't going to present any problems for you. Let's delve into a few reasons why that is.
1. Factory-Set Parallax
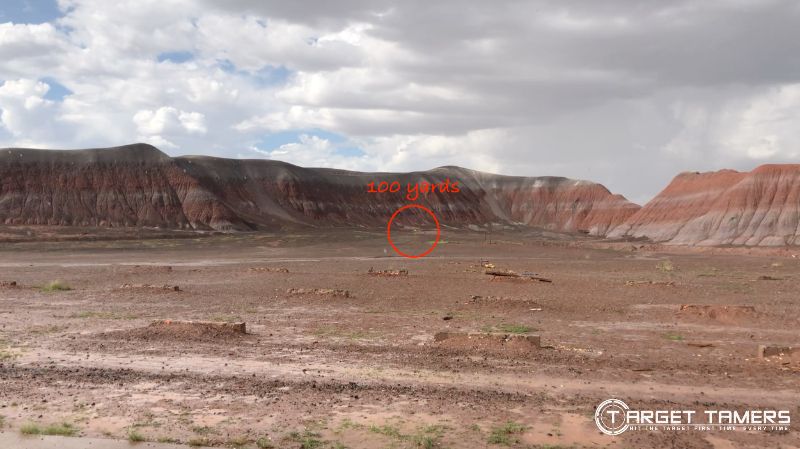
All rifle scopes without a parallax adjustment feature are going to be factory-set to be parallax free at a specific distance. At that set distance you can move your head and eyes all over the place and the cross hairs won't move in relation to the target.
- Rifle scope - factory-set at 100 or 150 yards
- Rimfire scope - factory-set at 50 to 100 yards
- Air gun scope - factory-set at 50 to 75 yards
2. Parallax is Unnoticeable at Your Normal Range
If you're hunting between the distances mentioned above, you're probably more than likely using a 3-9X40 rifle scope or something with lower power.
With these magnifications and distances, parallax shouldn't ever present a problem. Parallax provides a very small and slim margin of error, if it's even noticed at all, at these distances.
Rifle scopes with less than 10X magnification typically won't have a parallax adjustment, for example LPVO (low power variable optics) such as scopes for an AR-10. Rifle scopes with more than 10X magnification should almost always have a parallax adjustment. These rifle scopes are aimed towards the long range distance hunter.
For more info on long range hunting scopes, take a sneak peak at our long range rifle scope reviews.
3. You Use a 'Parallax Free' Device
If you're a reflex or red dot sight kinda guy, then you can safely say that you've never experienced parallax at all. They're what you would call "parallax free" devices at all distances.
This is because reflex sights have little to no magnification abilities (we'll come back to magnification and parallax later).
How To Make Parallax Adjustments on Your Scope
Now that we've got the foundation laid to understanding parallax, I'm going to take you through the meat of this article.
Here, we'll get into how to use your parallax adjustment feature, how to get rid of parallax even if you opt for a fixed objective rifle scope, and why you would want to adjust for parallax.
Step 1: Focus Your Diopter/Eyepiece
Before we jump the gun, ensure your scope is focused for your eyes first.
Focusing a rifle scope is a one time adjustment that shouldn't be done again unless someone else used your scope.
It's like getting back in the drivers seat after someone borrowed your car - you need to adjust the mirrors, the seat position, and perhaps even the steering wheel and pedal heights.
Once you've got the most comfortable and most practical position behind the wheel, you shouldn't have to adjust any of those components again.
The goal of focusing is to get the reticle focused for your set of eyes. There's no way you can adjust for parallax and get dead on if the foundation hasn't been cemented in.
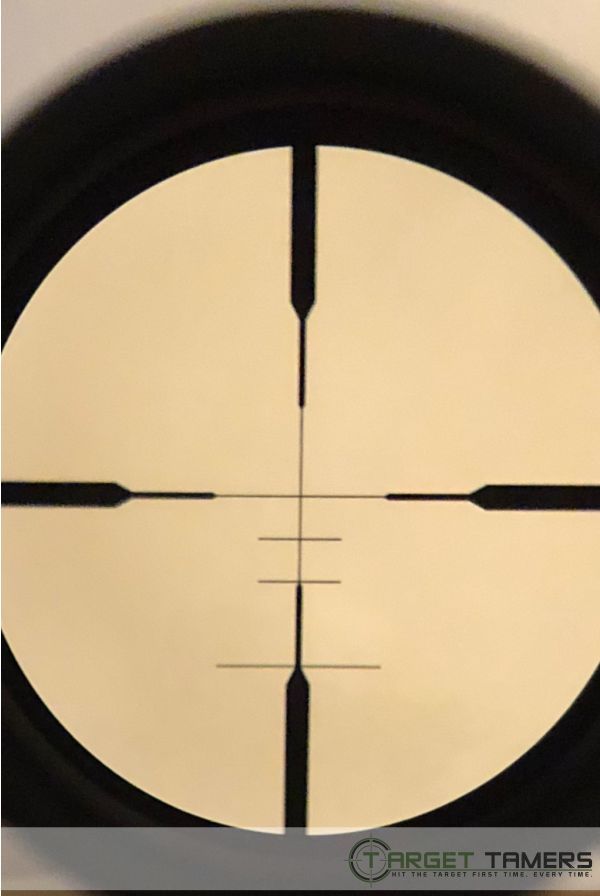
- Just look through the scope to a blank backdrop such as a wall.
- Close your eyes or look away. This is to prevent eye muscles from focusing and correcting the image for you.
- While looking away, make the adjustments with the eyepiece.
- Look back through the scope and repeat the process until the reticle is sharp, crisp, and as black as can be.
- Lock it in.

Step 2: Know How to Use Parallax Adjustment Features
These features include adjustable objectives and side focus and we are going to give you some tips to using both of those in the next section. We will also offer up some tips to eliminating parallax with a fixed objective. Let's get into the 27 tips!
Tips to Using an Adjustable Objective (AO)
TIP 1
The top surface of the AO will be marked with distances as references for you to aid in correcting parallax.
TIP 2
These distances will be marked in yards or meters. If your scope reads in yards but you need meters, don't panic and remember the distance markings are more for references.
You'll still need to play around with the AO until it's reached the right focal distance - you'll know when it's right because the image will be crisp and sharp without any cross hair travel.
TIP 3
If you're not sure what distance your target is in, this would be a pretty good time to whip out your laser rangefinder.
Oh, you don't have one?
Lucky for you, we have loads of info on them to muse through before you choose to buy a hunting rangefinder. Once you have the range, move the AO to the referenced distance that's appropriate and tweak for the best image from there.

TIP 4
As you are turning the AO, move your head and eyes up and down or sideways to ensure you're reducing as much of the floating effect as you possibly can.
TIP 5
Looking through the rifle scope and reaching for the AO might not be as comfortable as you hope it would be.
Sometimes the not-easily-seen reference markings on the AO, length, and sheer size of a scope may force you to leave your sight picture just to make the adjustments.
Make sure you take size, length, and markings into consideration before you buy a rifle scope with AO.
TIP 6
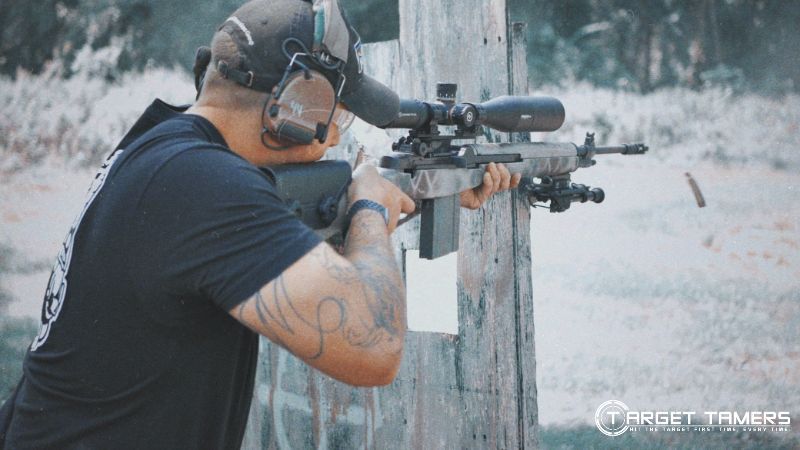
Ensure your stance and head, cheek, and eye placement are consistent every time (more on this later!). Try to look through the center of the scope from the same position with each shot.
TIP 7
This is an unconventional tip since it might void your warranty if you have one and intend to use it.
But, some people choose to do it and it provides a more accurate and faster way to get parallax free for that known distance.
Remember how I said reference markings are just that - references? That's because the markings might not always be completely accurate with your image quality while getting rid of parallax. In this case, you can disregard the reference markings and make your own.
Set up a time to hit the range and take full advantage to calibrate your AO settings for your eyesight.
- Set up a target at the maximum distance possible. This can be 1000 yards or lower if you don't shoot this far.
- Set the highest possible power/magnification.
- Examine your sight picture and look for parallax.
- Use the AO until focal planes are adjusted and there's no more reticle movement.
- Mark this distance with a fine paint marker of some sort on the AO for future and accurate references.
- Repeat this process until you have calibrated the AO for distances that you want to use quickly for precise bullet strikes when parallax is an issue.
TIP 8
It shouldn't be a big deal if you're not going to calibrate your AO. The deeper depth of focus an AO provides can give you wiggle room to use a middle-range parallax setting that will be suitable for most of your shots.
This is the "set it and forget it" concept that makes AO a popular parallax adjustment option.
Benefits of an Adjustable Objective
- Ability to make any parallax adjustment your rifle scope allows
- AO takes care of almost all parallax
- AO makes it so you don't have to be strictly consistent with cheek weld method
- No extra turret or exposed external feature
- Can use AO as a rudimentary range finder
- Deep depth of focus while in the field
- Middle-range parallax setting can be suitable for nearly all shots
- If the scope is rugged and solid the AO can take more abuse than a side focus
- AO allows for more finer adjustments because of the threading mechanism versus the side focus
Disadvantages of an Adjustable Objective
- Often more expensive than fixed objective scopes
- Can add more overall weight
- May have to leave sight picture to adjust
- AO combined with larger diameter size can make scope top-heavy
- Possibly adds complexity issues
- Deep depth of focus with a relative amount of parallax present can encourage misplaced shots
Tips to Using a Side Focus
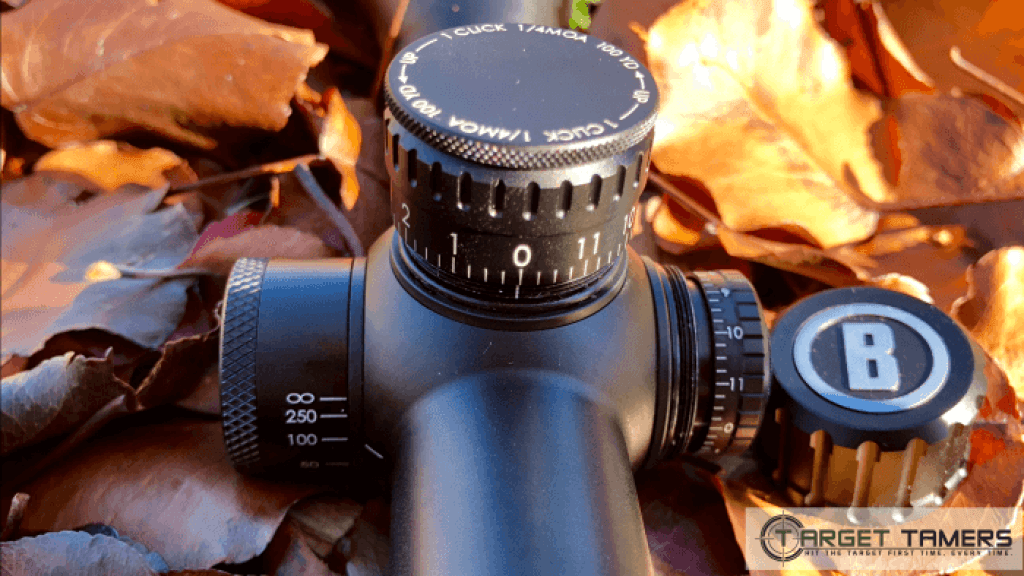
TIP 9
A side focus is sometimes referred to as third turret/knob. If you have an illuminated reticle, the side focus turret can sometimes double as the illumination control.
The side focus will have distance markings on it for visual reference.
TIP 10
Like the AO, the distance markings are for references. It can be in either yards or meters.
If you have a side focus that's measured in meters and you need yards, there's no need to freak out. Continue making the adjustments as necessary since you're calibrating the scope for the best image without parallax anyway.
TIP 11
To calibrate the side focus for a particular distance, rotate the dial all the way up past the infinity setting until it stops.
Turn the dial slowly until the image is sharp and parallax is eliminated. If you overshoot - turn more than you needed to - you can't go back to adjust. You have to start again. Why? Read on...
TIP 12
Backlash is slop, movement, or inaccurate and mushy clicks in the turret due to its mechanical construction and placement in the erector tube.
To prevent backlash, you have to dial the side focus all the way up until it stops. From here you can dial down to the distance you want.
If your side focus is set for 400 yards and you want to dial down to 150 yards, you can do that no problem. But, if you want to dial up from 150 yards to 400 yards, you'll need to start all over again by dialing up and then coming down.
The goal is to keep backlash completely to one side. If you decided to calibrate from the bottom end up, recoil will only kick the internal mechanisms in the erector tube out of your intended setting.
Always dial up and then come down every time if you're going from close range to long range.
TIP 13
Sight picture can get blurry or fuzzy as you change magnifications when adjusting for parallax. This is where the distance markers provided on the side focus aren't necessarily the most important factor.
Calibrating your side focus the same way as described in How to Use an AO/Tip 7 will provide you with a sharp and crisp image while reducing parallax.
TIP 14
When making unpredictable distance shots while out in the field, make sure your magnification is at the appropriate setting for that shot.
Leaving your setting in high power when a deer walks in on you at 75 yards can cause a blurry image or you won't know what you're looking at.
Most hunters will lose their chance of a clean kill because of the magnification, not because they forgot to dial down/up on their side focus.
TIP 15
Save the side focus adjustments for deliberate, intended shots.
Fiddling around with your parallax and magnification can be time consuming. You might lose that chance to make your shot on the trophy of your life.
But for long range, deliberate, and calculated shots, it can be the difference between taking dinner home or going hungry.
TIP 16
If you changed the side focus setting to 150 yards to match a fixed objective factory-set at the same distance, you'd have the same parallax free result.
But, if you were to change your hunting distance range in the same hunt, with a side focus you'd at least be able to change the parallax setting.
Without one, you'd be forced to use whatever the factory set parallax setting is for all shots.
Benefits of Side Focus
- Easy to reach and use
- Don't have to leave sight picture to use
- Reference markings should be highly visible (not always the case)
- Shallow depth of focus can aid wind reading in the right conditions
- Side focus makes it so you don't have to be strictly consistent with cheek weld method
Disadvantages of a Side Focus
- Perhaps a little time consuming to use
- Each "click" of the side focus may mean a lot more adjustment than you intend
- Overshooting the adjustment may cause you to have to start the process again
- Not as easily fine tuned as the AO
- Sometimes eliminating parallax can cause slight image blurriness
- External component can be prone to damage from abuse
How to Eliminate Parallax with a Fixed Objective
A fixed objective is a rifle scope that doesn't have any parallax adjustment features. This scope will be factory set at a determined distance to be parallax free.
Eliminating parallax without an AO or side focus isn't impossible. Although it takes skill to master, it's easy to attain.
For those who are opting for a fixed objective but would like to know how to eliminate parallax for the just-in-case moment, here's some tips that might help you out when you need it most.
TIP 17
Optimum focus comes from ranging your targets within your scope's parallax set range.
For example: if your rifle scope is factory-set to be parallax free at 150 yards, you're going to have the most favorable focus when looking at your target from 150 yards away.
TIP 18
Simply looking directly down the center of the scope will put you in parallax free range regardless of the setting on your AO or side focus or even if you don't have one.
Sounds easy enough? Actually, it's not quite that simple. To get that perfect alignment between eye and center of the scope involves a few more components than you think. Read on...
TIP 19
The key to centering your eye with the optical axis of the scope is to attain a good, comfortable, and consistent cheek weld.
The cheek weld method (which is a whole other topic in itself!) involves laying your cheek along the comb of the stock in the exact same position each and every time.
The idea of a good cheek weld in relation to parallax is stated in tip 2 - it sets you up for the ideal eye alignment to look down the center of the scope.
TIP 20
A good cheek weld is so important to accurate shooting, especially with a fixed objective scope.
Factors such as the size of the rifle scope (particularly the objective bell and eyepiece), mounting profile, mounting ring heights, eye relief, and more can all contribute to whether or not you can attain a good cheek weld.
Additional factors such as your face shape, clothing, shooting position, and even trigger control can affect your precision and cheek weld.
The take home message of this tip is to ensure you're positioned properly.
The consequences can be the intimate black kiss from the scope - poor positioning can have you too close to the scope that in turn causes a black eye or bruising to the face because of recoil.
Your face can slip off the stock causing inaccuracy or to learn the lesson more painfully, the stock will smack you in the face.
Your properly mounted optic can aid in an ideal positioned cheek weld. You'll have enough eye relief to be clear of the scope as well as attain the perfect eye alignment with the center of the scope.
TIP 21
Get a cheek rest or extra cheek padding if your scope is mounted with high rings.
Sometimes objective bells with 50+ mm lens can leave you with a high mounted scope that might just mean you can't get a good cheek weld.
It's true that cheek rests will be cheaper than buying a rifle scope with a parallax adjustment feature.
But, if it's strictly a financial decision to avoid the expense of a scope with an AO or side focus, I have some good news for you.
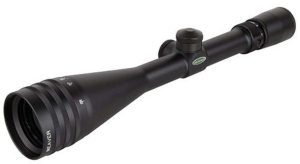
We've done the research and found a few scopes that can fit any budget - the Mueller APV 4.5-14x40 AO for under $200 and the Vortex Crossfire II Hog Hunter for under $300.
TIP 22
You can modify a make-shift cheek rest if you had to. With adhesive felt or moleskin, self-adhering bandages, and foam padding, you could rig your own rest together.
Since the cost of these supplies can easily match that of a cheap cheek rest for $15, I won't get into a step-by-step rant here about modifications.
But to be clear, you can still reduce neck fatigue and prevent slippage due to sweating even with a modified cheek rest that is always better than a poor cheek weld.
TIP 23
Another way for you to explore with eliminating parallax is to actually back away from the scope.
Increase your scope eye relief until you can see a consistent amount of the eyepiece around the entire sight picture. This might help you get that good cheek weld and your eye on center.
TIP 24
Remember you want good eye relief, eyes parallel with the ground, and although it'll be tempting to bring your head down to the gun - don't.
Instead, always bring the rifle up to your cheek to provide a consistent cheek weld, improve accuracy, eliminate parallax, and avoid as much neck fatigue as possible.
Benefits of a Fixed Objective
- Cheaper than rifle scopes with parallax adjustment
- Can have a light-weight, compact, and streamlined build
- User-friendly, uncomplicated design
- Factory-set parallax setting usually caters to most shots
- Consistent cheek weld can eliminate parallax regardless of parallax setting
- Can attain cheek weld with cheek rest on high mounted scopes
Disadvantages of a Fixed Objective
- May have to spend extra money on purchase of a cheek rest
- Requires strict adherence to cheek weld method to eliminate parallax
- Can't eliminate parallax if ranging far out of factory-set parallax range
Step 3: Know Why You Need to Correct for Parallax
When changing your hunting distance range, say from 70 yards to 400 yards with a fixed objective, you'd be forced to use the parallax setting that it's set for.
Some hunters, shooting enthusiasts, and experts say that these distances don't present any issues while hunting in relation to parallax.
I, and many other hunters that have used either an AO, side focus, or both say that there's no disadvantage to having the parallax adjustment feature if you know how to use it right.
This is the point where I welcome you to the much-debated and ongoing for-or-against discussion.
Why Adjust For Parallax at All?
It's true that if you're using the most versatile and popular 3-9X rifle scope for hunting big game, even out to 500 yards, you're still going to have pretty tight shots with less than a couple inches of give or take.
That's because at these distances, parallax has a very small margin of error.
But, each time you increase magnification you also increase parallax which means an increased margin of error. Obviously, this can be an issue for long range and extreme long range hunters with high-powered scopes.
TIP 25
The key to getting good picture quality without reducing your magnification setting is to use a scope with an AO or side focus.
You want to be able to adjust for parallax if you desire greater and more accurate aiming precision. By getting rid of parallax, you're assured that your bullet strike is going to be exactly where you intend it to be because you know you're seeing the target from the same perspective.
Who Needs Parallax Adjustments?
- Pellet shooters, air gunners, and rimfire hunters who want to shoot closer than factory settings of about 50-100 yards. Air gunners particularly, are rarely going to shoot out to 100 yards. Staying in the 50 yard range or even below will require needing to adjust for parallax.
- Target, precision, bench rest, and extreme long range target shooters using high-powered optics above 10X will want parallax adjustment. Also, if you want within 1/4 to 1/2 inch placements you're going to appreciate the extreme accuracy a parallax adjustment feature can provide.
- Varmint hunters who are looking to take down ground hogs, prairie dogs, squirrels, and the like from extreme various distances. Hunting in close ranges like 25 yards or long ranges out to 300 yards plus some will benefit from parallax adjustment.
- Big game hunters have a little more flexibility because painstakingly 1/4 to 1/2 inch bullet placement accuracy is not as critical when a kill zone can be 4 to 10 inches in diameter.
TIP 26
As a quick word on the topic, the optimum kill zone for a one-shot kill-shot chance on a deer is only about a hand-width size just above the heart.
The kill zone of various animals is a self-deserving topic that can easily rack up a whole other article, so we won't get into that - today.
So, you may ask if parallax adjustment is really necessary for most deer, elk, mountain goat, and other big game predator hunting?
Yes. Here's why those slim margins can be rather large from long range distances.
- Making a shot even 1/2 an inch outside of the kill zone can seriously injure the animal
- That misplaced shot can cause the animal unnecessary pain and suffering
- Misplaced shots will cause you unnecessary tracking of the wounded animal
- At long range distances, other factors are involved with the accuracy of your shot
TIP 27
Remember at long and extreme distances, you also need to take into consideration other factors such as bullet drop, wind speed and direction, bullet velocity and the like.
That in itself can directly cause deviating and large bullet placement results - even without parallax getting involved.
At these distances where these factors matter, parallax should be just as important. With lots of practice on the range, you'll know what to adjust your rifle scope for when presented with focus aberrations and varying results in the field, be it for windage, elevation, bullet drop, or parallax.
But, are you ever going to completely get rid of parallax?
While it will seem apparent to your eye that your scope is now completely parallax free, you can't deny that science says there will always be some level of eye/spherical aberration.
This is because you're still trying to look through several curved glass lenses. But, within the scope's set parallax free range, these aberrations should be a non-issue.
Benefits of Parallax Adjustment
- Provides more accurate, well-placed, and extremely precise shots
- Can allow for maximum potential one-shot kills
- Can change the parallax setting for most distances
- Makes the scope more versatile for all hunting conditions and distances
- Can remove almost all parallax
- Can work in tandem with other accuracy-affecting factors like wind and bullet drop to increase preciseness
- Reduces the need to perfect cheek weld when in a hurry or if the eye is in a less than ideal alignment with the scope
Disadvantages of Parallax Adjustments
- Can complicate the use of a rifle scope
- Can add more overall weight to the scope
- Costs more than a fixed objective or cheek rest
Rifle Scope Parallax - Yes or No?
All the sizzling, new, and added features of a rifle scope are formulated to help make the best, smoothest, most precise, clear, and user-friendly visionary experience possible - parallax adjustment included.
In the end, weighing up the decision to get it or not comes down to: giving yourself the green light and squeezing it into the budget or looking for more affordable or skill-earned ways to get by without it.
My motto is: it's better to have it and not need it than to not have it and need it.
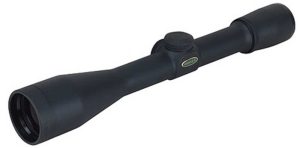
For long and extreme range hunters, it's mandatory. For you serious plinkers out there, go for it. With these tips and how-to's, there will never be a disadvantage to having it. This Simmons 8-Point 3-9X40 review is an example of an affordable scope that has no adjustable parallax settings.
I did promise a twaddle-free report for you, but if you still got lost in the sea of rifle scope gibberish, no problems! Don't let the terminology get the best of you and check out our Rifle Scope Glossary to keep up to date with even the most seasoned scope user.
Further Reading


Thanks Simon, it's a question that gets asked regularly and you have nailed it. Your site is a fantastic resource and I Always inform others to subscribe.
Thanks again Brett.
Thanks for the great feedback Brett. We appreciate your support!
I've been researching parallax and discussing it with another researcher who has talked with representatives from the biggest names in scope manufacturing. So far, all are in agreement that magnification does not impact parallax error. Only distance to target (and the resulting change in angles of reflection) impact parallax. Magnification just makes the error more apparent to the human eye. Parallax on a 100yard fixed parallax scope will have the same parallax error at 500 yards whether on 4x power or 15x because actual distance to the target/angles of reflection relative to the position of the reticle inside your scope tube remain the same.
If magnification impacted parallax, you'd have to have a second side focus knob on your scope to adjust based on magnification. But we don't because it is impacted solely by the distance, which changes where the visual image of the target is formed within the reflective system of the scope. (Parallax ERROR is also affected by objective size, but that has more to do with how far off axis you can place your eyeball, not an actual increase in the parallax effect). Once you move your reticle inside the scope to a position where it converges with the image being formed of the target, parallax effect is gone because now they are both on the same plane / same distance from your eyeball. Magnifying that view doesn't change any of the angles involved. It just makes things artificially look bigger
"Agreed. Thank you for the comment and sharing this valuable information."
Hey Simon,
I have an older/ discontinued 3-9x40 Leupold scope with a factory parallax set to 150 yards. No side adjustment feature. If I were to mount it on a .22LR used for grouse hunting, would the parallax be so bad that the scope would be rendered useless? I realize that the difference between a 20-30 yard shot and a 150 yard shot is pretty substantial.
Thanks!!
I also have an older 3-9x40 Leupold scope - sounds just like yours. Parallax is noticeable at much closer distances, and I can spot it at about 25 yards but that's with deliberate moving of my head. I wouldn't be too concerned since a consistent cheekweld will take care of it.
If you can keep your weld consistent and right down through the optical plane, any concerns of parallax error being magnified with increased power will be a non-issue - regardless of distance.
Love the .22LR and good luck grouse hunting! Hope that helps!