So, you got a new riflescope or a new hunting rifle, what now?
Sighting in a riflescope is often done at 100 yards. This means the firearm operator can predict where that round lands every time it leaves the chamber. It's a process that includes mounting the scope, bore sight, making adjustments, and having the patience to repeat these steps if necessary.
Since you’re responsible for every round that leaves the rifle, I’d advise that you be the one to sight in your scope, understand what’s happening, and be empowered by the process. That means learning how to sight in your rifle scope for 100 yards.
Here’s how you do it!
How to Sight in a Rifle Scope for 100 Yards – Zero!
For as much as can be said on this matter, it’s not too hard to grasp the concept of sighting in a riflescope. Get it mounted correctly, bore sight, shoot, make adjustments, and shoot again. Not too bad right?
Even if it’s mounted and bore sighted for you by a professional, I highly recommend that it be you that gets your rifle zeroed. Are you up for the challenge?
Of course you are!
1. Mount the Riflescope & Boresight
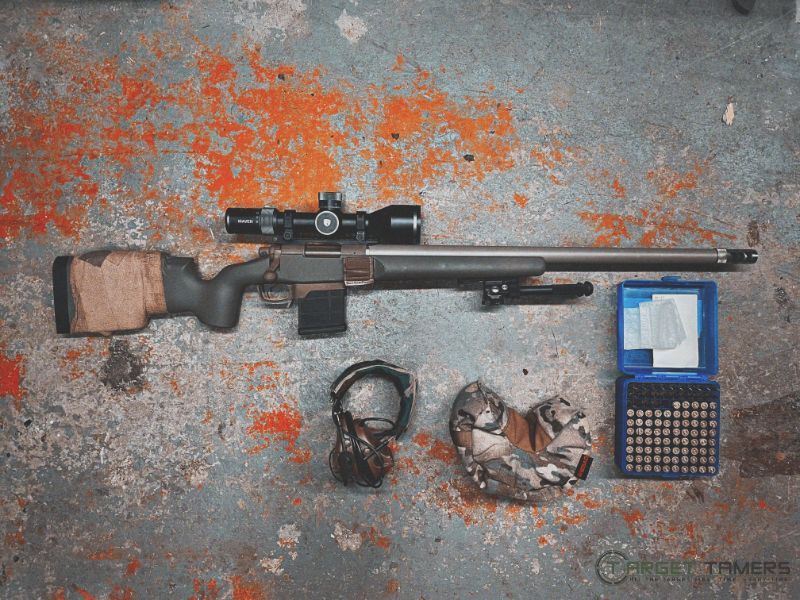
Part of a successful zeroing session with your new riflescope or hunting rifles starts at home. Incorrect mounting, canted scopes, etc., will affect sight-in accuracy. It is easier to mount your scope in a tidy, appropriate space with the correct tools in a controlled environment.
Scope over to our How to Mount a Scope and How to Level a Scope on a Rifle guides for more instructions on this.
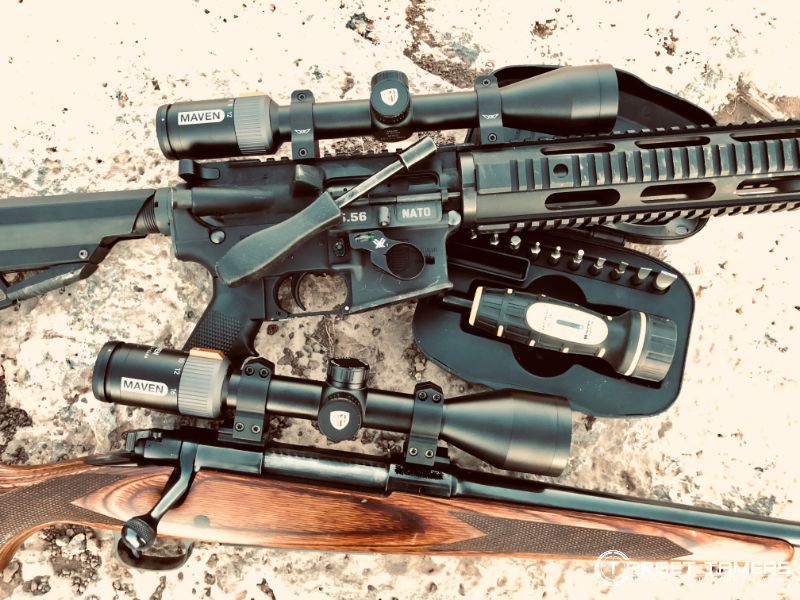
Riflescope Mounting Systems
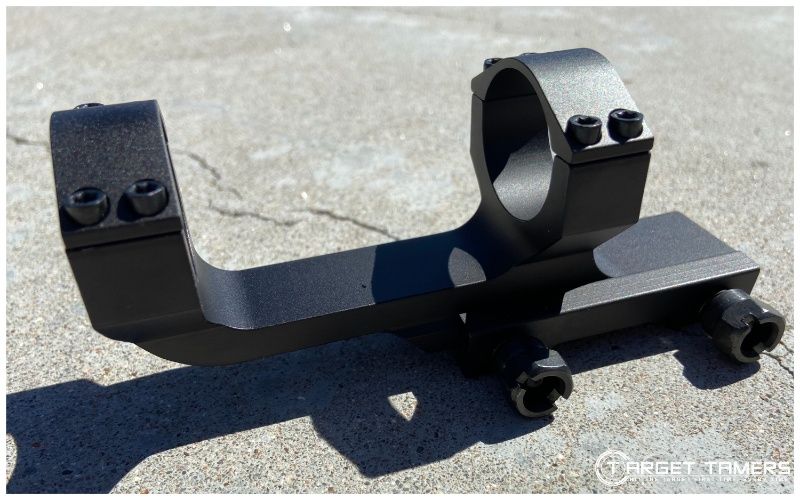
There are various scope mounts for riflescopes depending on what the scope is going on. For an LPVO that’s going on an AR-15, a cantilever mount tends to be the right mounting system.
For a riflescope going on a bolt action rifle, scope rings are the common mounting system. You want to make sure that the rings are the correct width and height. If the scope has a 1” tube, you’ll need 1” rings. If the scope has a large 50mm objective lens, you’ll likely need medium to tall height rings so that the front end of the scope clears the barrel.
Boresight
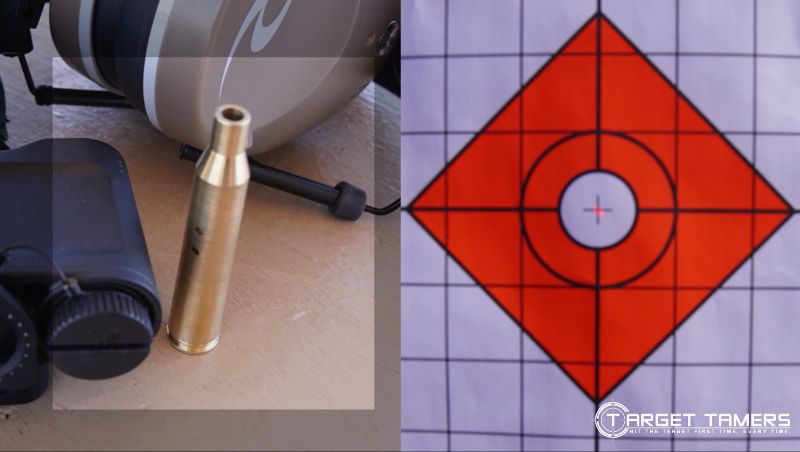
Technically, you can boresight at the range when you get ready to sight-in, but it can be done at home if you have the space to do it.
Boresighting requires the scope to be mounted and some sort of rifle disassembly. If you’re using a laser boresight, it may be inserted or attached. If you’re doing a manual boresight, the bolt must be removed.
For an in-depth how-to on bore sighting, check out this step-by-step boresighting guide!
2. Gather the Equipment
In general, gear is always needed when shooting - gear beyond just the rifle and scope. You’ll also need gridded targets (easiest method), a spotting scope (save you walking downrange every time), and maybe a calculator (unless you’re a math whizz).
Gear List
Here’s a rundown on gear you’ll need to get zeroed.
- Gridded 1” targets
- Spotting scope – optional
- Riflescope and mounting tools
- Calculator – optional
- Shooting equipment (sandbags, blocks, bipod, etc.)
- Ammo
- Safety gear (eyes and ear protection)
- Boresighting equipment
- Pen and paper – optional
- Rifle scope ruler e.g. Mildot Master - optional
Don’t forget your rifle or the case! Some ranges require that your firearm be cased.
Other Gear Essentials
It should be said that you’ll also need your target stand, stapler, and other common essentials that are needed for you to shoot. Whether it’s a mat (for shooting prone), a bench and chair, or shooting gloves, you should have a good idea of what you’ll need for the range you’re going to and your style of shooting.
Also, don’t forget lunch! You shouldn’t be at the range long, but I recommend staying hydrated and keeping those hunger pangs to a minimum.
3. Set Up at the Range

Unload all the gear you will need ensuring you have a safe, tidy space. Be considerate of other shooters at the range by keeping check of your gear and awareness of other's equipment.
Tip:
Boresighting at the Range
If you’re boresighting at this point, do not unload your ammunition. Please keep that in your vehicle until boresighting is complete. This ensures that no live ammunition and boresighting equipment get confused.
Once boresighting is complete, put the boresight equipment away and bring out live ammunition.
Set Up the Targets
On average, the first group is shot at 25 yards. It’s not a hard and fast rule, but it’s a common sight-in distance that is used first to get on paper. I personally practice this rule of thumb. With a boresight first, it's practically a guarantee to get that first shot on paper. Smaller adjustments are needed as you move up to 100 yards.
You could start at 50 yards or go straight to 100 if you’re a more experienced shooter. However, I’ll walk you through the process of starting at 25 yards. Get the gridded paper targets up and ready for use.
Prepare Rifle, Scope & Adjustment Tools
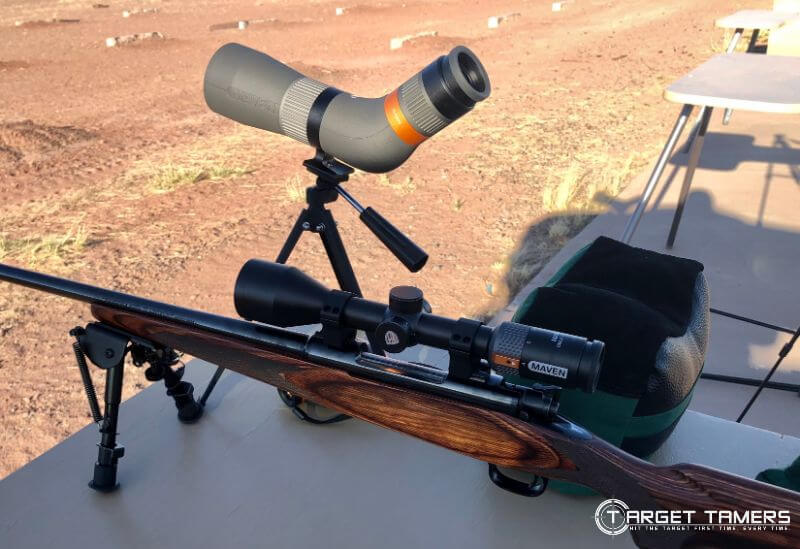
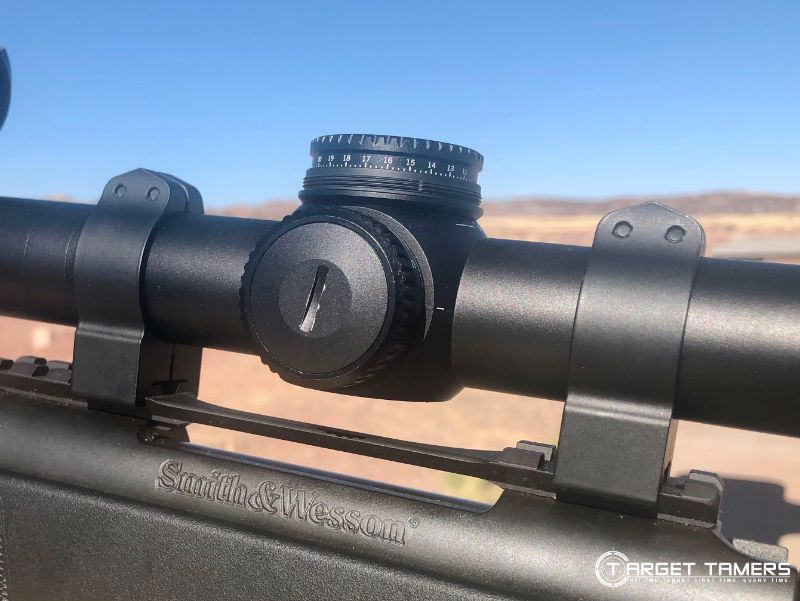
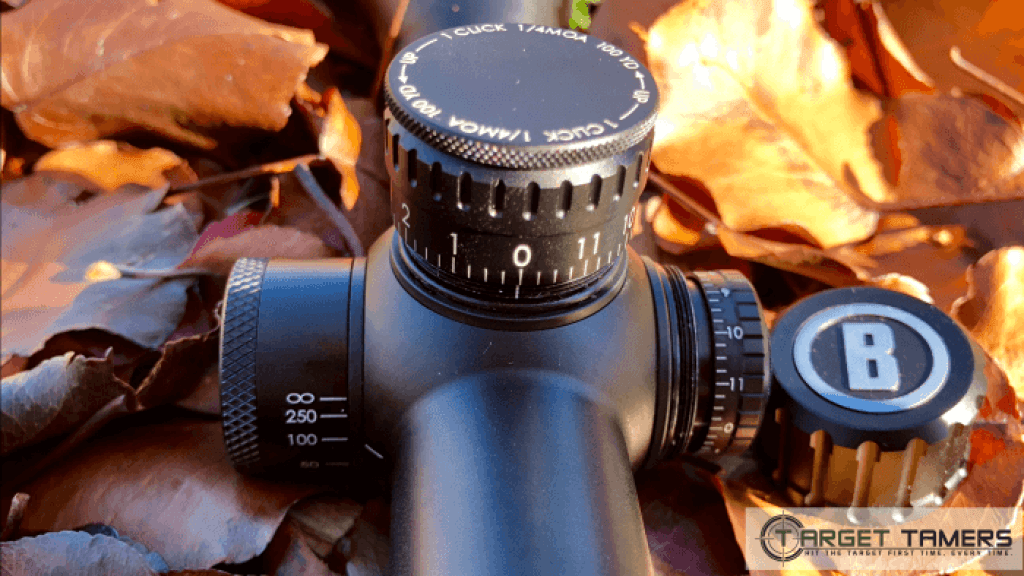
Prepare your shooting rig for the sight-in process. Keep your turret adjustment tools nearby (if applicable). These days, most scopes are finger adjustable. However, if you plan on resetting your turrets to zero or engaging the zero stop, you’ll need the proper tools. Remove the turret caps (if applicable) and don’t lose them.
It’s also a good idea to keep your mounting equipment nearby – screw drivers, torque wrench, etc. This is just in case you need to make adjustments to the mounting system or to completely disassemble and start again in case there are deeper issues.
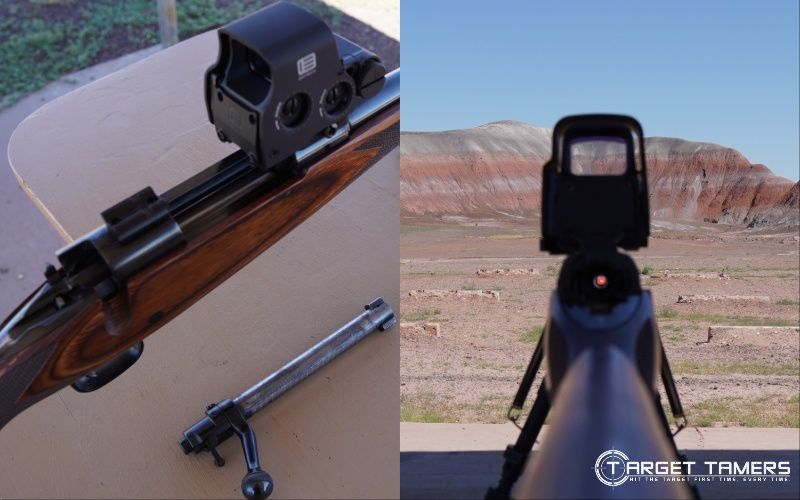
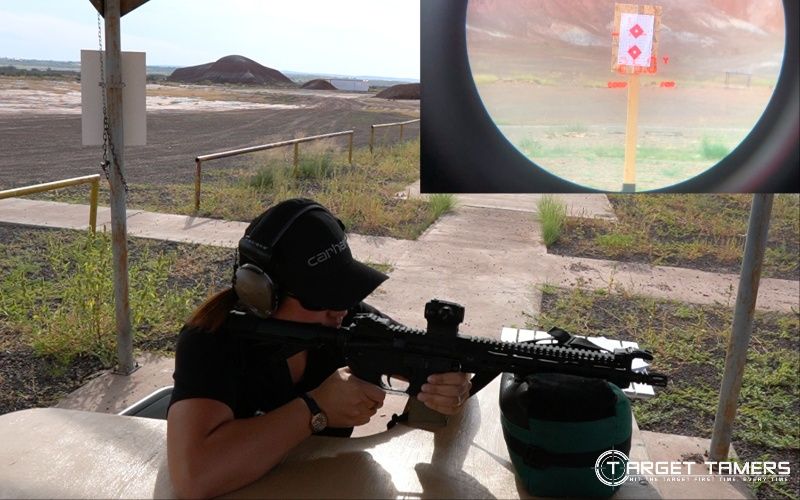
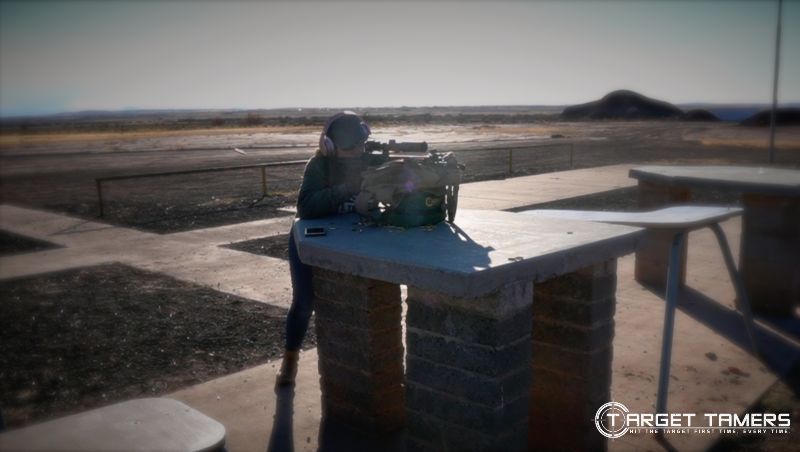
Consider the position in how you will sight-in your scope. I’ve known people to zero from the prone position and I know some who zero their handguns standing.
I like to zero at the bench, and afterwards, I’ll get a good idea of where I’m at by practicing in the position I would shoot for the intended application. For me, if it’s my hunting rig, after I’ve zeroed, I’ll get down on a knee and shoot groups because this is how I’m usually positioned in the field.
4. Take the First Shot
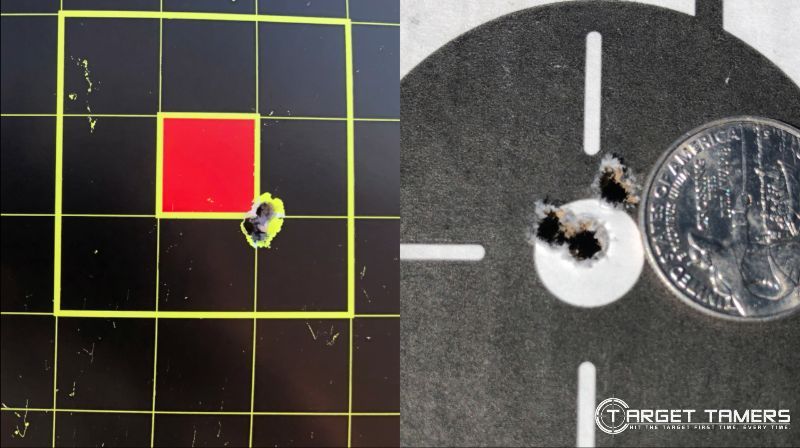
Aim for the center of the gridded paper target and take a shot. You could just do one shot, but a 5-group shot is recommended. This gives you a better picture of good loads, rifle accuracy, and your skill level.
Observe the POI & Prepare for Adjustments
POA – Point of Aim: where you are aiming (presumably the bull’s-eye – center).
POI – Point of Impact: where the bullet strikes on the target.
The first shot should be on paper and close to the POA. This is where some math comes in. Observe how far the actual POI is to where you were aiming.
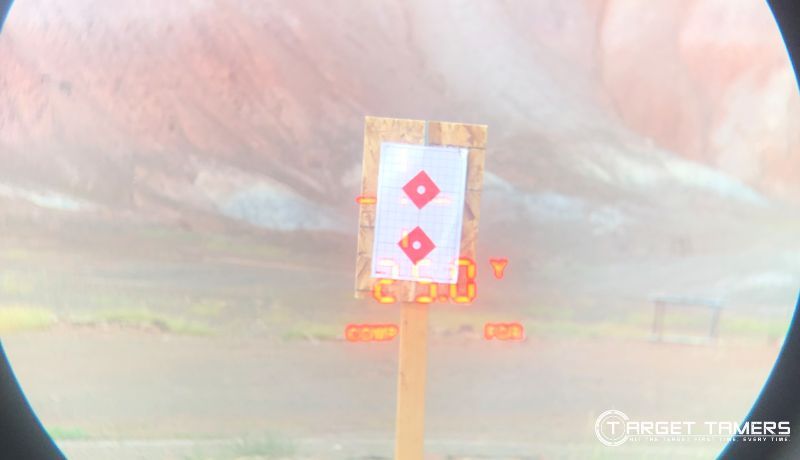
This is where you may be able to see bullet holes through your scope, but it’s best not to disturb your setup. Use your spotting scope, high-power binoculars, or walk downrange during a cease-fire.
Let’s create an example here that we will run through for the remainder of this guide.
- Riflescope with 0.25 MOA adjustments
- Target is at 25 yards
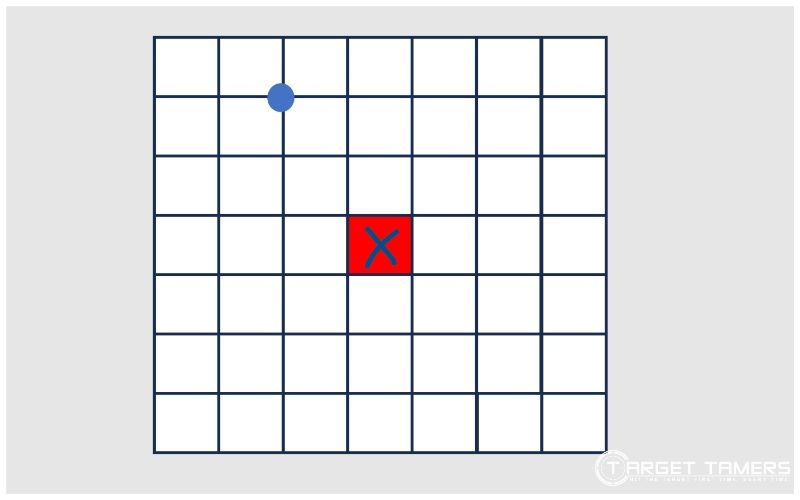
The X marks the POA – where you want to aim. The blue dot marks the actual POI – where the bullet actually hit the target.
The first shot/group lands 2” high and 1” to the left – this is why using 1” grid paper targets are easy!
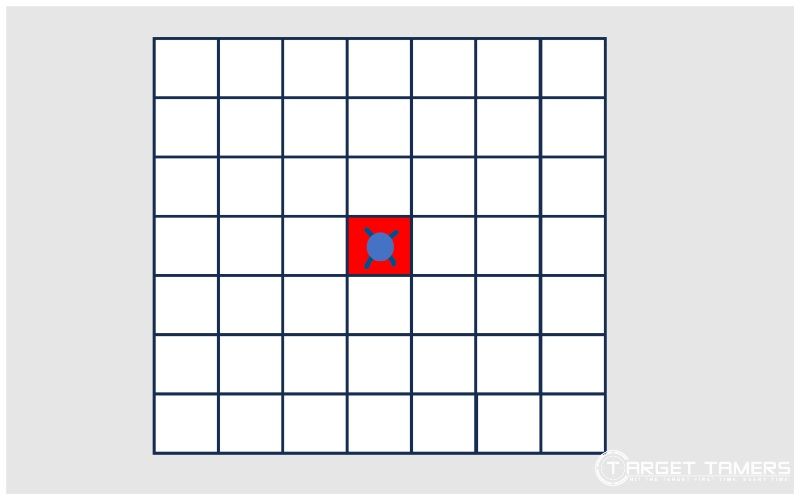
From this example, it’s clear we need to make adjustments so that the next POI comes down 2” and to the right by 1”. The goal? To get that blue dot on the X as seen in the second image.
5. Make Adjustments
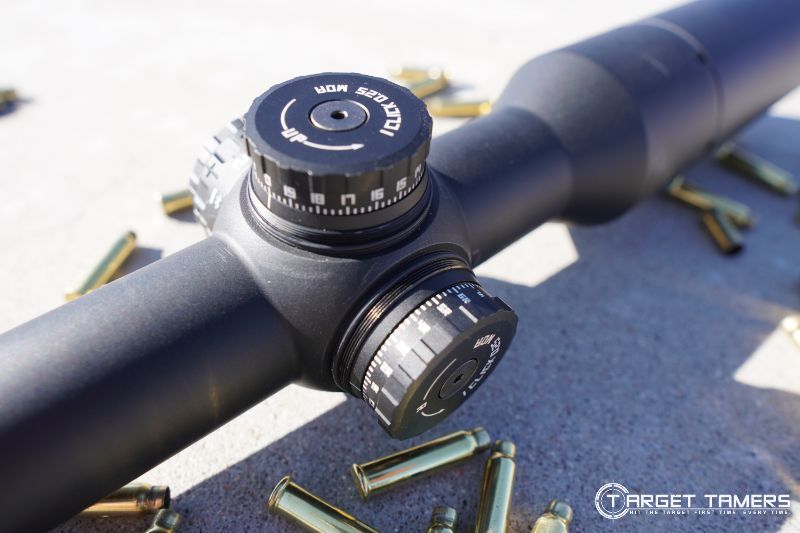
To adjust a riflescope is to rotate the turrets to make a change in the POI down range. You’ll need to know what the value is of each click of the turret. This is usually stamped on the turret itself, the cap, and is disclosed in the user manual that came with your scope.
Before we jump into some easy math, let’s get some groundwork covered.
What is MOA?
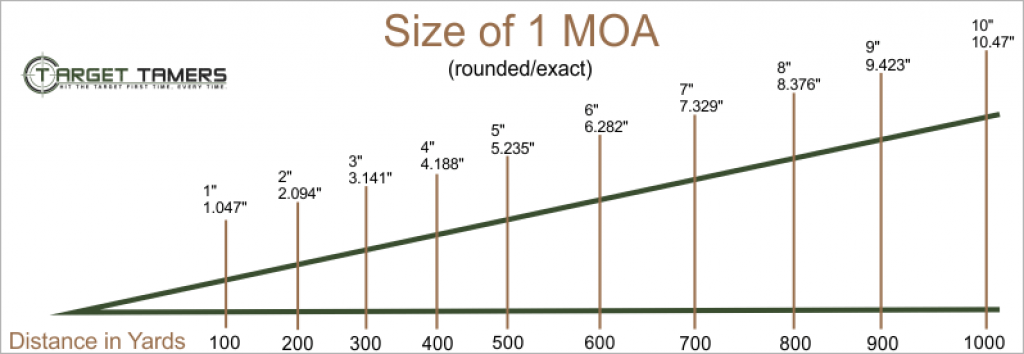
MOA stands for Minute of Angle. It’s an angular measurement we use for shooting because bullet trajectory happens in an arc. We use MOA to predict what the possible POI will be down range. 1 MOA or 1 minute is about 1 inch at 100 yards.
Many riflescopes have turret adjustments in 1/4 or 0.25 MOA clicks. This means that one click of the turret will move the POI approximately 0.25” at 100 yards. Four clicks of the turret will move the POI approximately 1” at 100 yards.
With that said, we can use some quick formulas to know how many clicks (adjustments) we need to make to the riflescope to get zeroed.
For an in-depth look at MOA, take the time to read our MOA Explained guide.
If you have a scope in MIL/MRAD, we have a comprehensive guide on that too!
Calculating the Adjustments
Per our example, we’re 2” high and 1” to the left. If you look at your turrets, they are not marked for movement in inches – they’re marked in either MOA or MILS.
How do we take the data we have and translate that into scope adjustments?
Here are some formulas that make it easy to get zeroed. This is where you may need a calculator…
| Calculate what 1 MOA is at the current target distance: |
| Distance to target (yards) / 100 = inches per 1 MOA at that distance |
| 25 yards / 100 = 0.25” is equal to 1 MOA at 25 yards. |
Now that you know what 1 MOA is in inches at 25 yards, you can figure out what the total MOA is that you need to correct.
| Calculate the amount of correction needed: |
| How far off you are / 1 MOA for that distance = MOA correction |
| 2” high / 0.25” = 8 MOA of elevation correction needed 1” left / 0.25” = 4 MOA of windage correction needed |
Now that you know how much you need to adjust, let's translate this data into how many clicks that means for you. You can always just move your turret down a total of 8 MOA on the elevation turret and 1 MOA right on the windage turret, or you can figure out the clicks.
| Calculate the correction needed in clicks: |
| MOA correction / Scope adjustment value = # of clicks to adjust |
| 8 MOA / 0.25 MOA = 32 clicks DOWN to elevation turret 4 MOA / 0.25 MOA = 16 clicks RIGHT to windage turret |
Calculate the adjustments you need and make them! For this part, you may need the necessary tools in order to make the click adjustments on your turrets. For those that are finger adjustable, you’ve got it easy.
Which Direction to Adjust Turrets?
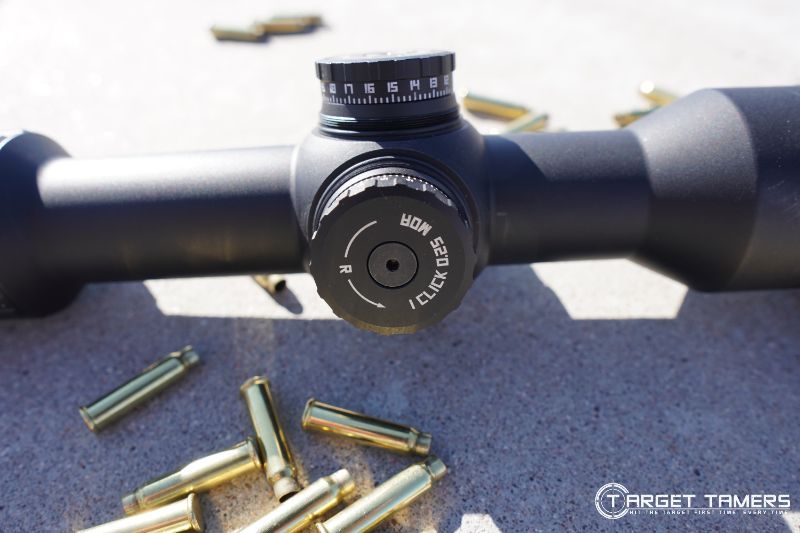
How do you know which direction to twist the turrets? The scope turrets should be marked with an arrow to indicate which direction makes upward adjustments downrange and which direction makes right adjustments downrange.
Generally, to make up (elevation) and right (windage) adjustments, you need to rotate the turrets anti-clockwise. To make down (elevation) and left (windage) adjustments, you need to rotate the turrets clockwise. Please confirm with your scope and manual.
6. Shoot Again to Confirm Zero
After making the adjustments to the rifle scope, aim for the center of the target and take the shot – send down another group.
At this point, the POI should be on the POA or at least very close to it. If you’re far off, you’ll need to repeat the steps of observing the POI and making the appropriate adjustments.
7. Repeat for Increased Distances to 100 Yards
Once you’re happy with your POI at 25 yards, you can staple up a new target and set it at 50 yards and repeat the process in 25-yard increments until you reach 100 yards.
More experienced shooters, or if you’re feeling confident enough, you can head right out for 100 yards. You will need to repeat steps 4 to 6 to have a successfully zeroed scope and rifle for 100 yards.
FAQ's
Overall, zeroing a riflescope is an essential procedure to acquire a relationship between the line of sight, bullet trajectory, and known distance of a riflescope and firearm. As an added benefit to sighting-in your own scope, you have confidence in your gear and its capabilities or limitations.
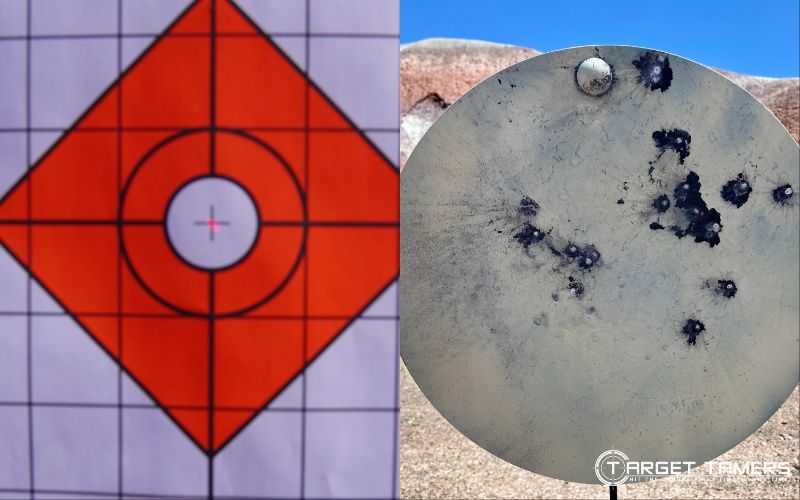
There could be multiple reasons for grouping inconsistency ranging from hot barrels to poor shooting fundamentals and the type of ammo being used. Other factors to consider is to turn down scope magnification, reconsider your rest or position setup, and scope mounting system.
Image by Tina Fa'apoi (Own Work) for Target Tamers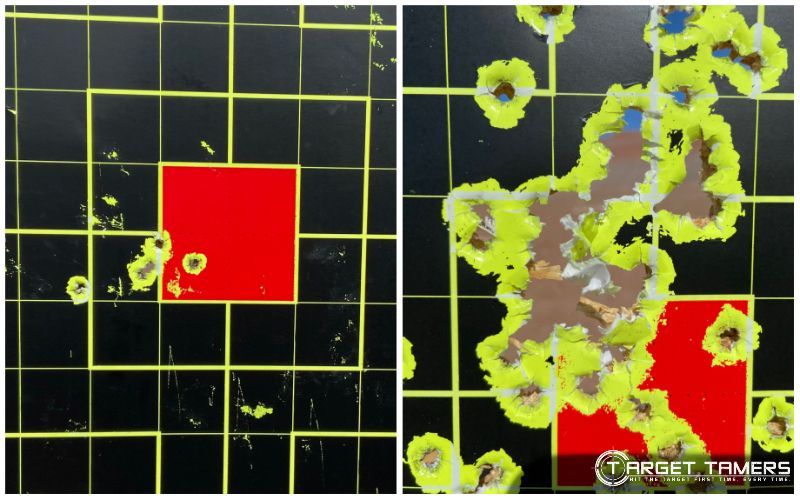
The best zero distance is dependent on the caliber and application. Different loads will behave differently even out of the same rifle. However, a popular zero distance is 100 yards. Others also practice shooting having a close-range secondary zero distance like the 50/200 or the 36/300 zero.
Neither MOA or MILS is better than the other as neither has an advantage over the other. The best advice is to stick with the system you know best. If you don’t have a preference but already have a scope, learn the system that the scope measures in.
For more info on MILS vs MOA with comparisons, adjust your sights over to our guide on it here.
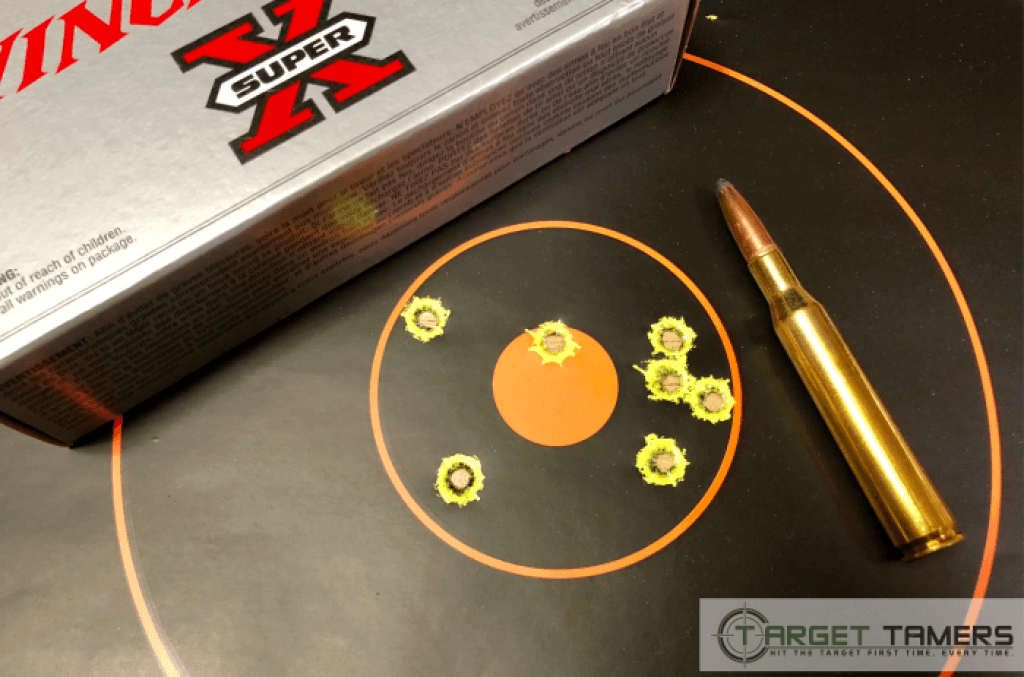
Image by Chris "The Optics Nut" (Own Work) for Target Tamers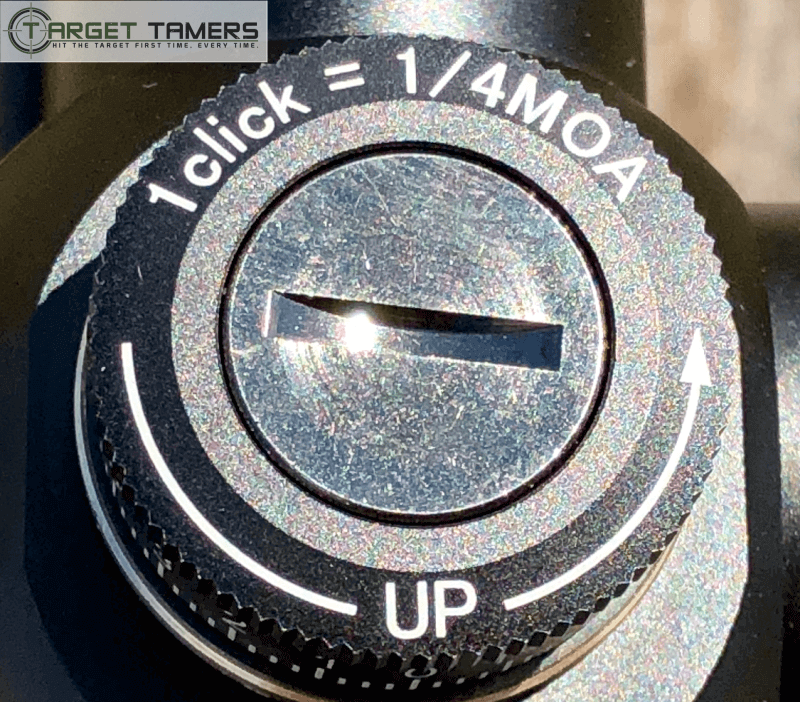
In general, if a riflescope runs out of adjustment, there could be issues stemming from the mounting system. You may need to disassemble and start again. A scope with a Zero Lock could be engaged and needs to be disengaged.
A rail with built-in MOA may be a solution for elevation turrets that run out of adjustment for long-range shots. For more on this, check out our guide on canted rails here.
Sighting In a Riflescope Made Easy!
The concept of sighting in a riflescope is easy to understand, but the first time might be more of an easier-said-than-done kind of scenario. It’s okay if it takes a few times to finally get zero or to start all over again.
I don’t know that many people will admit it, but we’ve all been there, done that, and continue to mess up. Don’t stress too much. Take your time, complete each step, and it will "click" with you - pun definitely intended.
Further Reading