If you’ve bought a new firearm, new rifle scope / optic, or maybe both, boresighting is recommended before you sight in - be it a red dot sight or riflescope.
Boresighting is a simple, quick process done before zeroing an optic. A laser boresight is inserted or attached to a firearm, or a manual boresight can be performed by removing the bolt and peering down the barrel. Center the target within the bore or aim the laser and proceed to adjust the optic.
Though that’s basically what boresighting is in a nutshell, my guide will explain boresight types, how to use a boresight, and I address some popular questions that you might have about the boresighting process.
What is a Boresight?
A boresight is a tool, a laser of sorts, that allows fast and easy pre-alignment of the bore axis with the target and optic prior to shooting live ammunition. To boresight is to follow a series of steps to acquire this alignment.
Though a boresight is an affordable tool and easily acquired at many sporting department stores, boresighting can be done without tools.
How do Boresights Work?
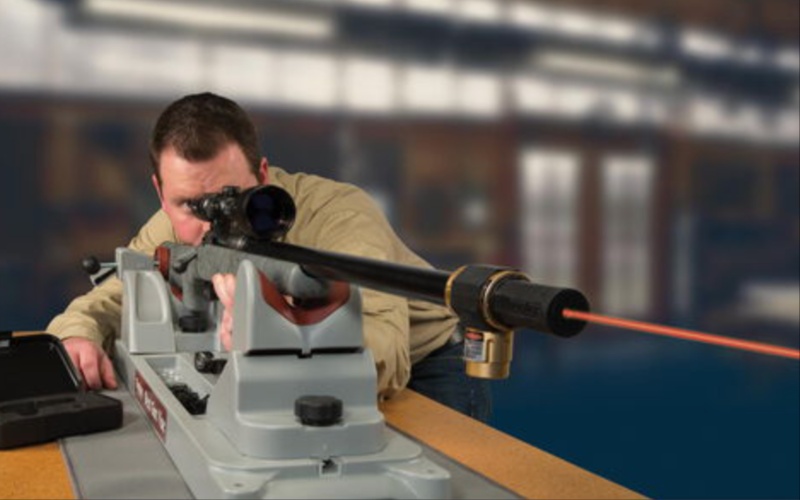
A boresight laser projects a dot onto a target at the distance that is set for laser bore sighting tool. This is usually around 25 yards at max. With the firearm barrel secured on a steady rest, the mounted optic is adjusted to meet the POA of the barrel as evident by the laser dot on the target.
Types of Boresights
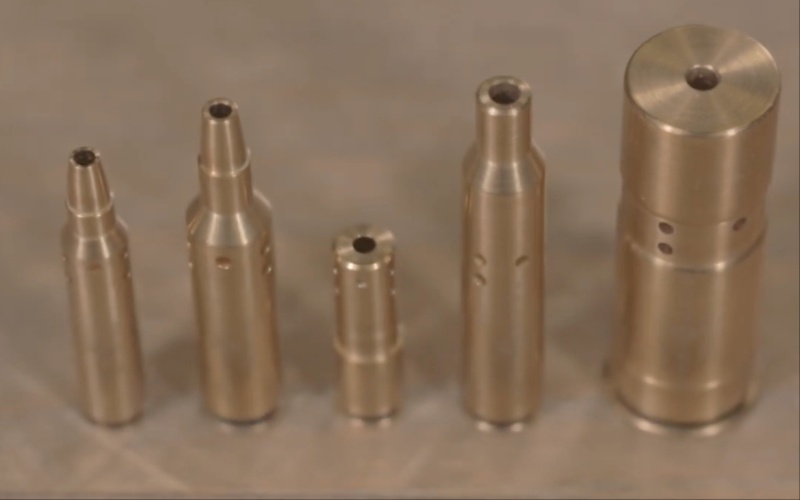
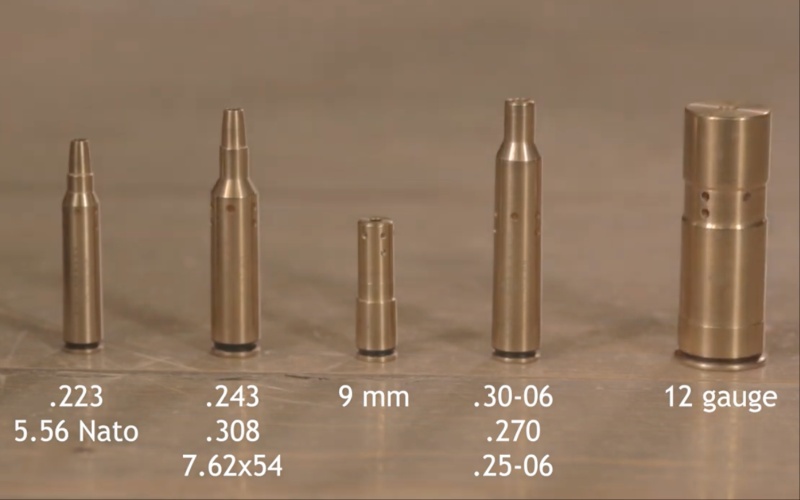
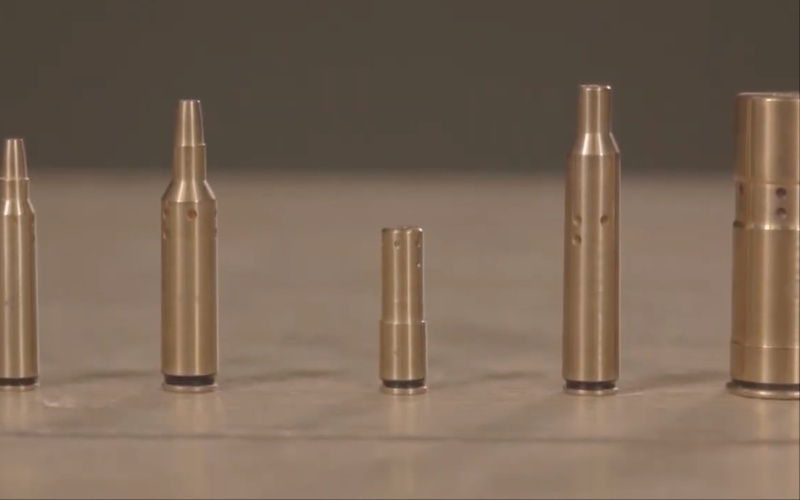
There are three common types of boresights: magnetic, muzzle, and in-chamber laser bore sights. Generally, they have fixed dimensions to fit a specific cartridge like the .22LR, 5.56mm, .270 WIN, .308 WIN, and more. Some may be configurable with interchangeable bits to fit the muzzle.
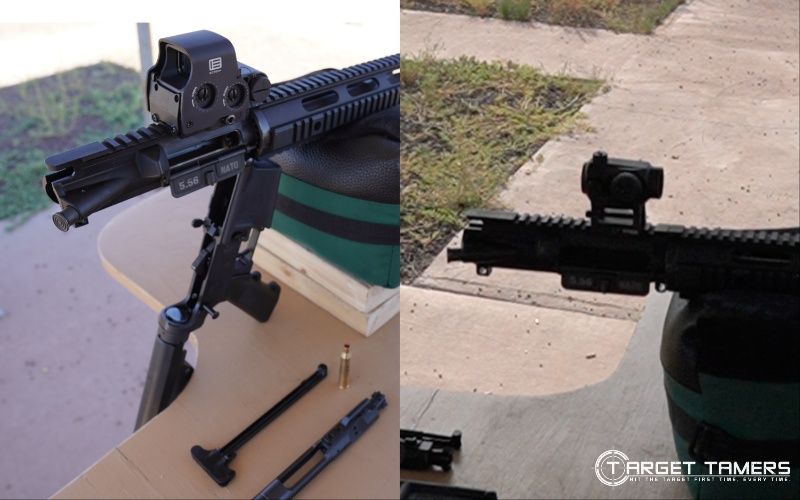
In-Chamber Laser Boresights
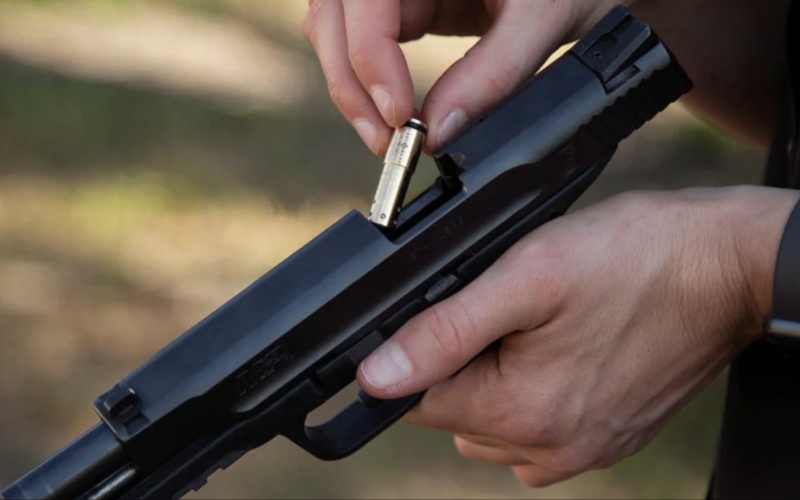
In-chamber laser boresights are extremely popular. They are designed to be caliber specific as they are inserted directly into the action of the firearm.
Muzzle Laser Boresights
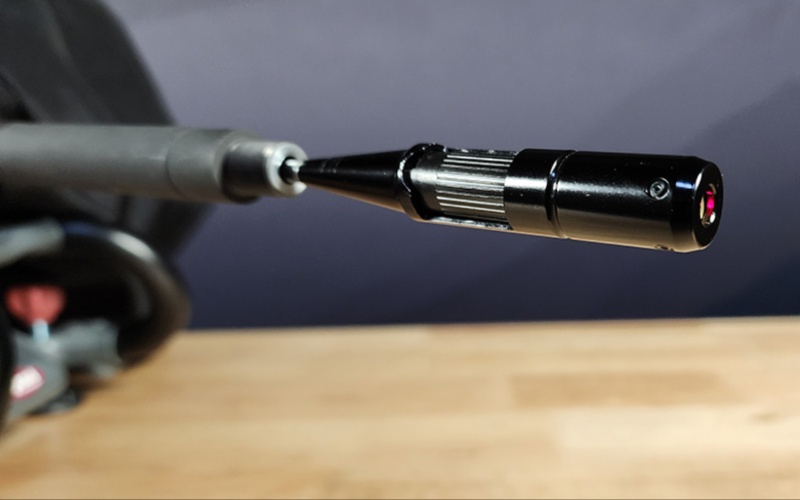
Muzzle bore sights are inserted into the muzzle end of the firearm. These types are usually configurable with threaded ends to accept different bits for various muzzles. They can come in kits with muzzle end bits adaptable from rimfire calibers to shot gun slugs.
Magnetic Laser Boresights
Magnetic laser boresights magnetically attach to the muzzle end of the firearm. Since they are not inserted into any part of the firearm, they are larger than the other two types. They are suitable for all calibers as they magnetically attach to the muzzle leaving the barrel rifling untouched.
Best Boresights
| Boresights | Key Feature | Type | Caliber | Price Range |
|---|---|---|---|---|
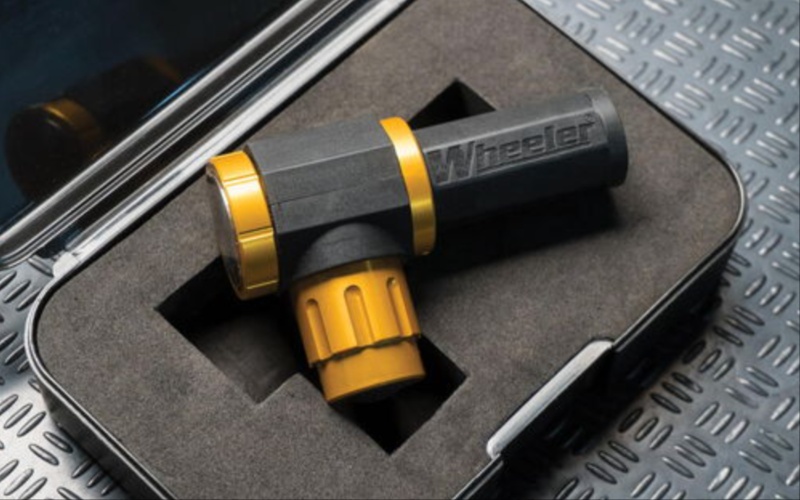
| Wheeler Laser Boresighter | Best Overall | Magnetic | All | Under $125 |
| Mid-Ten Boresighter | Best for AR-15 | In-chamber | .223, 5.56mm | Under $20 |
| EZShoot Boresighter Kit | Best Budget Kit | Muzzle | 0.177-0.54 | Under $25 |
| EZShoot 9mm Boresight | Best for Pistols | In-chamber | 9mm | Under $20 |
| StrongTools Green Dot Boresight Kit | Best for Green Laser | Muzzle | 0.177-12GA | Under $50 |
| SiteLite Ultra Mag Boresighter | Best for Hunting | Magnetic | All | Under $200 |
Boresighting Benefits
Why boresight at all? In general, boresighting allows for easier zeroing of a red dot sight or rifle scope. Though boresighting is a pre-alignment of sorts, it is not a substitute for a zero. Live ammunition must be fired to confirm a sighted-in optic.
Pros:
- Initial POI should be on paper
- The POI should be close to the POA
- Smaller optic adjustments needed
- Makes for easier zeroing at longer distances
- Less ammunition spent
- Less time wasted during zeroing
- Can help to identify other issues, i.e. Mounting, optic-related, etc.
- Manual boresight is minimalistic and free
Cons:
- Requires a power source
- Must manually boresight if it fails
- Can range in cost from approx. $10 to over $100
How to Use a Boresight (With & Without a Laser!)
1. Set a Distance & Targets
Typically, the most common distance to bore sight a rifle is about 25 yards with 5-15 yards as a common range to bore sight a handgun. Set up the targets at the distance that best suits your firearm and intended application.
Though I usually boresight with paper targets, some really sunny days make it extremely difficult to see the laser dot. This has forced me to move targets closer than I intended for bore sighting. In this case, reflective sticky targets are great for bore sighting. These are usually seen in the surveying section of retail stores.
You can always use steel targets for longer ranges too. A fresh coat of paint can provide a high-contrast backdrop for seeing the laser or the target itself through the bore at 100 yards.
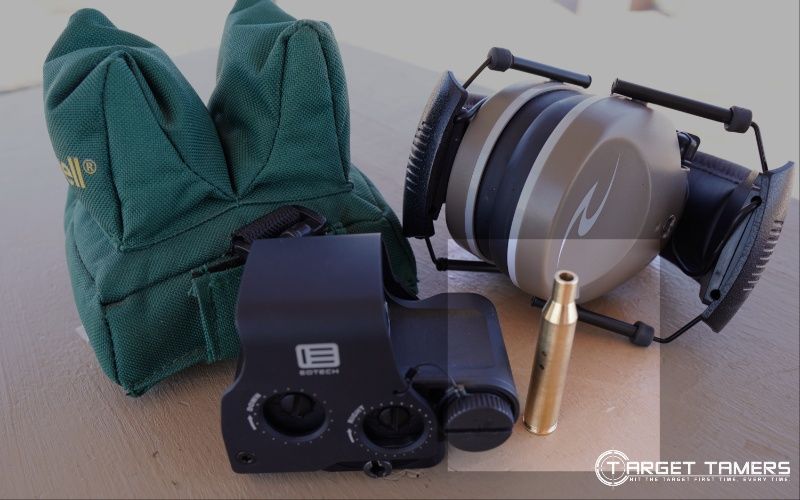
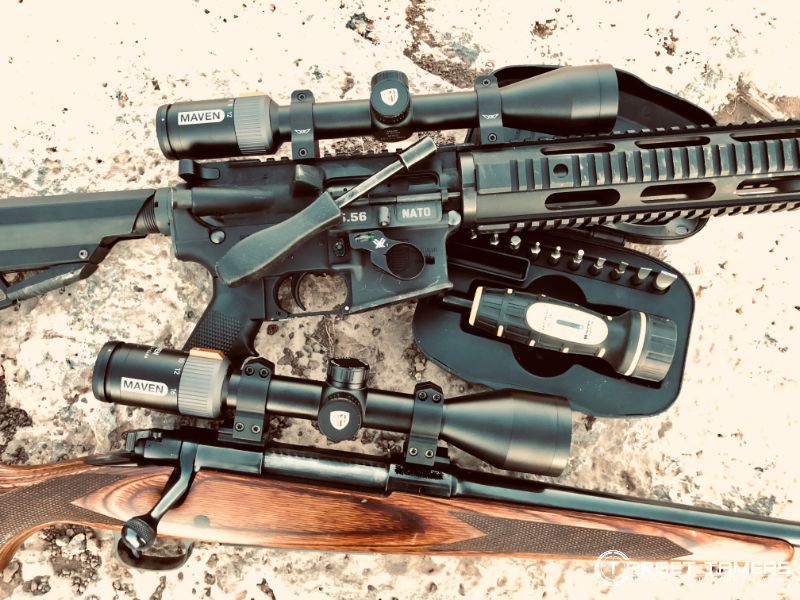
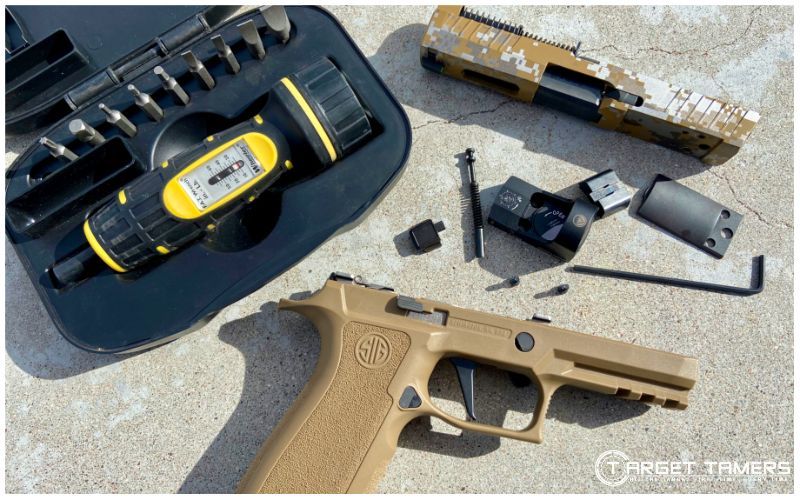
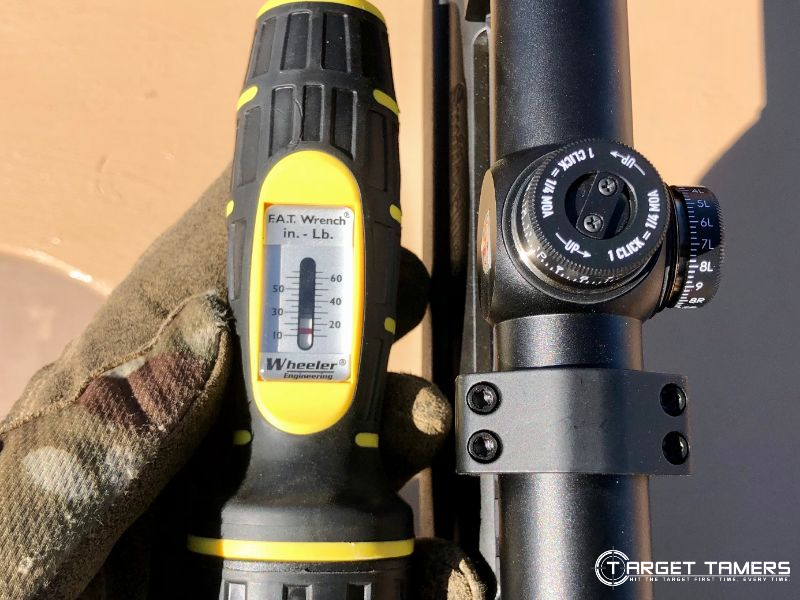
2. Get the Optic Ready
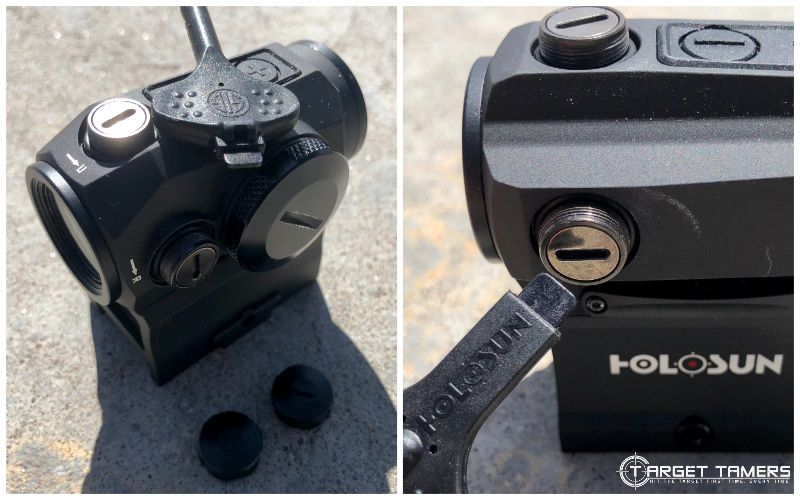
Remove the turret caps from the optic and have the necessary tools to make adjustments if applicable. Usually, riflescopes are finger adjustable and red dot sights will require the turret cap, coin, flathead, brass casing, or included tool to make adjustments.
If you’re using a rifle scope that has parallax correction, i.e., side focus or AO (adjustable objective), set it for the distance you’re boresighting.
The red dot sight or riflescope should already be mounted and level. If you’re not sure how to mount your riflescope, see our How to Mount a Scope guide for more info.
3. Set Up the Firearm for Boresighting
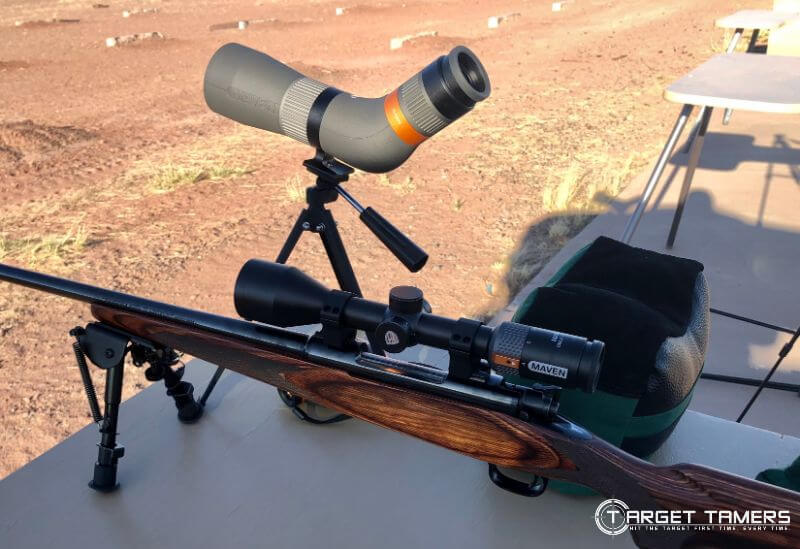
Some people use a sled, vice, or some sort of contraption to hold the firearm securely during the boresighting process. If you don’t have such an apparatus, just use shooting rests to keep the firearm in place.
If you’re using a laser bore sight, skip to step 5. If you’re manually boresighting without a laser boresight, continue to step 4.
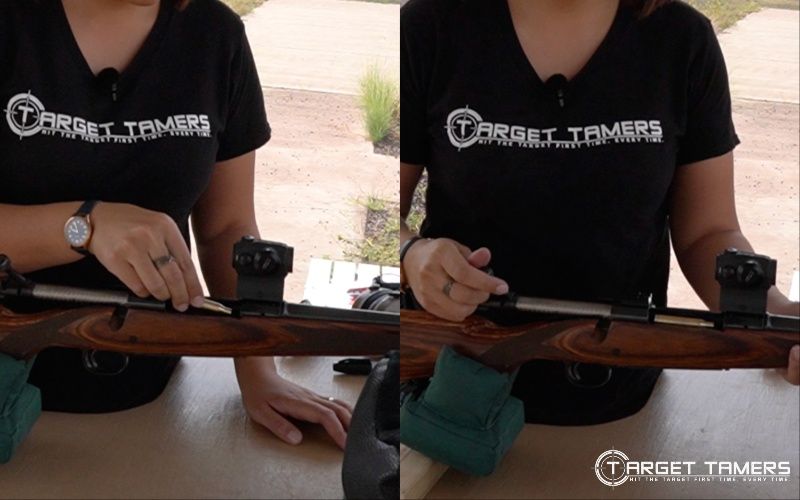
4. Remove the Bolt
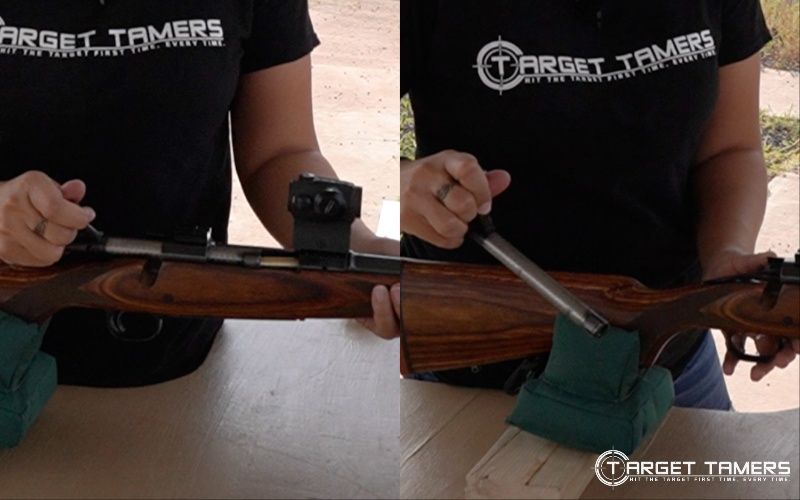
The purpose of a secure rest and position is to see the center of the target through the barrel from the breech end. To do this, you must remove the bolt.
Remove the bolt from a bolt-action rifle or the bolt carrier from an AR. You will need to either completely remove the lower receiver from the upper or at least eject the rear takedown pin to let the lower receiver pivot forward to allow access to the bolt carrier.
5. Insert or Attach the Laser Bore Sight
Insert batteries into the laser bore sight. Fresh batteries will provide a stronger, highly visible dot and it might be able to provide longer reach.
Depending on the type of laser boresight you have, insert or attach it now. If it’s an in-chamber boresight, you insert it directly into the action and slowly close the bolt.
If it’s a muzzle or magnetic boresight, insert or attach it to the muzzle end of the barrel. This also applies for handgun bore sights.
6. Observe the POA
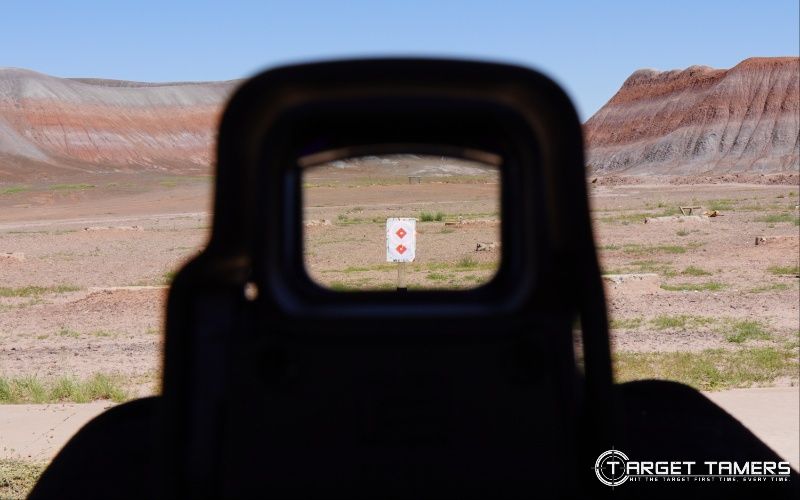
Align the bore with the center of the target by peering down the barrel to align the FOV with the center of the target. With a laser boresight, align it so that the dot is visible on the center of the target.
7. Make Optic Adjustments
Without moving the setup, look through the optic and observe where the aiming point of the reticle or the dot is in relation to the center of the target. Make adjustments to the elevation and windage turrets.
The purpose of making turret adjustments is to bring the reticle or the red dot to match the laser dot of the boresight (if using a laser). If manually boresighting, it’s to center the optic on the bull’s-eye of the target to match the POA of the bore.
TIP
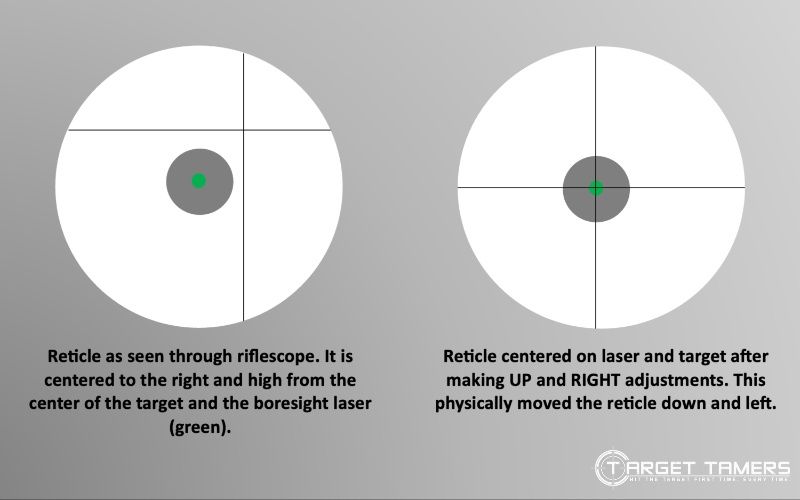
Turret adjustments change the POI downrange. The directional references on the scope or red dot (up/down, left/right) don’t actually refer to the physical movement of the reticle. It is referring to the changes in POI downrange on the target. What we want to do while boresighting is to physically move the reticle to have it visually match the laser dot or the center of the target where the bore is aimed.
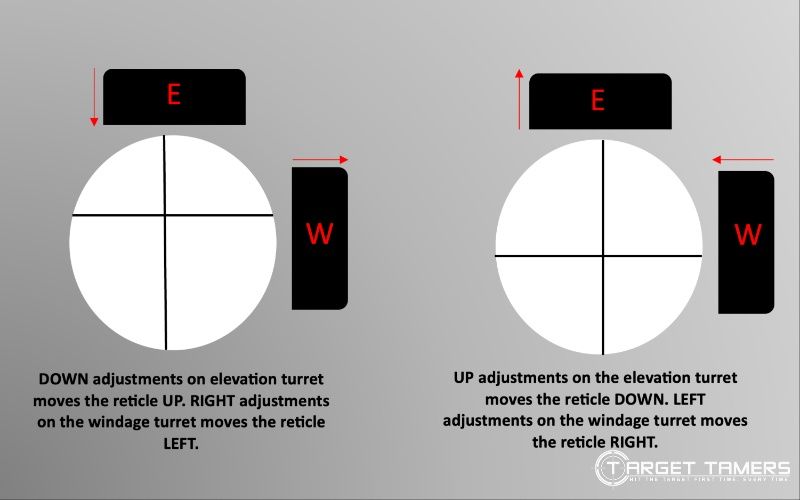
For example, the reticle or red dot is in the top right corner of the target while the bore or the laser dot is aimed on the center. To move the reticle down and left, you would need to make UP adjustments on the elevation turret and RIGHT adjustments on the windage turret.
When sighting-in the scope, you want to make adjustments in the direction you want to go. This means following the directional arrows on the turrets. Don’t worry about the actual physical movement of the reticle, just focus on what is going to happen to the POI downrange. If you were actually shooting and the bullet impact was in the top right corner, you’d want to take note of the directional references to follow them to make down and left adjustments to hit the bull’s-eye.

8. Immediately Store the Laser Bore Sighter
Once you feel like the POA of the bore or the laser dot and the POA of the reticle or red dot match, boresighting is complete. Your first shot will be on paper and closer to the POA than if you were to go without boresighting. (Don't take that first shot yet!)
At this point, immediately remove and store away any boresights and boresighting tools. A lot of the time, boresights look very similar to live rounds, and getting them confused or forgetting you have a boresight in the muzzle or the action would be a dangerous mistake.
Once all the boresighting equipment has been removed and stored away, reassemble your firearm if necessary and bring out live ammunition to complete the zeroing process.
For more information on sighting-in a red dot or riflescope, see our How to Zero a Red Dot and How to Sight-In a Riflescope guides.
FAQ's
In general, boresighting is not a substitute for zeroing a red dot sight or riflescope. Live ammunition must be spent downrange to confirm zero. Almost always, some adjustment is needed between boresighting and zeroing. However, the amount of adjustment needed after boresighting is minimal.
Though there is much discussion on the best distance for boresighting, the accepted norm is between 5 to 25 yards. The further the target, the harder it is to see the laser dot. Generally, the norm is to boresight at 25 yards and then zero for a longer distance like 100 yards.
Tina boresighting and taking first shot at 25 yards - Image by Tina Fa'apoi (Own Work) for Target Tamers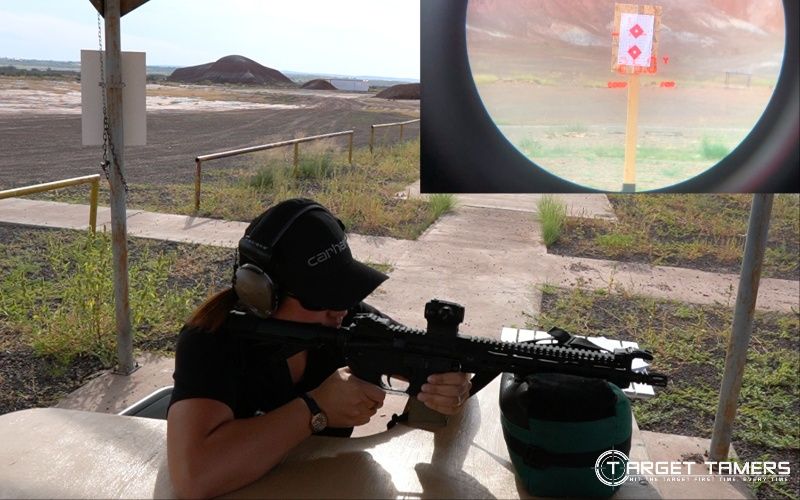
Generally, it takes no longer than a few minutes to boresight. No ammunition is being fired during this process as all you’re doing is aligning the reticle or red dot to the laser point or the center of the POA of the bore.
Though boresighting does not take long, the time it takes to set up targets, disassemble and remove lower receivers, etc. adds time to the process. However, it reduces overall time spent zeroing in as it gets you on paper and on target with less adjustments needed.
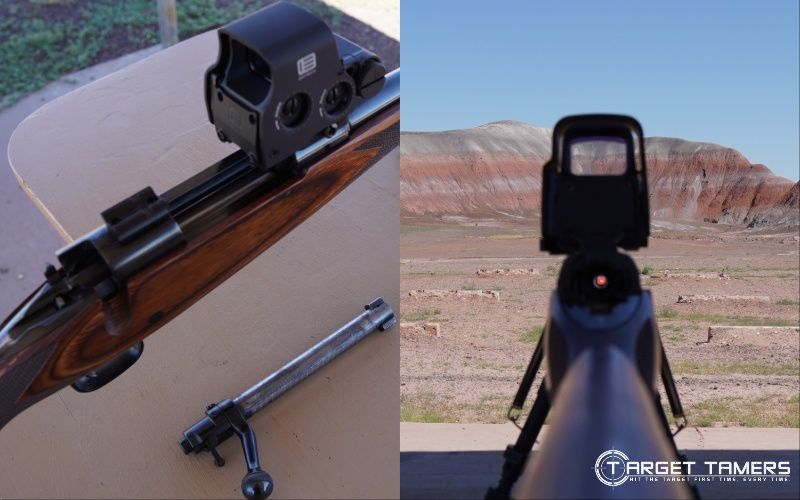
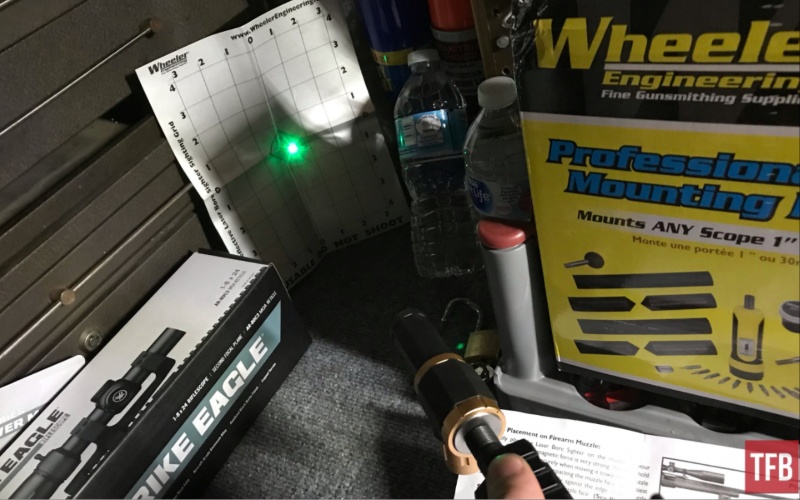
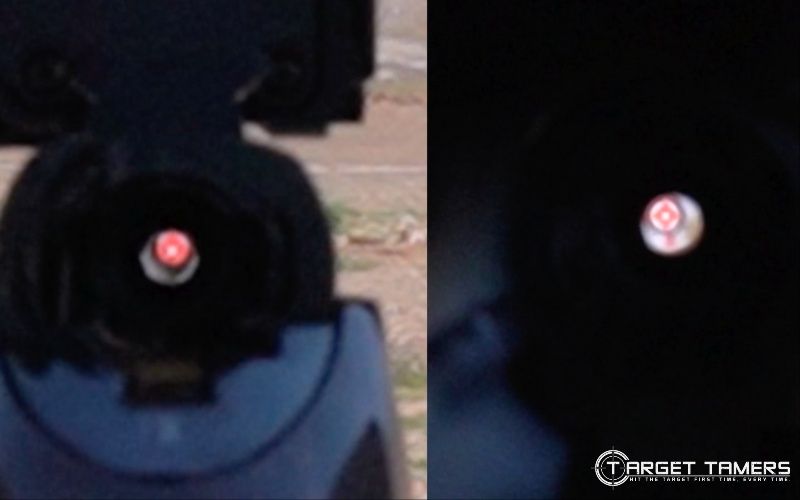
https://www.youtube.com/watch?v=CQ1euCPX5WcThe best boresight targets should offer high-contrast colors in order to see the laser dot with high visibility. Paper targets can be used at close range distances. Reflective and/or steel targets are especially useful for longer ranges.
Paper target w/boresight laser (left) & steel target (right) - Image by Tina Fa'apoi (Own Work) for Target Tamers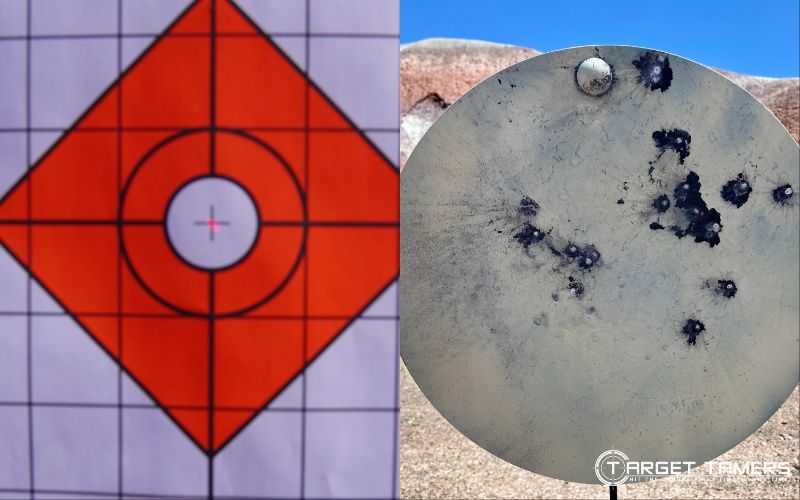
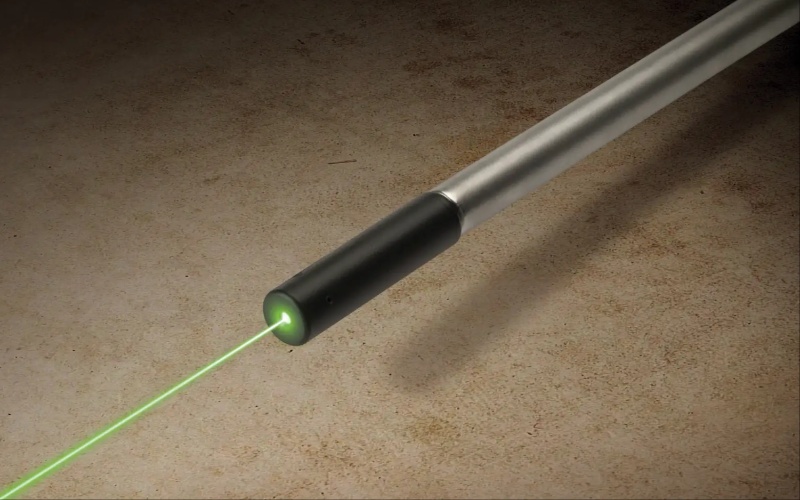
Green laser light is highly visible to the human eye and can offer some range over red lasers for bore sighting. They’ll perform great for boresighting conditions that’s usually done during the day. However, green lasers may require more battery life, so keep some fresh batteries on hand.
Green muzzle laser boresight - Image Credit: CVLife 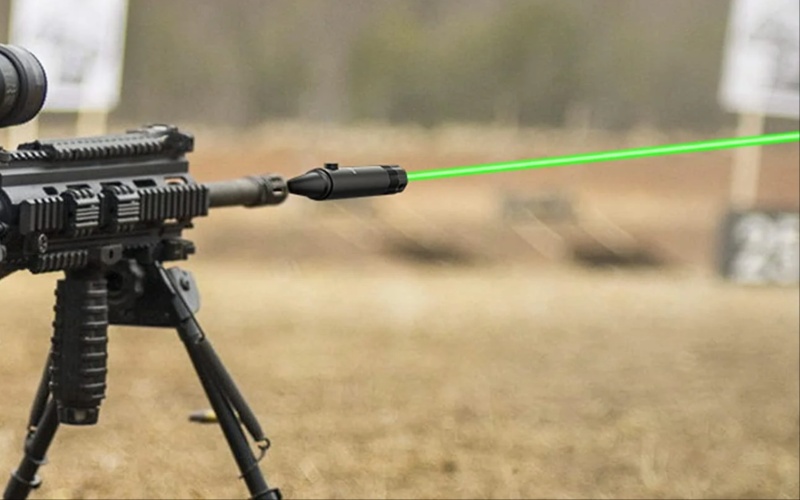
Boresighting & Safety Go Hand in Hand
Safety always and safety first. Always keep live ammunition out of sight and stored away during the boresighting process. Immediately after boresighting, store the boresight out of sight and reach (just put it away) during the zeroing process.
Boresighting is always worth taking the time to do regardless of the zero distance. It will help you get on paper and results in less time and wasted ammo at the range.
It’s really not as difficult as it can appear to be. Boresighting can be minimalistic as you don’t need a laser or fancy targets. However, many boresights are affordable and the laser can make it easier to get a closer POI to your POA.
Further Reading