Should you zero your irons with your red dot?
How hard is it to zero?
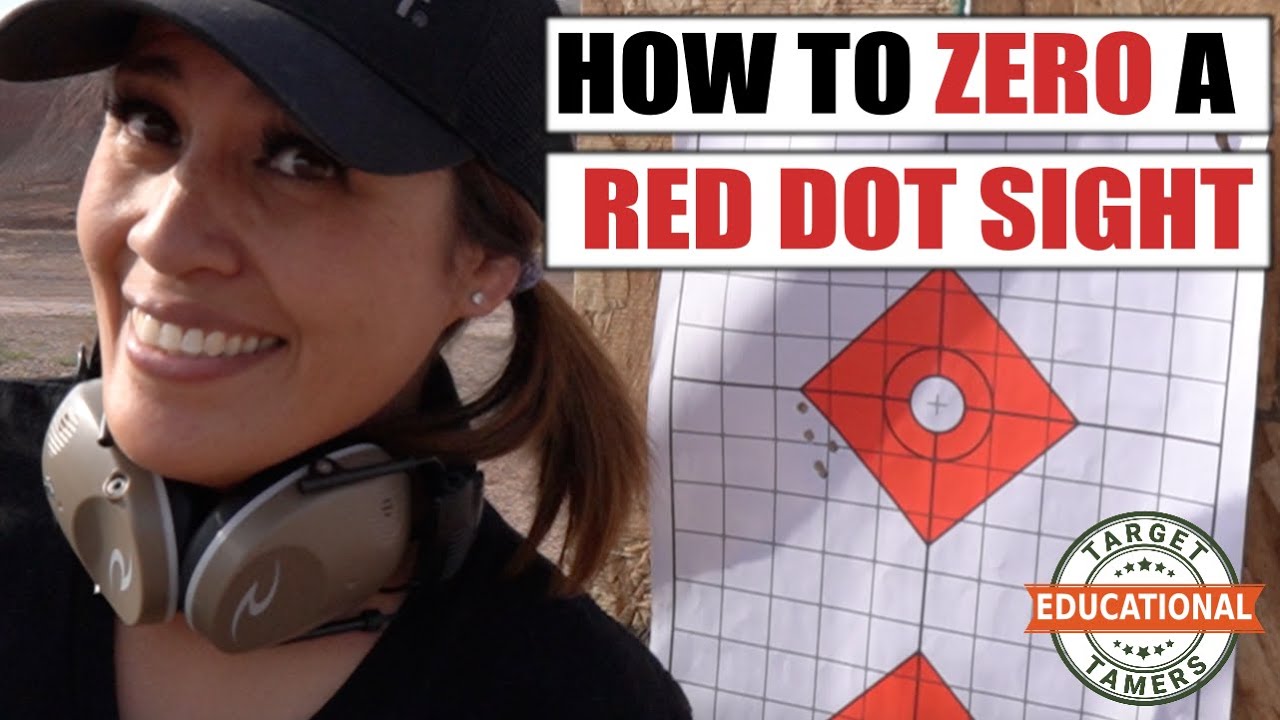
How do you sight in a red dot sight?
In general, follow the manufacturer instructions. However, zeroing in a red dot sight is straightforward and is the same process across the board. Adjust the turrets to move the POI to match the POA. The turrets are usually adjusted in 1 MOA or 0.5 MOA value increments.
If you don’t know how it’s done, this is a complete beginner’s guide that starts with boresighting, covers the ins-and-outs of sighting-in, and ends with you and a successful zero.
In just five steps, these step-by-step red dot zero instructions will get you squared away – rifle or handgun!
How to Zero a Red Dot Sight
Boresight. Set up target. Put the handguard or the fore-end on a solid setup i.e., shooting rest or lead sled. Put the dot on the center and shoot a group. Observe the POI and make the appropriate adjustments. Send another group down range. If further adjustments are needed, repeat the process.
Those are the basic steps, now lets get into the nitty-gritty of how each step is completed when sighting in a red dot sight:
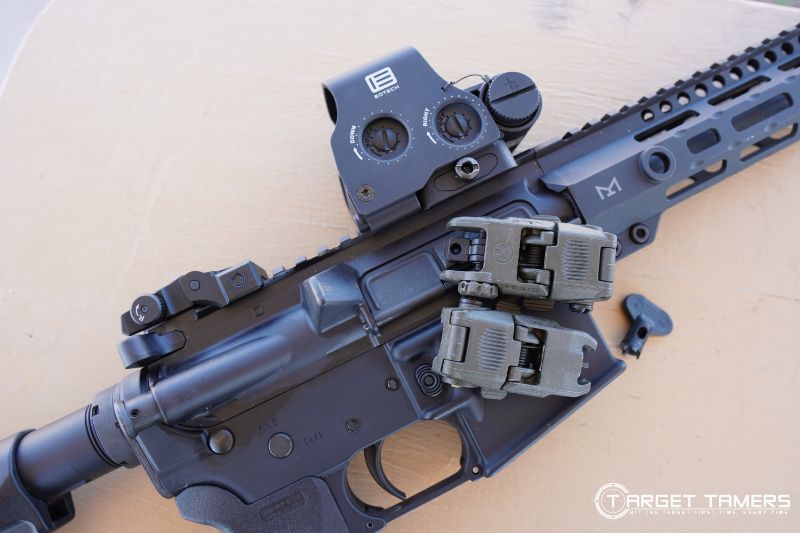
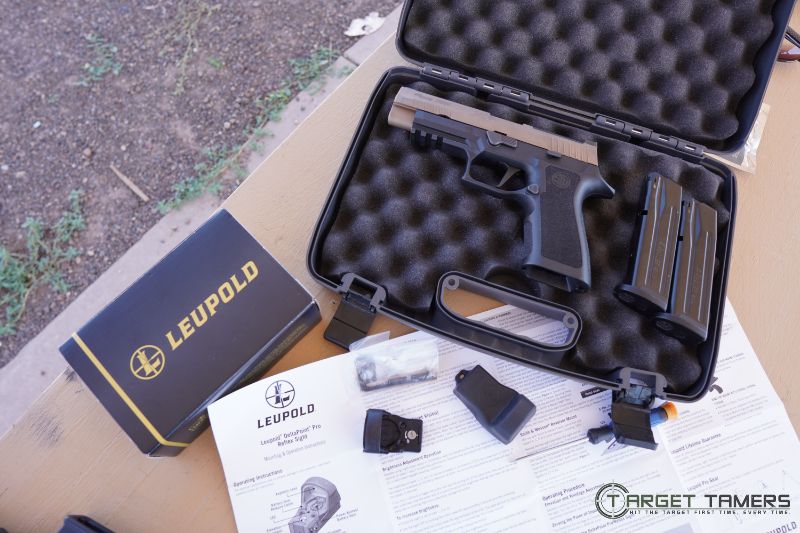
1. Mount the RDS and Boresight
What is Boresighting?
Boresighting is a process in which you are pre-aligning the rifle barrel’s bore axis with the target so that you can zero a gunsight easier. This allows for a closer POI (Point of Impact) to the POA (Point of Aim) when firing live ammunition. A successful boresight is not the same as having zero.
Boresighting Benefits VS Without Boresighting
- Gets on paper
- Closer POI to the POA
- Smaller adjustments needed
- Less ammo spent
- Less time wasted
- Could help to identify other issues: mounting, etc.
Types of Boresights
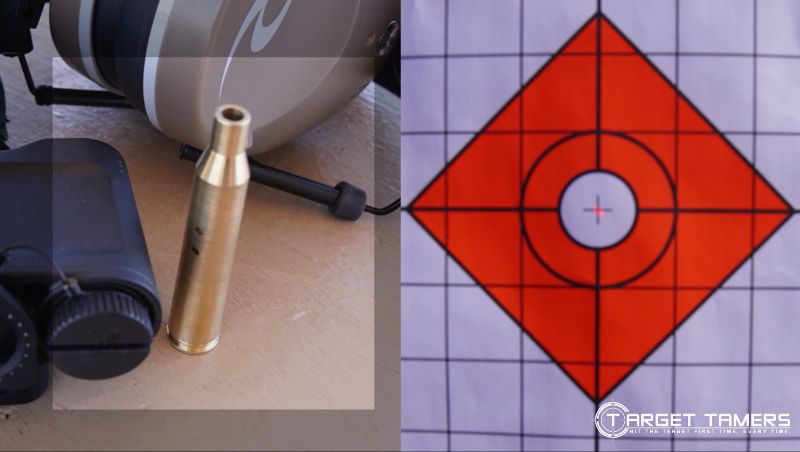
- Magnetic laser boresighter: attaches to the muzzle, suitable for all calibers and gauges.
- Muzzle laser boresighter: specific caliber/gauge size inserted into the muzzle end.
- In-chamber laser boresighter: specific caliber/gauge size inserted into the chamber.
How to Use a Boresighter
- Set up target at the appropriate distance. For laser boresighters, reflective targets are easier to see the laser point when outdoors.
- Mount the RDS to the firearm. Uncap the turrets, if applicable, and have the appropriate tool to anticipate making turret adjustments. The tool might be the cap themselves, an included tool (that came in the box), a coin, the end of a brass casing, or a flathead screwdriver.
- Put firearm onto a solid rest or lead sled and insert or attach the boresighter as appropriate. Put the laser dot on the center of the target.
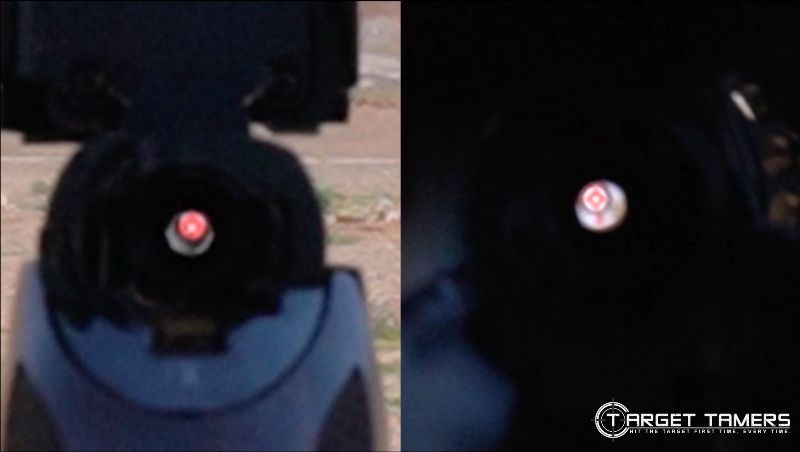
- Without moving the rifle or handgun, look through the RDS and observe where the dot is in relation to the laser point.
- Rotate the turrets with the appropriate tool to move the dot to match the laser point. Right and left adjustments will be made via the windage turret located on the side of the RDS. Up and down adjustments will be made via the elevation turret located on top of the RDS.
- Remove the boresighter and immediately store them away. This ensures you will not confuse them for live ammunition. Remember, keep your working space safe.
Manual Boresighting (No Tools Needed!)
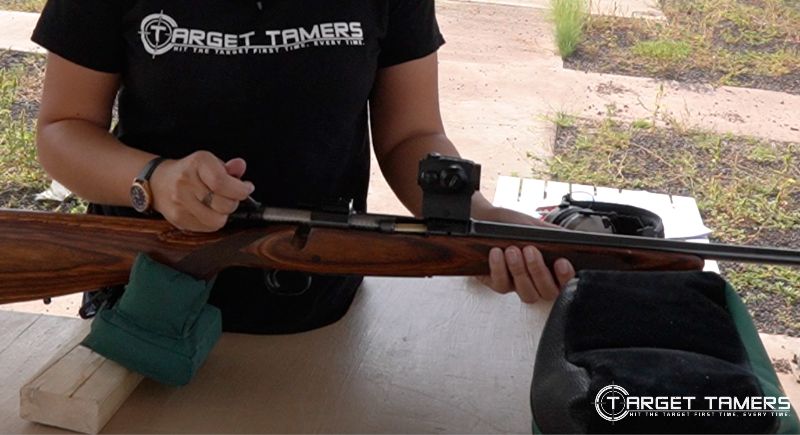
If you don’t have a boresighter, you can boresight manually. On a bolt action rifle, remove the bolt. On an AR, separate the upper from the lower receiver and remove the charging handle and the bolt. Put the firearm in a steady rest, look down through the bore to center the target.
Move to the RDS and adjust the dot to the bull’s-eye of the target. Take a second look through the bore to make sure it didn’t move while you were adjusting the RDS. If all looks good as best it can, reassemble the rifle. Immediately store boresighting tools to keep your working space safe.
Can You Sight in a RDS Without Shooting?
Overall, even with precision boresighting, live ammunition must be sent downrange to confirm zero. Boresighting is not a substitute for sighting-in a red dot sight, or any other gunsight for that matter.
Tips:
- Boresighting is not a substitute for a zero!
- Boresighting is usually done at a close-range distance:
- Pistols/handguns: 5-15 yards
- Rifles: 15-25 yards
- Though boresighting a pistol is not common practice, it can be done with a laser boresighter.
- Immediately store boresighting tools before bringing live ammunition into your working space!
| Boresighters | Caliber | Type | Key Feature | Price Range |
|---|---|---|---|---|
| Mid-Ten Boresighter | .223, 5.56mm | In-chamber | Highly rated | Under $20 |
| Wheeler Laser Boresighter | All | Magnetic | Professional grade | Under $100 |
| EZShoot Boresighter Kit | 0.177-0.54 | Muzzle | 9 adapters | Under $25 |
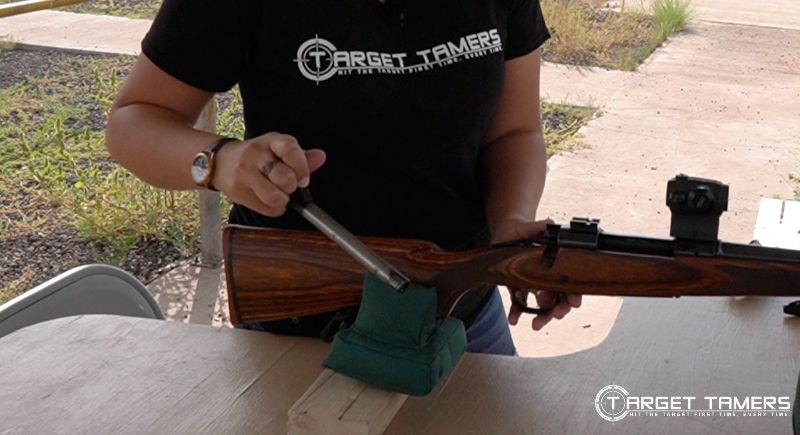
2. Zero the Iron Sights
Zeroing iron sights is necessary if they’re not zeroed, if you’re sighting-in for a different distance, or if you’re a using a different load than what they were zeroed with. Turn the RDS off. Zero the irons for the desired distance. Push down the sights or ignore them altogether going forward.
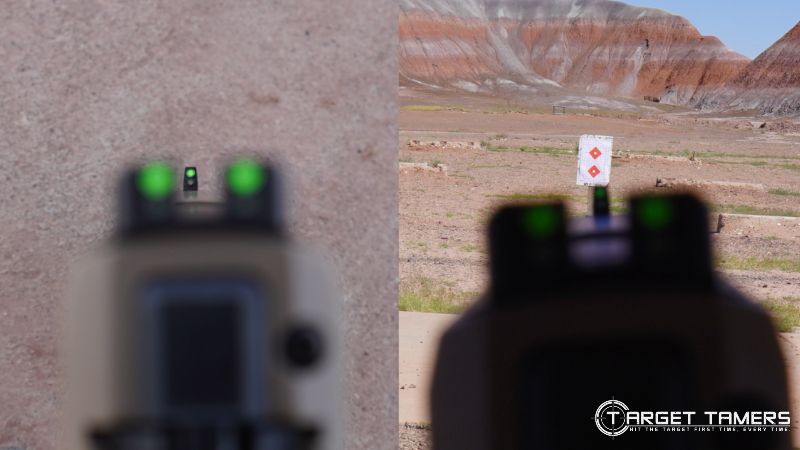
Lollipopping, slaving, or pumpkin on the fence terms means to have the dot or the target sit on top of the front post as seen through the rear sight. There are many reasons one might do this, and it could include being a substitute for boresighting, though neither is a substitute for a proper zero.
Iron Sights are an Independent Sighting System

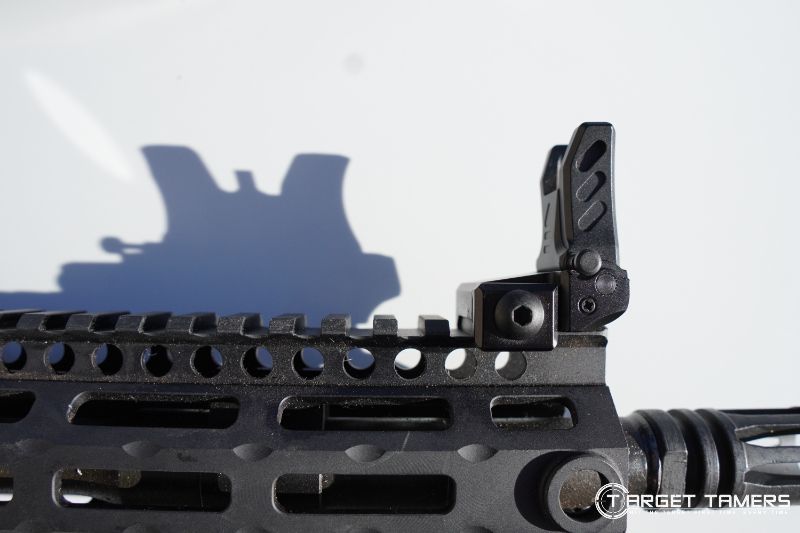
Iron sights are an independent sighting system, but you can co-witness with a red dot for fast transitional use. Co-witnessing indicates where the red dot sits, due to its mounting height, in relation to the irons. This allows visuals of the irons inside the reflex or holographic sight FOV/window.
Using them together would defeat the purpose of having a red dot in the first place. In the event of red dot failure, you don’t have to take the time to remove the red dot, especially if it lacks a QD mount. Simply revert to iron sight use as you can see them through the red dot FOV.
See our How to Zero Iron Sights guide for more detailed instructions and the Iron Sights VS Red Dot article for a comparison of the two sighting systems.
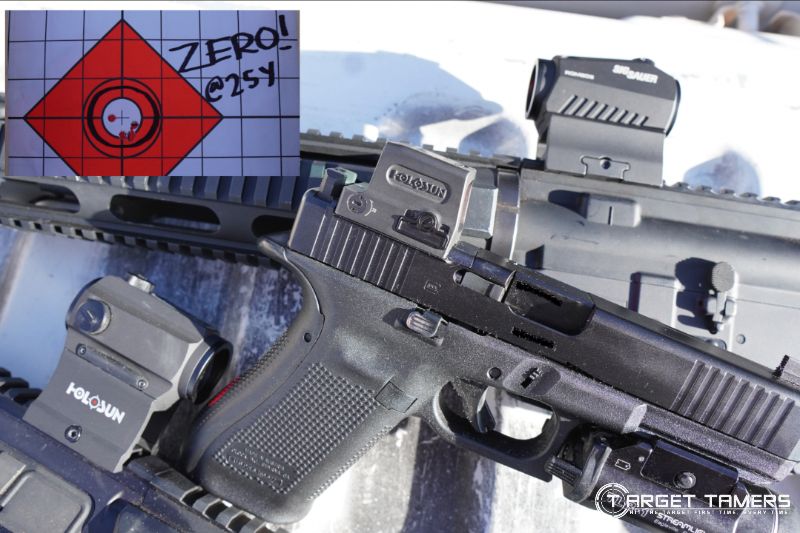
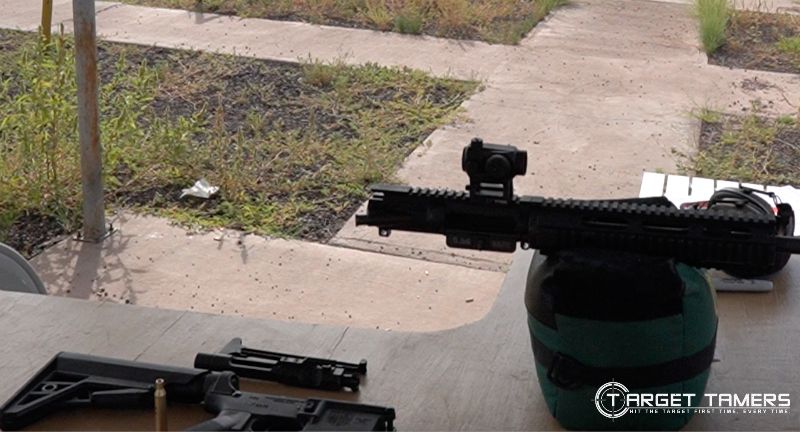
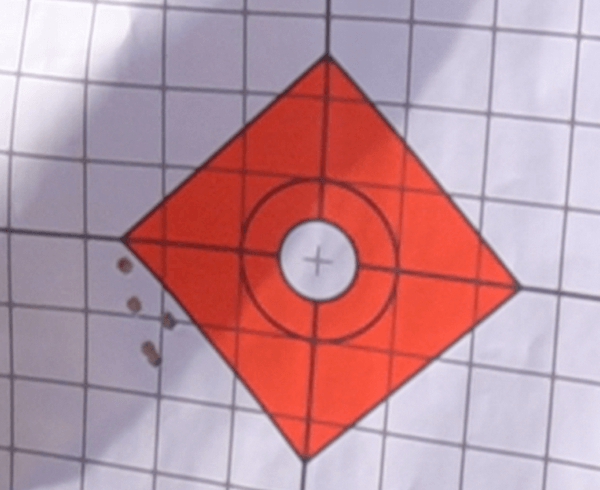
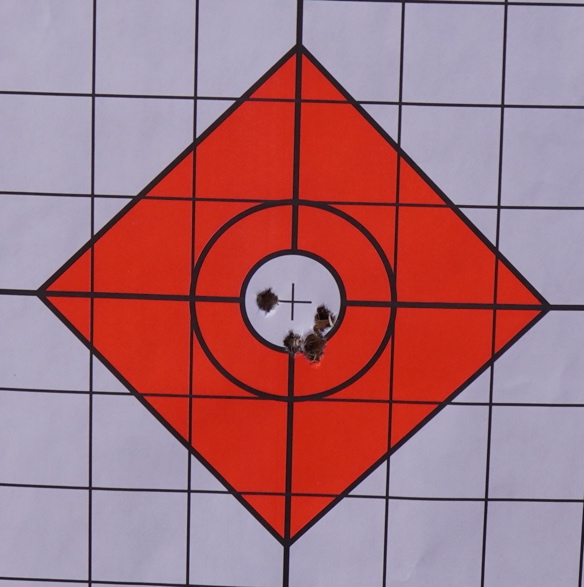
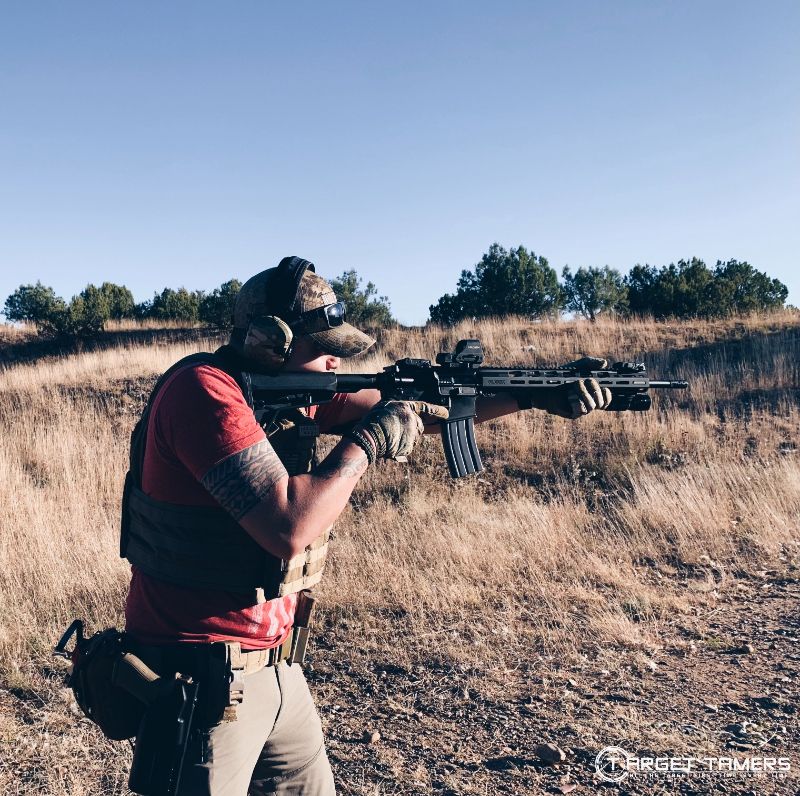
3. Shoot First Group & Make Corrections
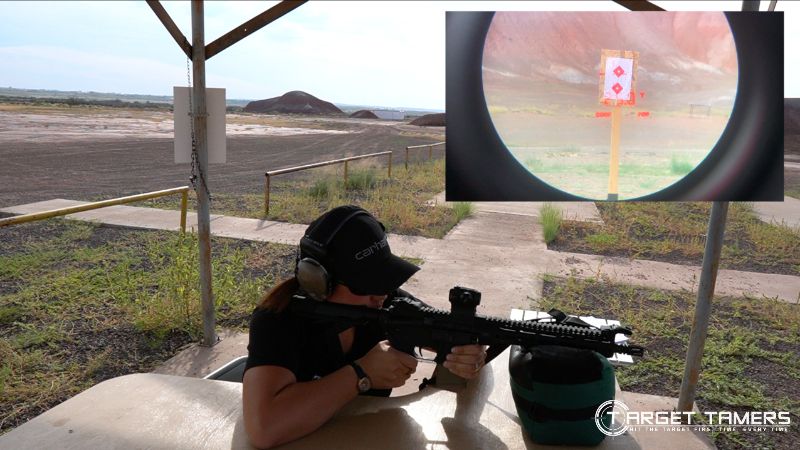
Set target at 25 yards for rifles and 10 yards for handguns. Sight-in targets are usually gridded in 1” squares. Shoot the first group to the center of the target. Observe how far off the group is from the POA. Make the appropriate elevation and windage adjustments.
How to Make Red Dot Sight Adjustments?
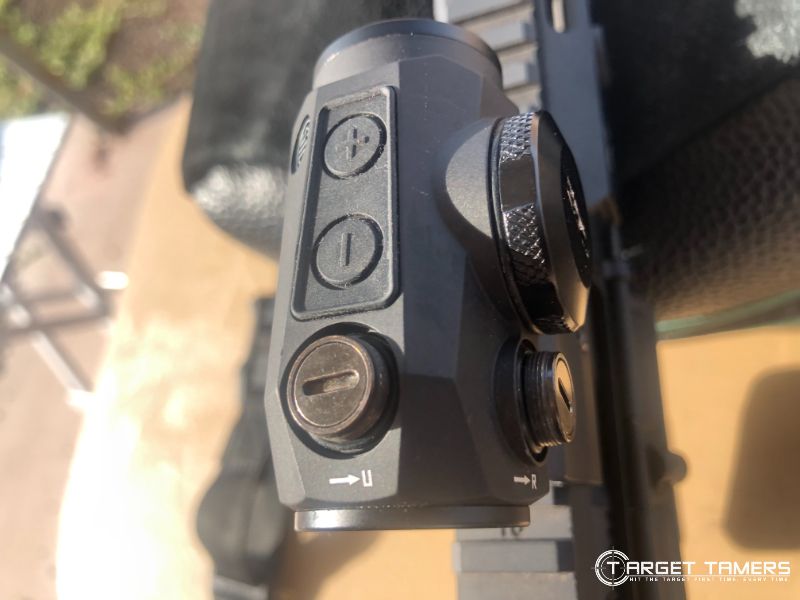
A red dot sight has an elevation turret on top and the windage turret on the side, usually on the right. The same way they were manipulated while boresighting is the same way to make adjustments here. However, making these adjustments to sight in needs to be a calculated process.
- Elevation turret: moves the dot vertically, UP and DOWN.
- Windage turret: moves the dot horizontally, LEFT and RIGHT.
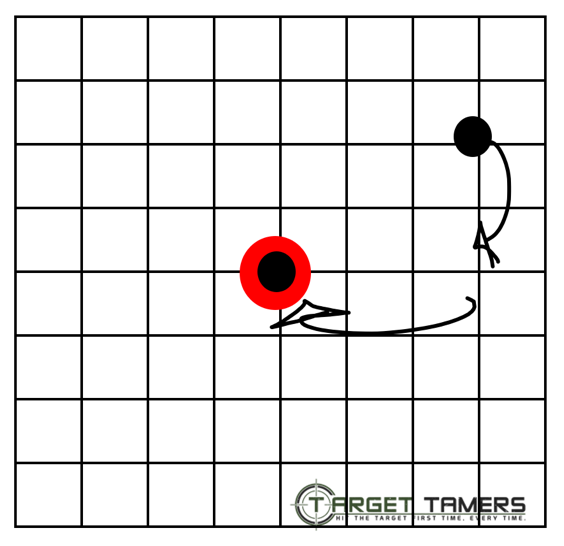
The goal? To get the POI to match the POA.
Tip:
- Make adjustments in the direction you want the POI to go. If the shot is too high and too far left, use the turrets to make adjustments in the opposite direction, i.e., DOWN and RIGHT.
- For more details, check out our How to Use a Red Dot Sight article.
What is MOA?
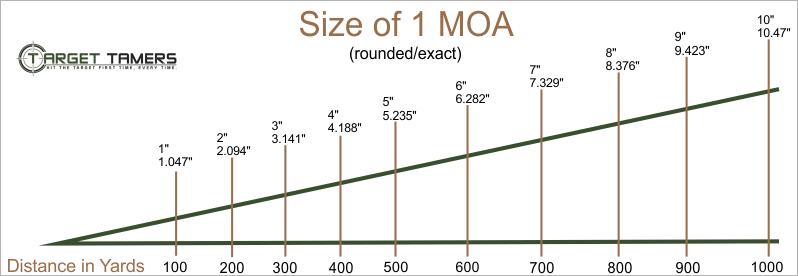
MOA stands for Minute of Angle and is an angular measurement. This measurement is independent of distance, i.e., 1 MOA is 1 MOA regardless of the distance. Even with that said, we can take that knowledge and translate it to reasonably predict changes in POI down range.
For an in-depth look at MOA, check out our simple MOA explained guide.
Tips:
- MOA is an angular measurement.
- Red dot sights have turret adjustment values in 1 and 0.5 (½) MOA.

Sighting Formulas & Examples
Remembering some simple math formulas will help with sighting-in a red dot sight. The formulas will take you through calculating the size of 1 MOA at the target distance, how much MOA you need to correct, and how that translates to clicks on your RDS.
Let’s run through an easy hypothetical example:
- Target distance: 100 yards
- RDS adjustment value: 1 MOA
- 1st group: POI is 2” HIGH and 3” to the RIGHT

Make adjustments:
- Elevation adjustments needed: 2 clicks DOWN
- Windage adjustments needed: 3 clicks LEFT
How did we get that? Here are the formulas:
FORMULA: CALCULATE 1 MOA AT ANY KNOWN DISTANCE (Rounded)
Distance to target (yards) / (divide by) 100 = inches per 1 MOA at that distance
| Distance | 1 MOA Size (Rounded) |
|---|---|
| 100 yards | 1” |
| 75 yards | 0.75” |
| 50 yards | 0.5” |
| 36 yards | 0.36” |
| 25 yards | 0.25” |
FORMULA: CALCULATE CORRECTION NEEDED IN MOA
How far off you are / 1 MOA for that distance = MOA correction
FORMULA: CALCULATE CORRECTION NEEDED IN CLICKS
MOA correction / RDS adjustment value = Number of clicks to adjust
Completing the example:
1 MOA SIZE: 100 YARDS TO TARGET / 100 = 1” (1 MOA)
| ELEVATION | WINDAGE |
| 2” (HIGH) / 1” = 2 MOA | 3” (RIGHT) / 1” = 3 MOA |
| 2 MOA / 1 MOA (RDS VALUE) = 2 CLICKS | 3 MOA / 1 MOA (RDS VALUE) = 3 CLICKS |
| CORRECTION NEEDED: 2 CLICKS DOWN | CORRECTION NEEDED: 3 CLICKS LEFT |
Now you know how to make adjustment corrections to sight-in your RDS!
Follow through with me one last time for a slightly harder, but real-life example.
- Target distance: 25 yards
- RDS adjustment value: 0.5 MOA
- Elevation POI: 1.5” LOW
- Elevation Correction: 1.5” / 0.25 MOA = 6 MOA … 6 MOA / 0.5 MOA = 12 clicks UP
- Windage POI: 2” LEFT
- Windage Correction: 2” / 0.25 MOA = 8 MOA … 8 MOA / 0.5 MOA = 16 clicks RIGHT
- Elevation POI: 1” HIGH
- Elevation Correction: 1” / 0.25” = 4 MOA … 4 MOA / 0.5 MOA = 8 clicks DOWN
- Windage POI: 0.5” LEFT
- Windage Correction: 0.5” / 0.25” = 2 MOA … 2 MOA / 0.5 MOA = 4 clicks RIGHT
Done.
Is there a “cheat” way around the math?
You can always calculate the math for what the corrections would be at 100 yards. If you’re at 50 yards, multiply the correction by 2. If you’re at 25 yards, multiply the correction by 4.
It yields the same results, but I strongly recommend following the formulas from scratch. I’ve made mistakes and I continue to do so. Slow down and take your time.
| Red Dot Sight | Adjustment Value | Price Range |
|---|---|---|
| Sig Sauer Romeo MSR | 1 MOA | Under $100 |
| STNGR Axiom II | 1 MOA | Under $150 |
| Holosun HS510C | 0.5 MOA | Under $350 |
| Leupold DeltaPoint Pro | 1 MOA | Under $500 |
| EOTech EXPS3 | 0.5 MOA | Under $700 |
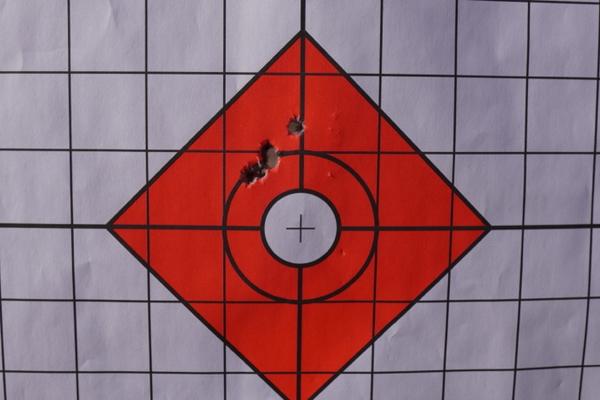
4. Shoot Another Group to Confirm
Essentially, once you’ve shot your first group, observed the POI, and have calculated and made the adjustments, shoot another group to confirm zero or continue to tweak until you have zero.
We already kind of covered step 4 in the step 3 discussion for the natural ease of following through with examples, formulas, and instructions on how to make adjustments.
1 vs 3 vs 5 vs 10-Shot Groups?
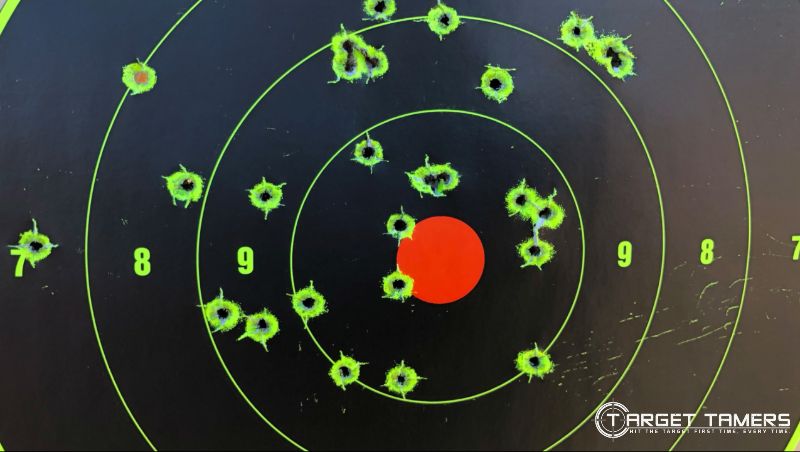
Many are obsessed with spending as little ammo downrange as is possible when it comes to sighting-in. Though one-shot zeros are done, it doesn’t tell a good enough story about accuracy, tracking, shooting technique, and if there could be problems with mounting or your loads.
Therefore, a one-shot zero is not a good indication of actually having achieved zero!
3-shot groups are better than one, but some groups can be a complete fluke. Again, a 3-shot zero doesn’t quite tell you enough when it comes to a red dot.
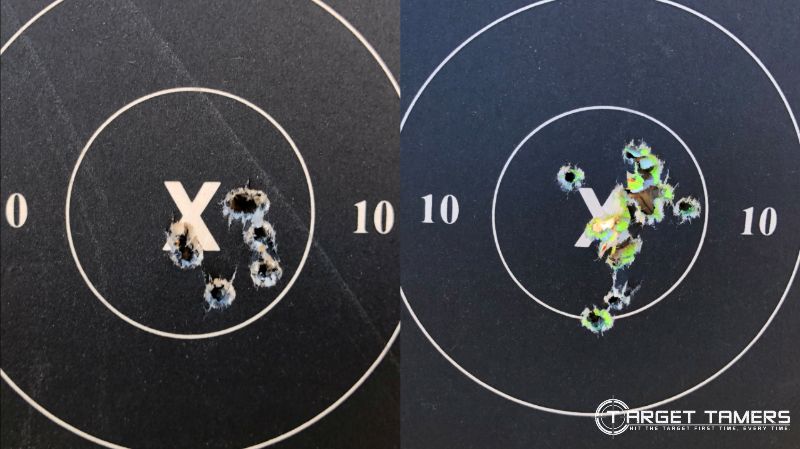
5-shot and 10-shot groups are ideal to zero a red dot sight. It gives a lot more detail in the shot pattern, and as a result, you have a lot more confidence in your zero.
Tip:
- Red dot sights aren’t intended for precision accuracy. However, their strengths lie in speed needed for rapid target acquisition and follow-up shots excellent for close-distance engagements.

Consider sight-in targets with gridding as they make for zeroing in a RDS easier because you can count those squares. You might not need shoot ‘n see targets, but they do help with visually spotting groups. Remember, a red dot sight doesn’t have magnification, so anything you can do to streamline the process makes it more enjoyable.
| Sight-in Targets | Features | Price Range |
|---|---|---|
| Champion Redfield Precision Targets | Low price | Under $5 |
| Splatterburst 12x18 Targets | Shoot ‘n see | Under $40 |
| Splatterburst 12x12 Targets | Self-adhesive | Under $40 |
| PlusTactical M16A2 Targets | Tactical | Under $20 |
| AxeOn Optics Reflective Laser Chart | Reflective | Under $10 |
5. Repeat for Longer Distances
If you’re shooting for a longer distance, you’ll want to repeat steps 3 and 4. Remember that you must calculate what 1 MOA is for that distance as it will affect how much correction you will need.
Can You Zero for the Distance Right After Boresighting?
Generally, it’s encouraged to start at a close-range distance to ensure you get on paper. Moving out in increments makes for smaller adjustments along the way. Many people zero for the distance right after boresighting and do so successfully.
It’s very likely that larger adjustments will be required. Either way, boresighting tends to reduce frustration by the time you go the distance.
What is the Best Distance to Zero a Handgun?
The best distance to zero a pistol/handgun is the distance that is most appropriate for the intended application.
This varies widely between one person and the next. Many in professional applications will sight-in a RDS on their handgun for 25 yards. Those in competition might opt for 50 yards. However, with engagements happening closer than you think, a 7 or 10-yard zero is not uncommon for self-defense. 15 yards tends to be the middle ground for personal carry.
What is the Best Distance to Zero an AR-15?
The best distance to a zero an AR-15 is the distance that is most appropriate for the intended application. The zeroing distance might also be dependent on your ballistics.
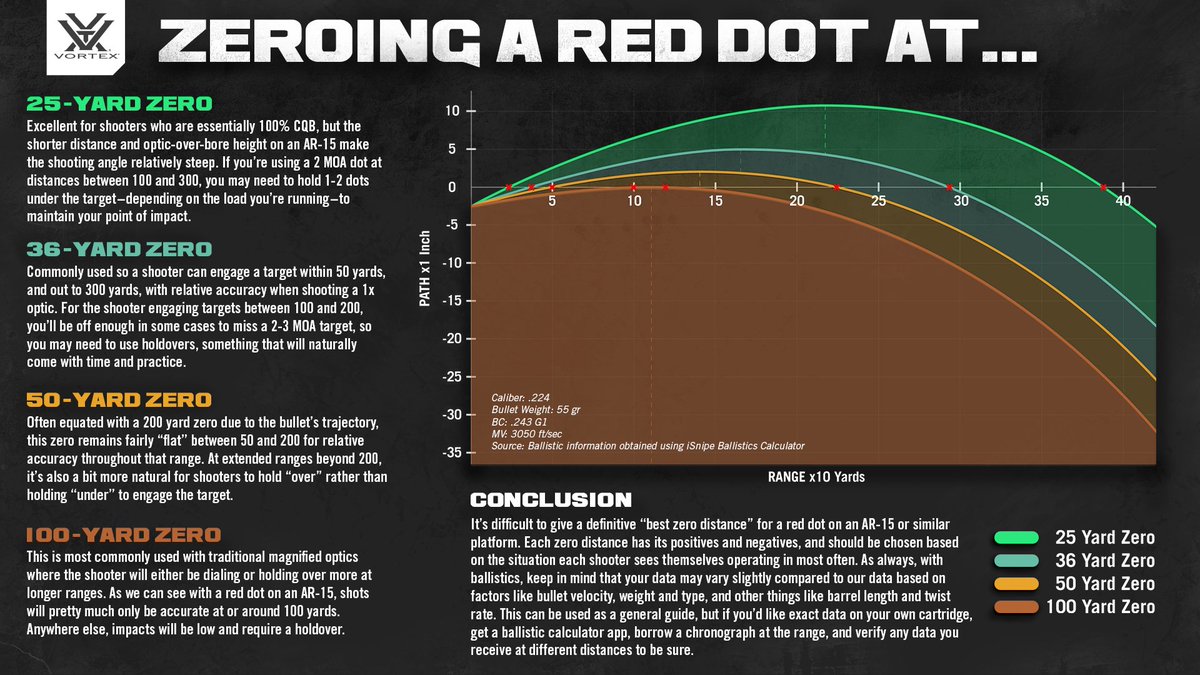
It’s common practice to sight-in for a 50/200-yard zero or the 36/300-yard zero. Though it seems like I’m saying you can get two zeros out of one – I’m not. Let me clarify.
You have one zero – the first number, 50 yards. The second number is the effective range at which your POI is relatively the same as/or at least close to the POA, getting you in that ballpark while shooting off the center dot – not having to hold over.
Can Zeroing a RDS be Fun?
I’m not the only one with the opinion that it’s super exciting and fun to unbox a shiny, new red dot. But that experience alone is not satisfying. When you have a red dot to zero, it’s work and pleasure at the same time, and there’s something about that, that is gratifying.
Getting to the range is not only an obligation when you have firearms, but it’s also empowering when you know what you’re doing. This results in confidence.
This guide is a long one, but it’s detailed and thorough. Though sighting-in a RDS is not exactly “easy,” it’s not as hard as you might imagine it to be. If it takes you a few groups to get it, the ammo spent was well worth it.
By that point, you should be feeling comfortable with running some simple math and shooting your new RDS – not to mention the newfound confidence you have.
Remember to enjoy yourself and always be safe – follow firearm and range safety protocols!
Further Reading


Hello
I have a red dot on my gun and am interested in anything to do with it
Thanks
Thanks for the comment Yuval! Here are all our articles on red dot sights - https://www.targettamers.com/category/red-dot-sights/