Hunting binoculars are far from the child's play thing that you used to run around with as a kid.
But, don't get me wrong, they can be the fun and exciting adult play thing if you know how to use them right.
And, part of knowing how to use binoculars to maximize your hunting experience starts with calibrating the binocular for your eyes.
In this article, we'll address how-to's in adjusting the binocular specific to you and the types of focus systems available.
We'll also get into the elements that affect calibration, such as IPD distances, eye relief, and exit pupil. Also, you glasses-wearers might want to pay close attention.
By the time you get to the end of this, you'll know how to shop for and adjust any pair of binoculars to match your hunting style, whether it be a low budget binocular or a high-end master-piece.
Why Focus Your Binoculars?
"What's the big deal in focusing binoculars anyway?" - Most of you will ask yourselves this question, especially if you're not accustomed to a well-made pair of optics.
You'd also be part of the large majority of binocular users that don't know how to properly focus a binocular for your eyes and to adjust for abnormalities, either in the image or in your own eyesight. And we want you to be the most well-prepared optic user when out in the field.
So, the simple answer as to why you should properly focus your binocular is... to get the maximum benefits of up-close sight a well-calibrated binocular can offer you. Think sharp, clear, and bright images of that buck, the hot-spot you're glassing to return to later, or the wide, open field with birds of every color, size, and breed.
No more blurry images, say goodbye to double vision, and eliminate dark, shadowy spots that appear to float around on the lens as if you have a tiny poltergeist cortege following your every move.
Types of Binocular Focus Systems
Getting excellent image quality starts with the type of focus system you choose to invest in. And, there are two different types that we're going to get into today:
- Center focus
- Individual focus
Center Focus System Binoculars
This type of system is the most common focus method that's used on modern and conventional binoculars. And surprisingly, it's also the least understood system among binocular users.
While the general idea of use is easy to comprehend - just turn the wheel in the center, right? - it seems taking things further to actually properly calibrate it for your eyesight is where even the most apt hunters get lost.
So, for the sake of clarity, let's go over center focus anatomy...
Where is the Center Focus on Binoculars?
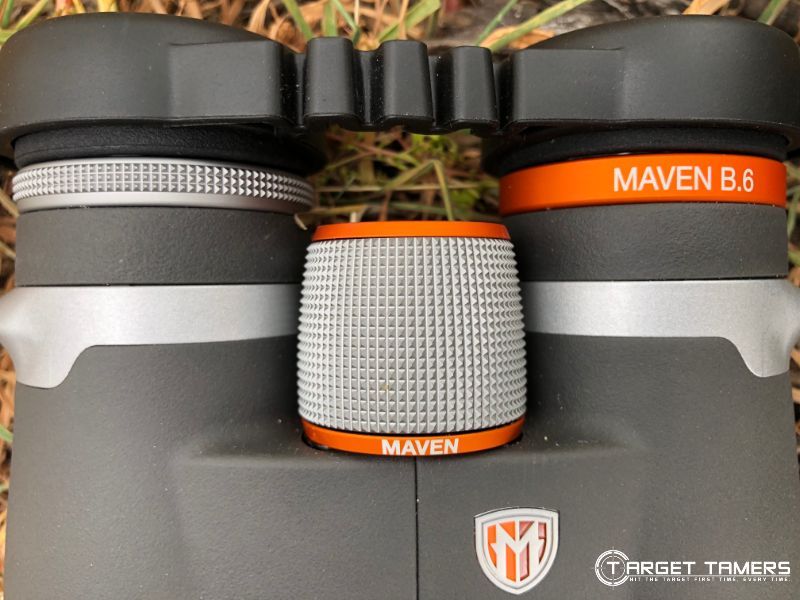
The center focus is the wheel or the knob that's located in the center of the binocular, usually somewhere in between the two barrels where it's easy to use with either the left or right index fingers. Ideally, it should be rather large in size with knurly or well-serrated grooves to be able to use with ease. And, even the best hunting binoculars should be relatively easy to use with gloves on.
The second indication of a center focus system is the adjustable eyepiece/diopter. This is nearly always found on the right eyepiece. Sometimes, it's even discreetly hidden under the center focus knob. It should have a simple scale, such as "-0+", with some sort of marking on the outer piece of the diopter, perhaps an arrow, line, or dot.
What is the function of the center focus and the diopter?
The job of the center focus is to bring into focus your image. It will focus both the left and right eyepieces of the binocular simultaneously. Depending on your hunting and glassing style, you will need to make adjustments here as you focus on targets at various distances.
The diopter goes a step further and allows for each eye to be focused to compensate for varying eye strengths between your left and right eye.
How to Calibrate a Center Focus System
Step 1
First ensure that you have the appropriate IPD distance, the right amount of eye relief, and a correct holding position. You'll know you have all these things when it's comfy to hold up to your eyes, you see one complete, round circle of vision, and the entire field of view is intact.
Step 2
Look through the binoculars and pick out a mid to long distance, stationary target.
Step 3
Here, you can either just close your right eye or block out the right objective lens. You can do this by taping a piece of paper over the right objective bell if you must.
Step 4
Looking only through your left eye or the left eyepiece of the binocular, look at your target and use the center focus to bring the image into focus. Aim for a sharp, crisp, and clear view. When you've got it, you've now focused it for your left eye.
Step 5
Now, tape up the left objective bell or simply close your left eye.
Step 6
Looking only through your right eye or the right eyepiece of the binocular, look at your target and use the diopter to bring the image into focus. Don't touch the center focus knob at all. Just keep rotating the diopter until you've got the sharpest image possible.
Step 7
You might also want to take note of the setting on the scale once you've done this. It might help you to go back to this setting if it's ever been changed. You've now focused the binocular for your right eye also.
The result should be a brilliantly sharp, clear, and crisp image of your target since the binoculars have now been calibrated for each eye.
Tips to Calibrating the Center Focus
TIP 1: Don't be afraid to fiddle around with the center focus or the diopter if you feel you need better image quality.
TIP 2: Remember that the center focus adjusts for the left eyepiece and the diopter adjusts for the right eyepiece.
TIP 3: Always start with focusing your binoculars with the left side and the center focus knob first. If you try to reverse the process by starting with the right side first, you won't be able to achieve the sharpest images possible.
Individual Focus (IF) System Binoculars
This is the focus system that allows you to focus each eye individually. These types of binos are also known as:
- no-focus
- focus-free
- self-focusing
- auto-focus
- fixed focus
- permanent focus
Tip:
No-focus and focus-free binos are low-budget versions of the IF system. They're typically fixed somewhere between 40-60 feet and that's it. You can't adjust for any further distances and you can't calibrate for different eye strengths.
Beware of Marketing Hype!
The terms auto-focus and self-focus are misnomers. There is no internal mechanism that adjusts for focus automatically.
Confused? Yes, that can happen when marketing tactics get in the way trying to make an informed binocular buying decision. You'll often times find that auto-focus and self-focus binoculars are marketed as separate products from individual eyepiece systems because of the fancy terminology.
Don't get sucked in by paying more for a marketing strategy. Pay attention to the actual description of the function of the binocular before you decide to buy. You can save yourself a lot of cash!
Binoculars with the IF system are factory-set to be focused for distances beyond 40 yards that allows you to have a wide, fixed depth of field.
"But, why would I want a binocular that's been factory-set to be focused for me?"
Good Question!
Answer: The wide, fixed depth of field actually allows you to glass any target from most distances, from around 40 yards to infinity, and it will always stay in focus.
How? Without any auto-correcting mechanisms or electronic focusing technology, it's got to be some sort of voodoo magic right? Wrong.
Your eye muscles will compensate for focus aberrations. The optics will use your eyes natural abilities to focus your image within the wide, fixed depth of field.
"What does an individual focus system look like?"
An individual focus system forgoes the iconic center focus knob that so many associate with binoculars.
Each eyepiece will be adjustable. It should have a diopter scale on each side.
How to Calibrate an Individual Focus System
To save you from tedious and painful repetition, the way to adjust your IF binocular is essentially identical to the center focus system.
Instead of using the center focus knob to focus the left eye, just use the diopter on the left eyepiece to focus the image. Then, do the same with the right side. Don't forget the setting for each eyepiece - this will always be your basic setting to start off with when glassing.
Benefits of IF Systems:
- They're often more rugged in construction
- Are impervious to water, sand, dust, and the like
- Reduces the need to constantly re-focus image
- Fewer moving parts
- Requires natural ability of eyes to focus
Drawbacks of IF Systems:
- Not apt for close focus distances
- Typically geared towards marine and military use
- Often seen on either low budget binoculars or very expensive ones
- Requires natural ability of eyes to focus - can be a problem for those whose vision isn't the best
- Is user-specific; makes sharing the binocular extremely inconvenient
TIP: You shouldn't have to re-focus your binocular often with an IF system. If you find yourself re-focusing for targets at various distances more frequently than not, you may have a defective binocular. This may warrant a call to the manufacturer or use of your warranty.
Elements that Affect Binocular Calibration
1. Interpupillary Distance (IPD)
This is just another process that needs to be perfected if you're going to make the most of your hunting binoculars. And, it has a lot to do with getting that perfect image.
While everyone knows you need to be able to comfortably put your eyes to the eyepieces, you should also know that you're meant to see one, complete circle without discomfort, blurry images, and double vision.
Achieving this comes down to correctly adjusting your Interpupillary Distance.
What is Interpupillary Distance?
Interpupillary Distance (IPD) is the distance from one pupil to the other.
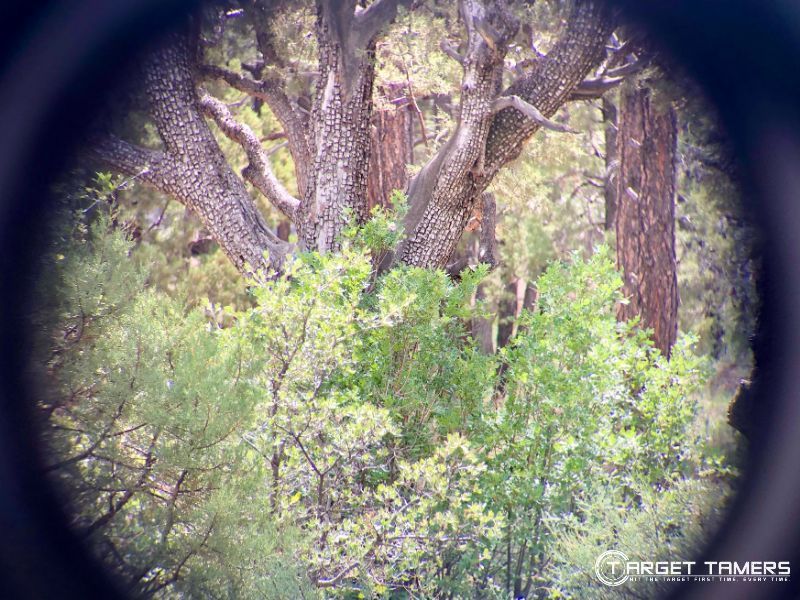
Getting the perfect IPD means that you will have achieved a complete, single circle of vision - both fields of view from each eyepiece will be joined as one for a sharp, single image.
"What will happen if you don't properly adjust for IPD?"
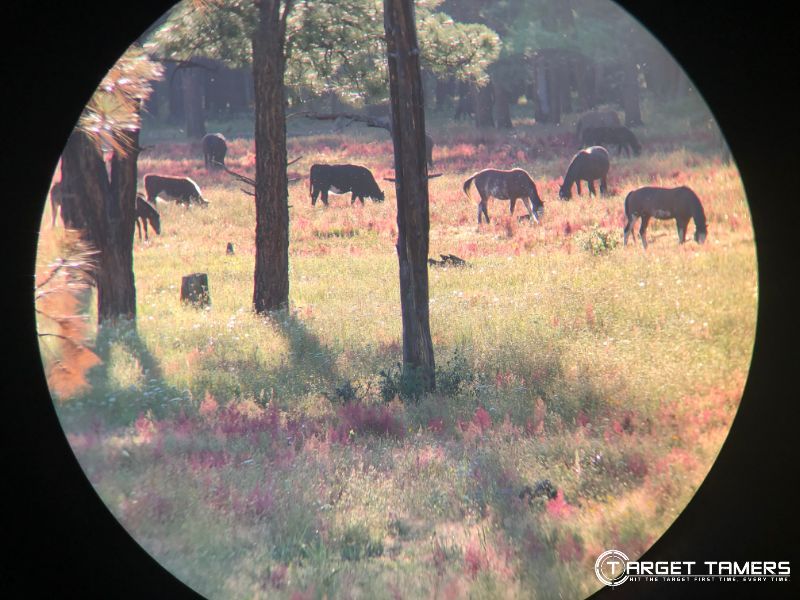
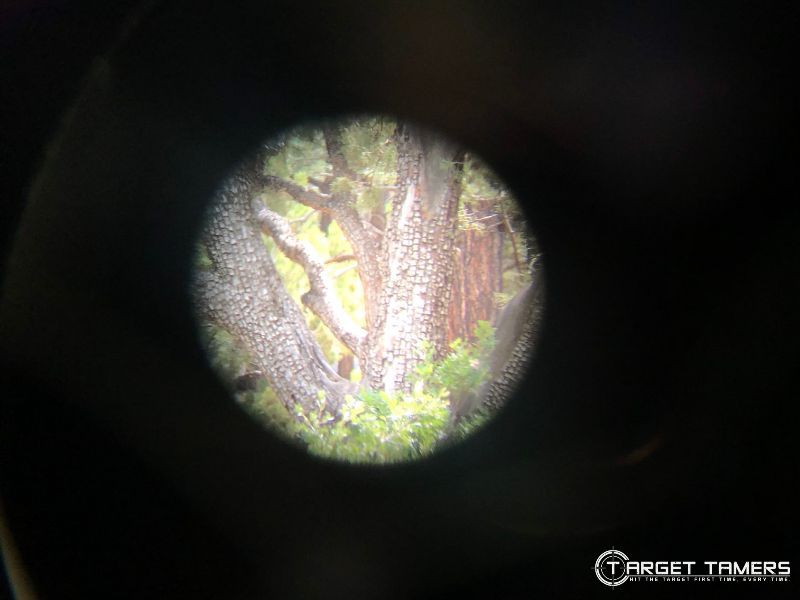
Answer: Your image will be blurry, you may see "doubles" of your target, and vignetting will occur.
What is Vignetting?
Vignetting is when you're going to lose color fidelity, detail, and brightness at edges of your field of view or your periphery. You'll see a noticeable difference versus the quality of color and brightness at the center of the image. To fix it, you must correctly adjust for IPD.
How to Adjust for IPD
Step 1
If you're in the shopping stage of buying a binocular, you might want to see if the manufacturer lists the IPD in the product specs. This usually gives you an idea of the binoculars IPD capability.
Tip:
Most binoculars have an IPD around 57-72 mm. This is usually sufficient for most people. But, if your eyes are close together, or you're shopping for a child or younger hunter, you'll want one that can probably come down to 50 mm. For hunters that have wider spaced eyes, look for something that can range up to around 75+ mm.
Step 2
If you've already purchased one, simply hold them with two hands - one hand on each barrel.
Step 3
Look through the binocular and focus in on a mid-range to long-range target.
Step 4
Widen or narrow the binocular by pulling outwards or pushing inwards on the barrels to produce a single, complete field of view.
Tip:
If you can't get the right IPD, not only will your image be poor compared to what you could have, eye strain is quickly inevitable.
2. Binocular Eye Relief
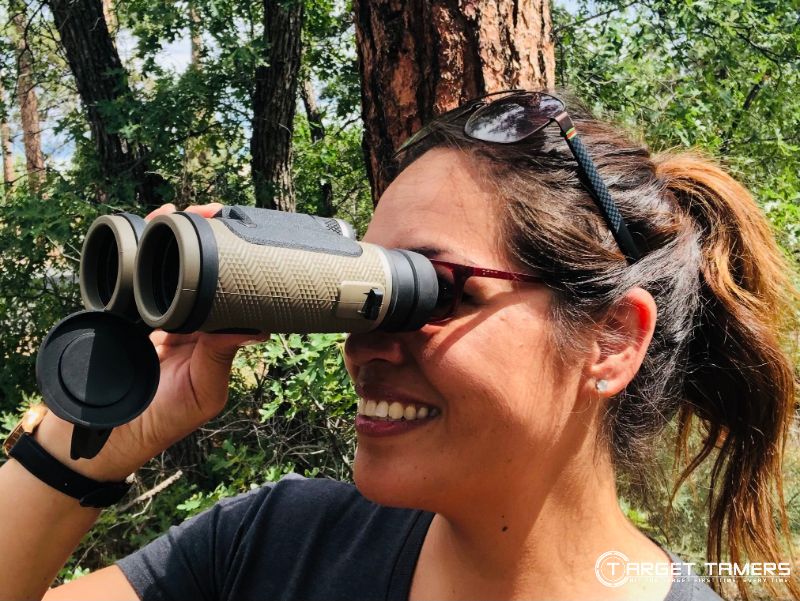
Ah, this is one of those topics that non-glasses wearers typically don't need to worry about when it comes to binoculars. But, those who do wear specs are often gypped on the short side if they don't pay close attention to it while they're in the buying process.
(By the way, eye-relief is not the only consideration for glasses wearers, so be sure to check out our How to Use Binoculars With Glasses guide for more tips.)
Who can benefit from knowing about eye relief?
- Glasses-wearers with astigmatism
- Hunters that wear sun-glasses and don't want to remove them
- Glasses-wearers who don't want to remove them during use
- Contact-wearers that would prefer to wear their glasses so as not to compromise on image quality due to contacts drying out and having to blink often.
Tip:
If you are nearsighted or farsighted, you can usually focus and calibrate your binoculars to correct for your vision.
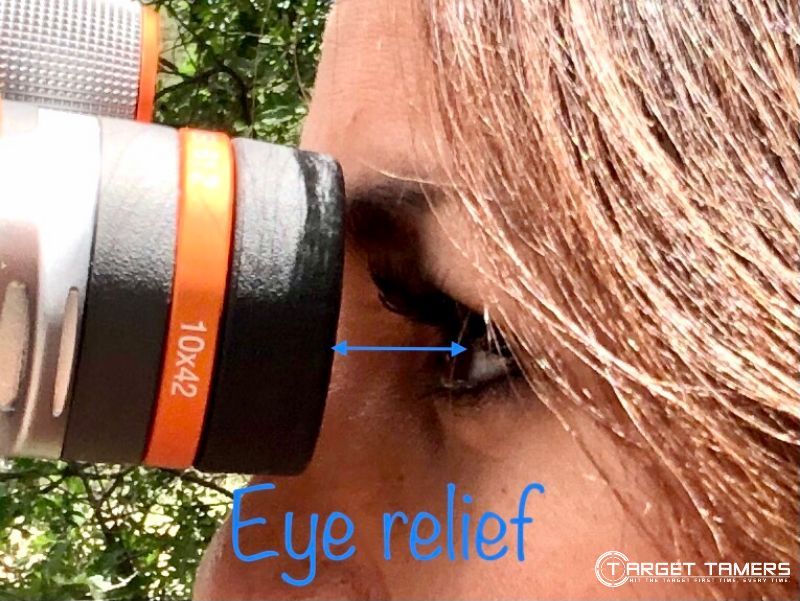
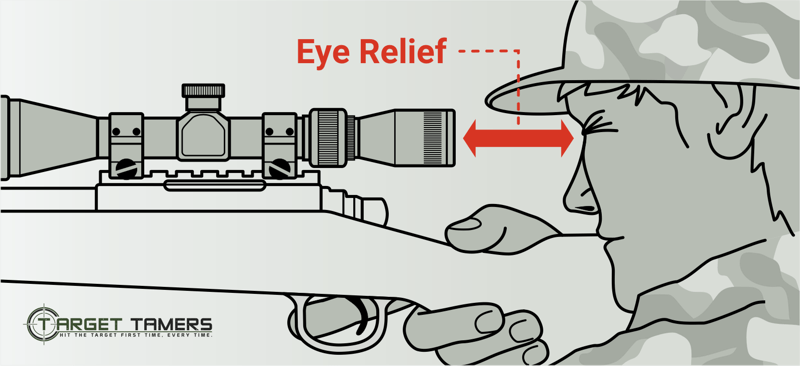
What is Eye Relief of Binoculars?
Eye relief is the distance from your eyes to the oculars of your optic (binocular, rifle scope etc) where you can see the entire field of view unobstructed.
Sounds easy enough to obtain right? Not for everyone.
Glasses often get in the way of being able to properly maximize binocular use. If you have rather strong prescription lenses, thick lenses, or if you wear your glasses further down your nose, you're going to need to look for binoculars with sufficient or even long eye relief.
Tips:
- Short eye relief is anywhere between 9-13 mm.
- Mid-range eye relief is anywhere between 14-16 mm.
- Long eye relief is any distance above 17 mm.
How Much Eye Relief is Ideal?
Glasses-wearers will want around 16 mm to a nice 18 mm for sufficient eye relief.
For non-glasses wearers, this is a nice enough distance to not have to dig your eyes into the eyepieces. For glasses-wearers, you're going to notice the more forgiving distance for your lenses as well as still be able to retain a full field of view.
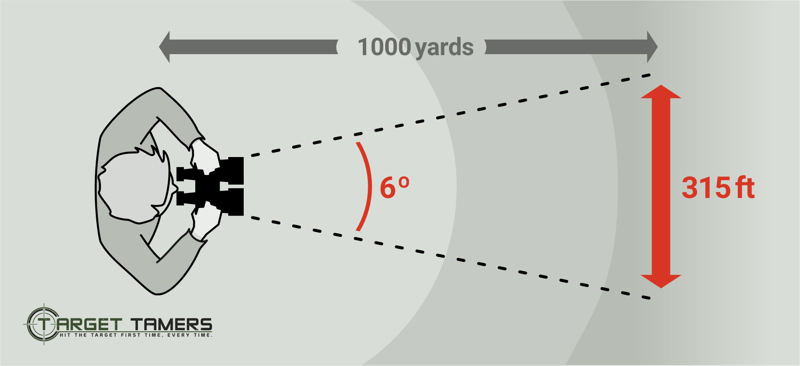
But, what's the big deal with seeing a full field of view?
Answer: Achieving the appropriate amount of eye relief will allow you to see the entire area your binocular is capable of showing you. This is really helpful if you're hunting fast, moving targets on the go or if you're a bird watcher who needs to catch birds in flight.
With a wide field of view, you'll have more of an area visible to you in one image and it should be more comfortable and easier on the eyes.
If you're having trouble picturing this, just imagine peering through a set of windows with the curtains fully open instead of partially drawn.
To make the most of your binocular, always double check what the eye relief is. You might also want to pay attention to manufacturers that advertise long eye relief but it doesn't actually reflect that in the product specs!
3. Exit Pupil of Binoculars
Exit pupil is a great factor to consider when looking to buy binoculars. It can tell you whether or not you have a binocular that's suited for just daytime use, if it can double for low light conditions, or if you've accidentally picked up a binocular for star gazing.
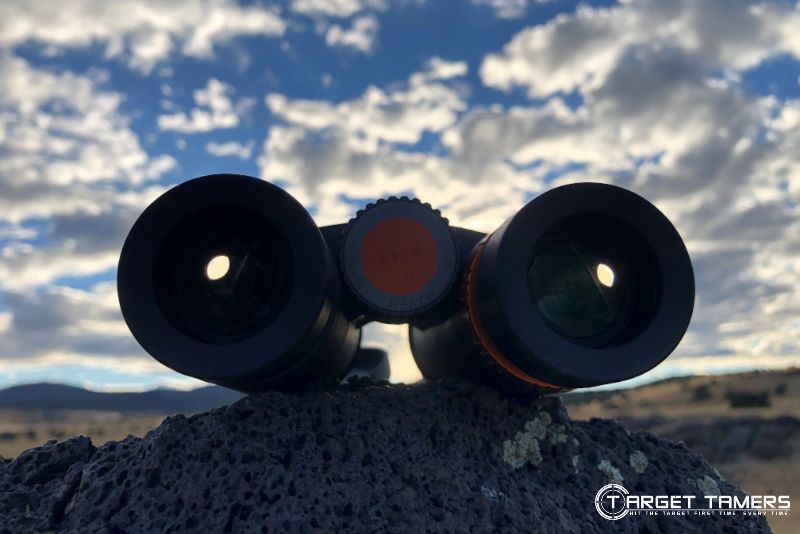
What is the Exit Pupil of Binoculars and How do You Calculate It?
If you hold the binoculars up to a bright background or light with the oculars facing you about 10 inches from your eyes, you'll see a bright beam or circle of light - this is the exit pupil.
It will be measured in millimeters, and most of the time it should be listed in the product specs and techs. But, if it's not...
Just take the objective diameter lens size and divide it by the magnification power. For example, a 7X50 binocular will have an exit pupil of 7.14 mm (50 divided by 7). Easy!
Now... how to determine whether your binocular will be good for daytime, low light, or both?
Choosing Exit Pupil Size for Your Binoculars
Choosing the ideal exit pupil size will come down to the type of lighting you will be using your binoculars in. Whether you plan on daytime use, nighttime use or a bit of both, there is a binocular designed to fit your needs.
Check out the idea exit pupil size for the following glassing conditions:
Daytime Use and Bright Conditions
The healthy human pupil only opens to around 2-3 mm in bright conditions.
If your bino has an exit pupil of around 2-3 mm and you're getting close to perfect light transmission, there's going to be little to no light loss. You will be able to perceive the image with as much brightness as possible as you would see with the naked eye.
If your binocular has a larger exit pupil of, say 5-7mm, over half of that light coming through the binoculars will be blocked out by the iris and it won't be used by the pupil - you'll still only see images as bright as if the exit pupil were no more than 2-3 mm.
Tip:
A larger exit pupil in bright conditions will not make your image any brighter.
Therefore, if you're primarily glassing during daytime, you won't need a binocular with more than 3 mm of exit pupil. This may also help to cut down on the weight and costs of the larger objective lens size binoculars.
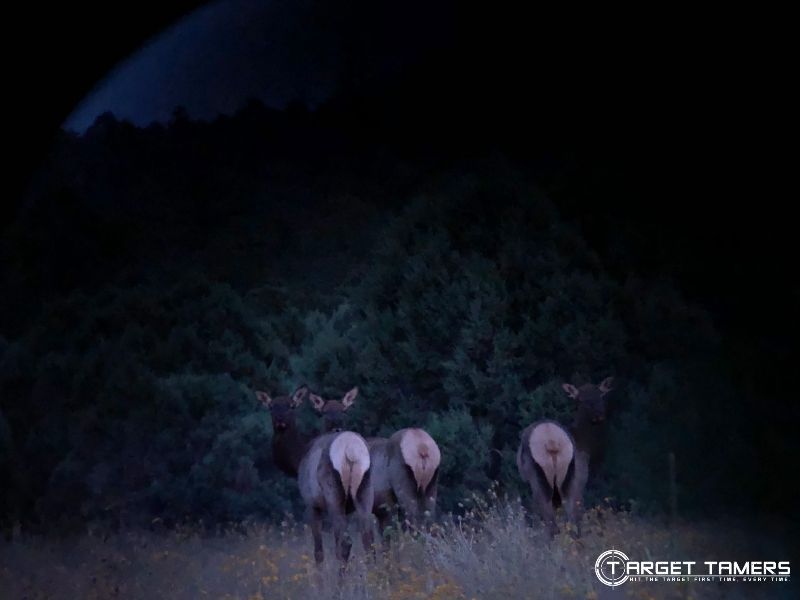
Nighttime Use & Low Light Conditions
A healthy human pupil opens between 5-7 mm in low light conditions. In fact, total exposure to complete darkness for at least 30 mins is often required to get pupils to dilate to around 7 mm or more.
If you're glassing around dusk and dawn for when your prey is the most active, you're going to want a binocular that can gather as much light as it can with what little may be available. Look for a binocular with a larger objective bell or with an exit pupil that is at least a minimum of 5 mm.
Most hunters with normal aging eyes over their forties usually have pupils that dilate between 5 and 6 mm. So, even a 7 mm or more exit pupil binocular may be overkill. If you like low light hunting, our hands on review of the Maven B.5 15X56 binocular is a must read - that binocular is an absolute dream.
If your eyes open to about 7 mm in low light conditions and you have a 7X50 binocular with an exit pupil of 7.14 mm with perfect light transmission, no light loss will occur and you will be able to see about as bright an image as you can get.
But...
If you're glassing at night with a daytime binocular that has an exit pupil of 2.5 mm, it will only be capable of delivering 2.5 mm worth of light, again assuming that light transmission is near perfect. This will result in a dark and dim image because your pupil isn't getting as much light as it can receive.
Tip:
If you're going to be glassing at night, aim to buy a binocular that has a larger exit pupil and you can always use it for daytime use too, even though during bright conditions, all the collected and transmitted light won't be usable. This way, you'd at least be able to use the same binocular for all times of the day.
Astronomy and Star Gazing
If you're looking to find answers within the constellations or you're just trying to spark some romantic chemistry, then a binocular with a large exit pupil is what you want.
Often times, these binoculars have huge objective lenses that range in the 56, 60, and 70 mm sizes.
They can be heavy, will need to be tripod adaptable, and aren't really the kind of tool used for hunting. Their close focus distance will often be very far and inconvenient for a hunter.
So, the bottom line on Exit Pupil size is...
- For daytime use, an exit pupil around 2 to 4 mm is great
- For low light use, an exit pupil of up to 7 mm is excellent
- For dual purpose binoculars, go with a larger exit pupil in between 4-7 mm
- Avoid extremely large objective lenses for hunting
- Human pupils dilate to around 2-3 mm in daytime and around 5-7 mm at night
Focus, Adjust, Calibrate Your Binoculars and Win!
As you can tell, focusing and calibrating a binocular for your eyes involves more than you may have previously thought. Oh, think of the many pairs that you tossed out because you thought it was a piece of junk! Well, gone are those ignorant days!
If you're planning a safari tour, a bird-watching binge weekend, or a tag-filling hunt season, then you need to know how to make the most of your binoculars. Focus, adjust, and calibrate. You'll never put up with poor sights again. Now that you know how to use them properly make sure you keep them clean so they last a long time.
Further Reading