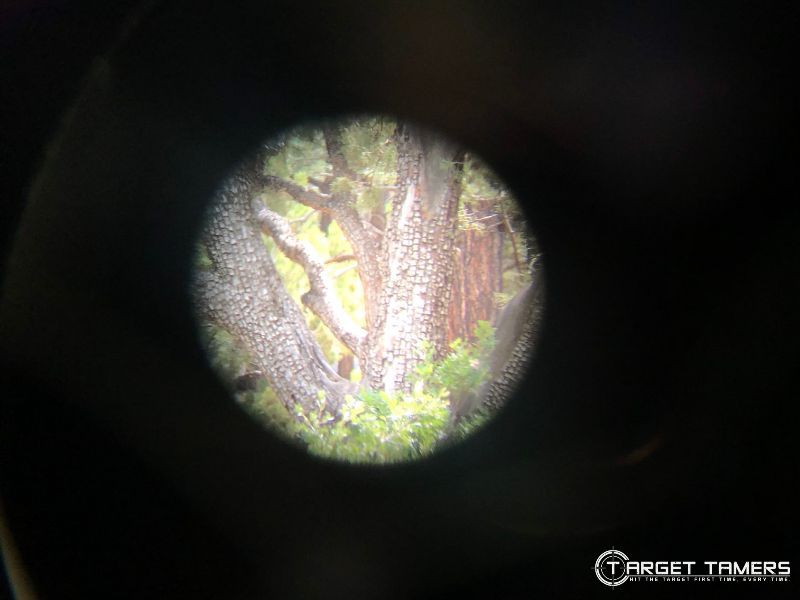
When cartoons and movies show double vision images through binoculars, it’s all laughs and jokes since we can relate.
However, this should not be the standard in reality.
If you’re seeing figure-8 views, it could be a simple focus issue or a can of worms that’s not worth fixing.
Here is all the info you need to discern if your binoculars are keepers or are nothing more than a paperweight.
How to Fix Double Vision in Binoculars

Ah, the frustrations of seeing two of everything, unmerged field of views, unaligned images – that’s double vision.
Unfortunately, it occurs more often than anyone would care to admit. They’re either poorly constructed binoculars, not correctly collimated if they’ve been collimated at all, or the optics are misaligned. Who knows, it could be a combination of all the above!
How would you know? Well, you could take the binoculars apart, but if you have to ask how to do it, you shouldn’t be doing it at all.
Let’s go over some of the basics about why this happens, what you can do to fix it, and what you may have to live with.
What is Collimation?
Binoculars are simply two, individual optical tubes put together for two-eye-use to achieve stereoscopic vision with magnification.
Since those tubes are independent optical systems, they must be aligned with each other to in order to acquire the best visual comfort to the user with the best seeing quality that it can optically provide.
When those optical systems are in alignment, the binoculars are collimated.
You may not notice slight misalignment as the brain does an excellent job of compensating for poor collimation.
So, what is okay to live with and what must be addressed?
While tolerance is subjective, this is a reasonable guideline to follow.
- There may be a slight appearance of double vision at close focus distances. This is inherently normal and not a fault.
- Double vision or the figure-8 image is not acceptable at long-range and distance glassing. You lose the benefits of stereoscopic vision and fatigue is inevitable.
- Slight appearance of double vision at low magnification may not be noticeable as the brain may compensate for it, though fatigue is likely to occur. At high magnifications, proper alignment is essential.
- Though collimated before leaving the manufacturer, optical assemblies can come out of alignment during shipping, rough handling, and accidental abuse during ownership. Though not ideal, there is to be some level of expectation of these occurrences.
- Aligning the optical tubes via the IPD is not the same as full collimation of the optics with the hinge. This would classify as conditional alignment. If true collimation is required, send it in under warranty or buy a new pair.
- Full collimation via DIY is not recommended. It is also likely to void any warranty coverage. Send it in or tinker yourself and forfeit warranty coverage regardless if things go right or wrong.
What is True Collimation?
This is perhaps the most important collimation that buyers and bino users must demand as a standard, quality feature in order to have functionable binoculars.
True collimation is alignment of the 3-axis points. The primary axis point is the hinge while the other two axes are the binocular optical prisms - the glass assemblies in each tube.
The prisms must be seated in a way that there is parallelism between all three axes. The left side of the binocular is aligned to the hinge while the right side of the binocular is aligned to the left side of the binocular.
This ensures that the binoculars are collimated and are aligned regardless of what is happening at the hinge. This results in a binocular that can truly provide singular and well-collimated images across the entire IPD range.
Most binoculars today are designed with the prism tilt system. This allows for users to make adjustments to the spring-tension prisms by rotating the set screws. This results in a prism that is now tilted up to help improve binocular performance should double vision occur.
These conditional alignment adjustments should allow for some improvement without entirely losing parallelism with the other optical axis points.
Additionally, true collimation also includes adjusting the objective lenses. This is hardly ever done because some are not designed to be removed, and it takes expertise and special equipment to align the objective lenses with the optical axis.
Pro Tip:
It should be remembered that these adjustments should not be attempted without having first confirmed that you have the correct IPD. True collimation involving the objective lenses, hinge, and both prisms in each tube should be referred to the manufacturer or a repairs specialist.
To make things even more confusing, if there are other mechanical issues or general poor binocular quality, true collimation may not be possible. If you’re experiencing true collimation issues, send it in for repair under warranty as DIY collimation is not recommended.
If the binoculars are outside of the warranty period, you may want to have a specialist collimate it for you if you do not want to attempt it yourself and unintentionally make things worse.
What is Conditional Alignment?
We can thank Bill Cook for this term as it’s what we amateurs do to improve binocular performance the DIY way.
This means that you are aligning the two optical tubes with each other at one IPD setting.
While it can result in what seems to be better performance with minimized negative effects, such as double vision, it does nothing to actually address poor collimation.
Additionally, with conditional alignment, the binoculars are only good for use to the specific IPD setting that you make the alignment for. In other words, if you have an IPD of 70mm and set alignment for 70mm, the 56mm IPD user will not have the same, great user experience as you.

What is the IPD?
The IPD is the interpupillary distance – the distance measured in millimeters from the center of one pupil to the other.
Don’t worry, you shouldn’t need to put a measuring tape to your face. Binocular specs should indicate an IPD range that is usually between 52-76mm, and some may even have a hinge scale to acquire the distance.
As you can see, the IPD is largely related to alignment and collimation, but the simple act of getting the best IPD fit for your face has nothing to do with collimation.
Pro Tip:
Now what the real function of a correct IPD provides is maximum, even, and simultaneous illumination through both eyepieces.
This should be uniform throughout the entire IPD range as no manufacturer knows the IPD setting for any buyer that will be using the binoculars.
Things to know about IPD:
- If properly collimated, you will have a singular image at the right IPD for you.
- Both eyepieces should have clear, equal field of views free of vignetting or “clipped” images.


- The exit pupils should be clear, circular, and free of clipping.
- Moving the binoculars slowly in left to right motions should provide even illumination simultaneously. If one darkens faster than the other, the IPD needs to be adjusted.
Why is IPD Important?
Not all binoculars have an adjustable IPD and yet some of the cheapest ones do. Being able to adjust for IPD provides both physical comfort and a single circle of vision without optical aberrations that allows you to glass for extended periods of time without visual fatigue.
What happens when you do not calibrate for IPD?
- Double vision*
- Vignetting
- Optical aberrations
- Poor glassing experience
- Fast onset of visual fatigue
*Remember, double vision may also be the symptom of poorly collimated optics. Adjusting the IPD may not remedy double vision.
As a side note, what is fast onset of visual fatigue? Especially if you’re seeing doubles or optical aberrations, the muscles in your eyes will be strained to compensate and align an image due to poor collimation. You’ll find that it’s uncomfortable to keep using the binoculars, it can induce headaches, eye sensitivity, and nausea.
To get the best seeing and operating experience possible, ensure you’re adjusting for IPD. Look for How to Adjust for IPD instructions here.
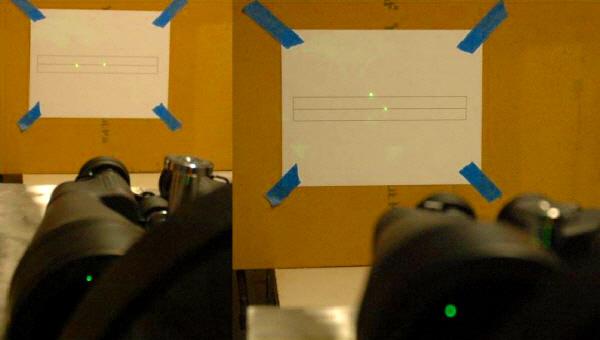
How to Check for Poor Collimation or Misalignment
So, you know you’re seeing doubles, and now you know why. But do you know how to check exactly what’s wrong so that you can make the right corrections?
There are multiple ways to test for obvious misalignment, but the popular methods are with the blink test and/or making your own target to spot collimation misalignments.
Create your own target with a huge “t” to create a cross that has distinct vertical and horizontal lines. Otherwise, you can focus on a house/building rooftop, fence, etc. What target you choose to focus on must be at least 100 yards away.
Ensure you’re outside to eliminate diffraction from the equation from looking through glass.
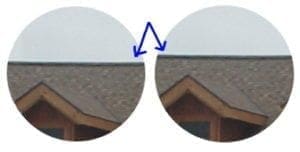
How to Look for Horizontal Misalignment

- Focus on the horizontal lines of the target.
- Relax eyes and alternate closing each eye every second while keeping your head still.
- Slight movement between the images of each eye is normal but significant movement is not.
- If you suspect that you’re unable to detect misalignment due to your eyes compensating for it, pull your eyes away from the eyepieces by an inch or so. You will likely have double vision, so focus on the top of the field of view and look for clear misalignment of horizontal lines.
How to Look for Vertical Misalignment

- Relax eyes and focus on the vertical lines of the target.
- Obvious misalignment will be seen if it is severe.
- To double-check misalignment, pull your eyes back from the binocular by 3” or so. Look at the image/target as seen through the eyepieces versus trying to look “through” the binocular.
- Focus your view on the top of the fields of view to identify any vertical misalignment.
How to Perform Binocular Conditional Alignment
What most people are looking for is a DIY fix for double vision in binoculars. This usually means fixing what you can by aligning the optical tubes with each other for the IPD that you align them for.
This is not the answer for the full collimation fix for double vision at the hinge.
With that in mind, we’ll let you in on a dirty, little secret. What you don’t know is when manufacturers take shortcuts and set alignment for a specific IPD – so it will not work along the entire, specified IPD range except for at the undisclosed, preset setting.
Essentially, this is something that you are trying to do to fix things for yourself! But you shouldn’t have to resort to conditional alignments with a new product. It also goes without saying that it does not provide a lot of confidence in whether it’s a truly collimated binocular (3-axis collimation).
Assuming that the binoculars are properly collimated, you can align the optics to provide a single image at a specific IPD that you set.
Conditional Alignment Process
- Confirm that you have the correct IPD for your personal use.
- Find the collimating screws (set screws) on the underside of the binocular. A jeweler’s screwdriver is usually the standard tool required. The screws may be hidden beneath the rubber armor that protects the housing or covered with set glue that must be pried/cut out to access them. Don’t damage the heads or you’ll strip them out!
- There are two sets of set screws on each side the tubes because there are two prisms in each tube! One set should be found close to the eyepiece while the other set should be found close to the hinge assembly.
- Mount the binocular to a steady platform such as a tripod.
- Reconfirm you have proper IPD.
- Focus on a target at approximately 100 yards away. For those who are using binoculars for astronomy, focus on a bright star like Polaris (North Star).
- Make very tiny adjustments at a time. Sometimes no more than an 1/8” adjustment is required.
- Because prisms are angled and rotate around the center axis point, the prism moves in tilted motions. Adjustments made cause apparent upwards and downwards shifts in the image/target while simultaneously causing left and right shifts.
- Right tube prisms: counterclockwise adjustments move the image/target right and upwards. Clockwise adjustments move the image/target left and downwards.
- Left tube prisms: counterclockwise adjustments move the image/target left and upwards Clockwise adjustments move the image/target right and downwards.
- Look through the binoculars to confirm that correct alignments have been made as seen with a singular, merged image.
- Make further adjustments as necessary.
Adjustment Tips
- Instead of completely misaligning the optical axes between all three points by heavily adjusting only one side, try to split the adjustments in half between both prisms if appropriate.
- Move your head back about 6-12” from the eyepieces to view the exit pupils. Ensure that they are equally illuminated and have circular shapes.
- If exit pupils are misshapen, this indicates too much of a titled prism that is vignetting the light path and causes an obstructed field of view and light loss as seen with a darker image on side. The bad news – you must start again. You may have a merged image, but you could be experiencing significant light loss and restricted field of views.
- Don’t let your eyes make up for poor collimation – headaches are the price you pay for it. Perform visual tests to ensure collimation or whether further adjustments are needed. Your eyes will be more relaxed during the glassing experience if collimation is successful.
Disclosure
We’ve gotta say it. This is all for informational purposes only, and it is upon good faith that we share this information. We’re assuming that your binoculars are in an unusable state, and you’re going to do what you want to do anyway.
We are not responsible for your attempts to use this information in all and any such ways that include but not limited to true collimation, conditional alignment, DIY repair, and assembly and disassembly of binoculars.
We highly recommend sending in your binoculars under warranty if you’re experiencing double vision or any other optical aberration, mechanical failure, or defective parts and issues.
If they’re not covered under warranty, we recommend seeking out an optics repair specialist to evaluate, quote, and if appropriate, repair, collimate, and adjust your binoculars.
For very inexpensive binoculars, the cost of repair may far exceed its worth. If this is the case, you may just want to try the DIY method. You have nothing to lose at this point, but the risks, failures, or maybe the success is all on you!
Good Luck + Research = Collimated Success… Hopefully
If you’ve determined that the double vision issues are due to poor collimation and misalignment, you’re going to need some good luck and a lot of research if you’re attempting to remedy it yourself.
It’s not that it can’t be done, it’s just that the optics are fragile and must be precisely positioned to ensure optimal performance.
Check your IPD and be sure that’s not the problem to avoid undoing all the exacting work of binocular engineering. While it might be funny to crack a few jokes about double vision and figure-8 views, it’s no laughing matter if you want to do something about it. Goodluck!
Further Reading
- 10x42 vs 8x42 Binoculars for Hunting, Birding, Safari & Event Observation
- 4 Features to Consider & Look for When Buying Binoculars
- Best Binocular Magnification For Hunting, Birding, Wildlife Observation & More
- Binocular Glass 101: BK7 vs BAK4 and Porro Prism vs Roof Prism
- Binocular Terminology: Glossary Of Features & Parts Of Binoculars


ive tried everything. i have good expensive binoculars. theyre perfectly aligned. and other see though them perfectly. its just me who has a double vision while looking through binoculars. i see perfectly without them but through them is a different story.
That is a shame Sid, might be time to invest in a good quality monocular!