What are iron sights?
Do you have to zero them in?
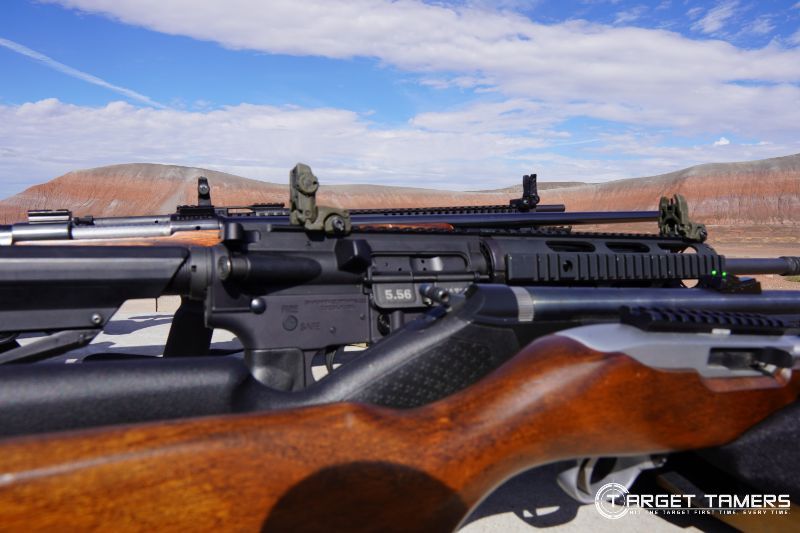
Iron sights consist of two components, the front sight and the rear sight. Though there are many variations of iron sights, a similar design of the notch in the rear sight or a peep allows for alignment with the front post, blade, or bead for aiming and accurate POI.
Like any gunsight, it must be sighted-in for maximum accuracy whether it’s on a pistol or a rifle.
Though the process of zeroing in irons on a handgun and rifle are similar, they’re just different enough when it comes to style and adjustments that they can be explained separately.
So, for a complete beginner’s guide on how to sight-in iron sights, making sight adjustments, co-witnessing, and pros and cons, it’s all here!
How to Sight-in Pistol Iron Sights?
1. Set Up Solid Shooting Rest
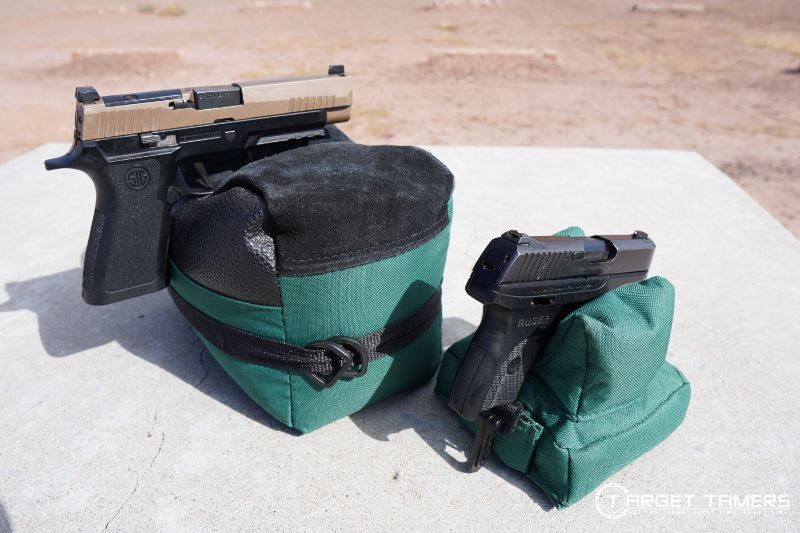
Advanced shooters may sight-in from the position they intend to use their pistol, i.e., standing.
If you’re not comfortable with that, sighting-in may require a stable and solid platform to remove user shake and error. If you’re using a shooting rest, be sure to keep the muzzle end off the rest - it can burn a hole through it. The rest is more for keeping your hands steady. After completing sighting in, it’s best to double check your zero offhand.
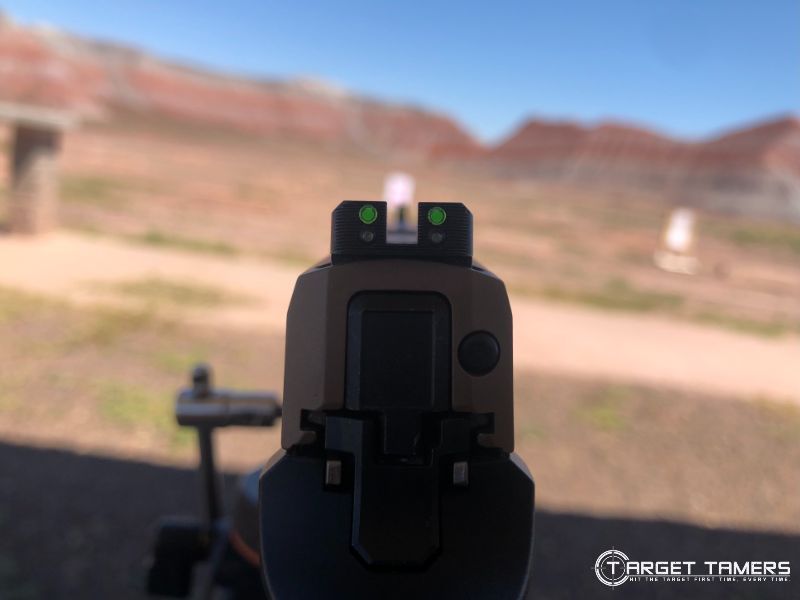
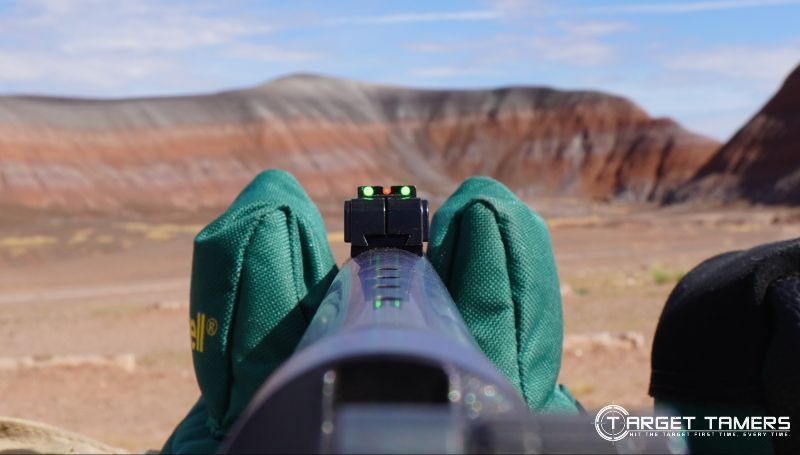
2. Align the Dots & Shoot

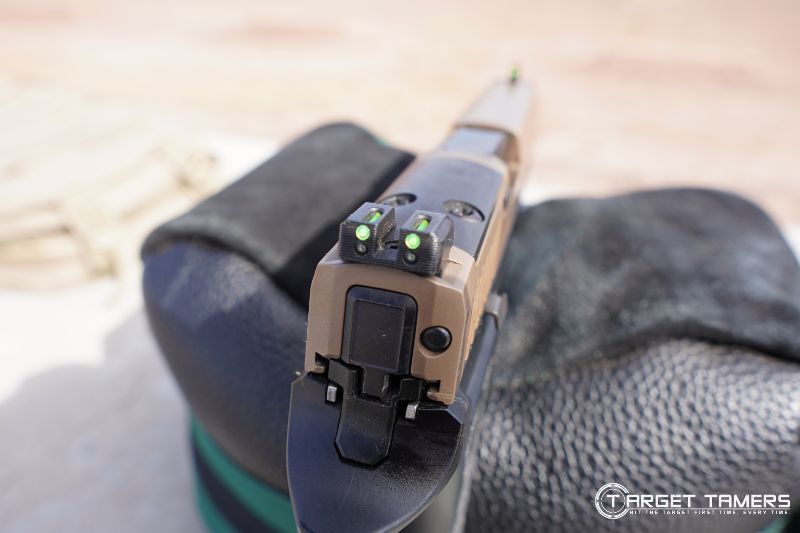
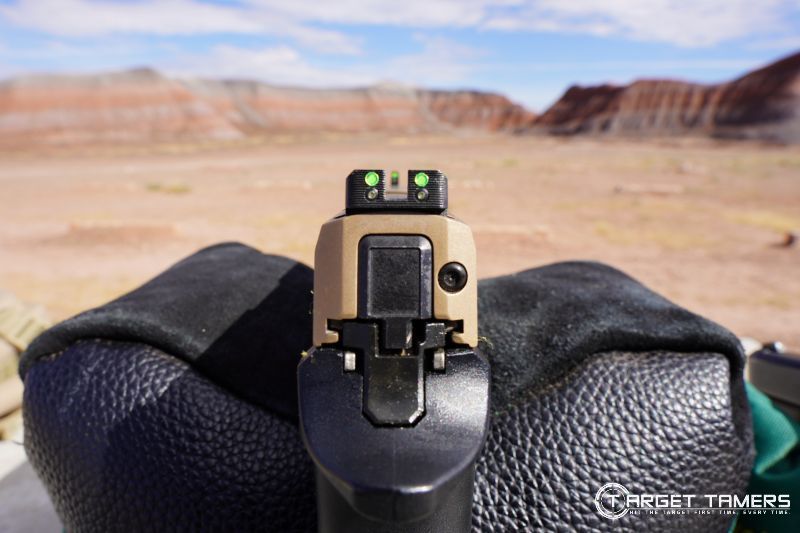
Align the dots or the posts together horizontally and vertically on the center of the target. In this instance, you are trying to focus for three optical planes: the rear sights, front sights, and the target. Shoot your first group.
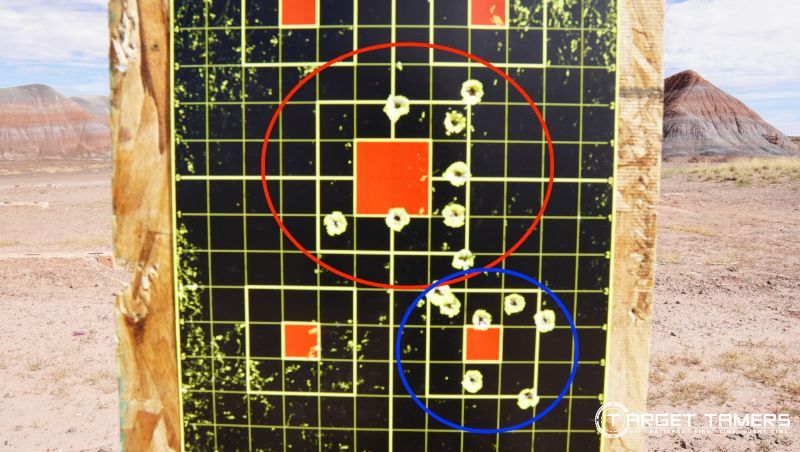
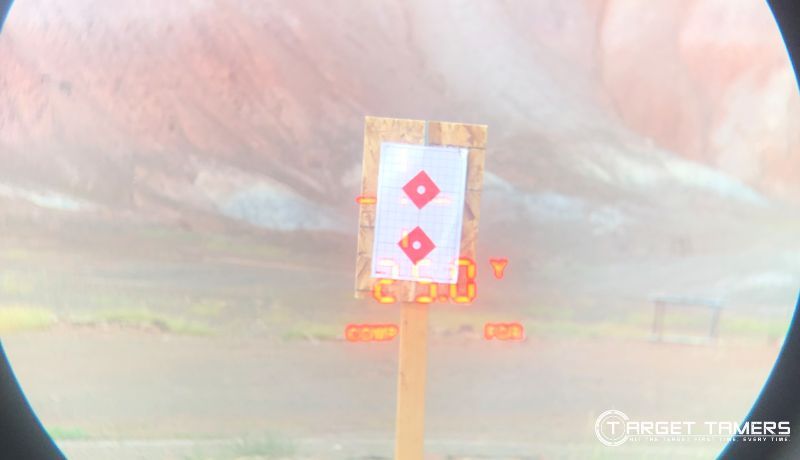
3. Observe the POI
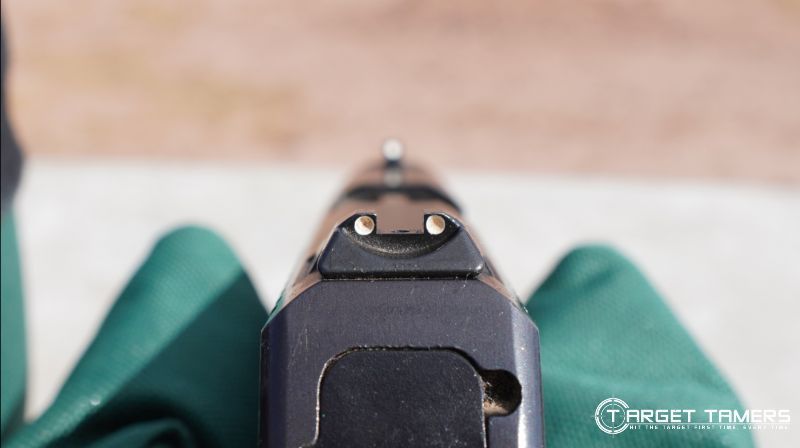
With fixed sights that came with the pistol, the manufacturer should already have them zeroed for the pistol. Even so, they may need adjustments or replacement. If the POI (Point of Impact) is not matching the POA (Point of Aim), address any user errors including iron sight mounting, alignment, shooting technique, etc.
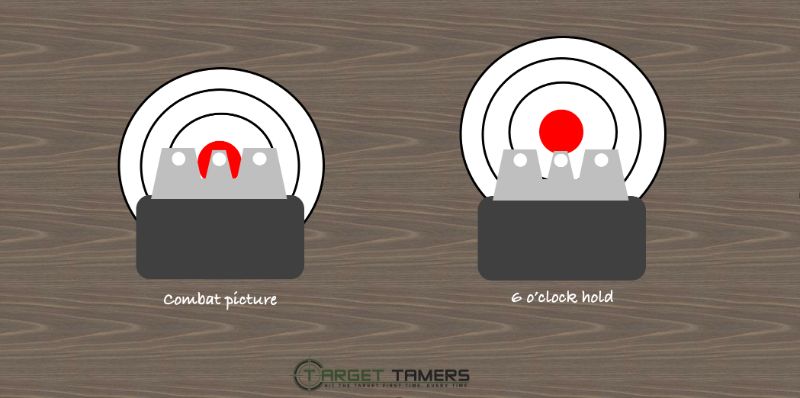
For example, many sights are set for combat picture, which means the actual front post will cover up the POA on the target. If you’re shooting with the front post just below what you intend to shoot, the “6 o’clock hold,” you will hit low.
Observe the POI, calculate the appropriate adjustment correction needed (instructions and formulas for this are below) to make the next POI match the POA. Make the adjustments. This may require a sight pusher for dovetail sights or the tool needed for adjustable sights.
4. Shoot Another Group
After making the adjustments, send another group down range. Your POI should now match your POA. If it’s not quite there, make the adjustments needed and shoot another group. Repeat as is necessary to confirm your zero.
5. Repeat for Longer Distances
Starting at a close-range distance for getting on paper is good practice to see where you are, and smaller adjustments are needed at a longer range. The starting point could be 10 yards. Repeat the process for the longer distance you want to sight-in for.
How to Make Pistol Iron Sight Adjustments?

Pistol iron sight adjustments are not simple. There are fixed, drifting (a fixed height type), and adjustable irons. You could have a mix and match combo. While manufacturer advocates may say the sights are factory-zeroed, it’s not the case with various ammo, distances, sight radii, and shooting skills.
What is the Iron Sight Adjustment Rule?
FORS. Front Opposite. Rear Same.
We’ll get into this later, but for right now, remember this:
- Front sight: Post goes UP/POI comes down. Post goes DOWN/POI goes UP (opposite results).
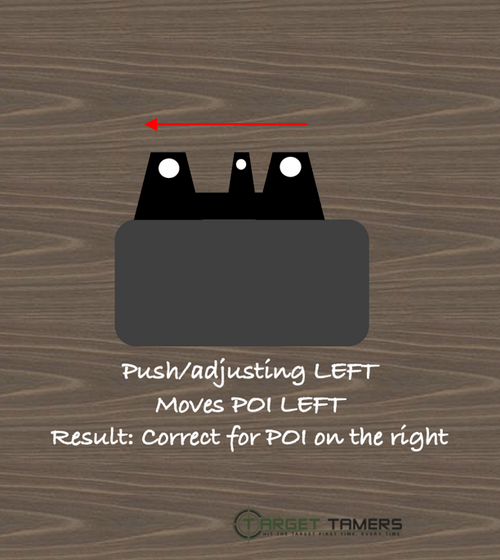
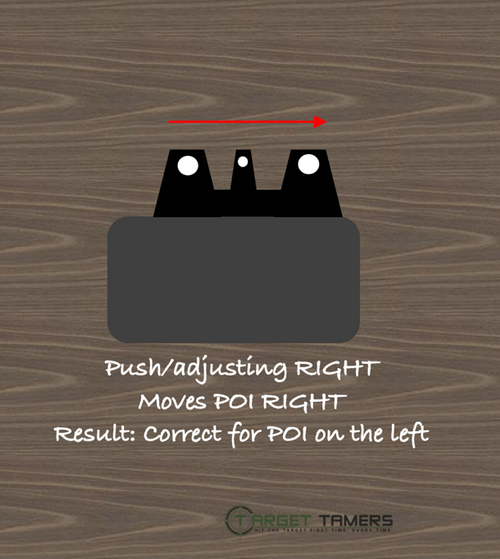
- Rear sight: Sight moves LEFT/POI moves left. Sight moves RIGHT/POI moves RIGHT (same results).
How to Adjust Fixed Sights?
There's not a whole lot you can do with truly fixed sights short of needing special tools and being willing to take your gun apart. The best solution is to replace the unfit sights with ones that will do the job accurately.
Elevation
If you are attempting to DIY, the front sight will need to be shortened (filed) if your impacts are hitting too low and you need them to come up. If you’re hitting too high, weld a little more steel to the front post for more height or simply replace it with a taller one to bring those impacts down.
Rear sights also come in different heights, and this is to help correct for your POI not matching the POA in the vertical alignment (elevation). Some manufacturers have rear dovetail sights that have special reference markings.
These markings can provide a measurement reference for the manufacturer to produce the right height rear sight to correct for bullet drop at that distance.
Windage
To correct for windage on a revolver, it would require turning the barrel slightly out of its frame in tight or looser rotations to shift the POI right or left. On a semi-auto handgun, fixed sights are typically drifting dovetail sights that can be ‘pushed’ from their position in left and right directions.
Dovetail front sights can be the culprit of windage POI shifts. It must be centered in the slide. If it’s offset to the left or the right, it may need a ‘push’ (using a sight pusher) to center it. If it’s centered – ignore this and revert to the rear sight.
These windage correction methods on fixed iron sights require some form of taking the gun apart and special tools.
How to Use Adjustable Pistol Iron Sights?
Adjustable sights are a lot easier to use. Usually, the front sight is fixed but the rear sight provides for elevation and windage adjustments. Detents provide the adjustment and usually something like a small flathead screwdriver will work as the tool.
The elevation detent allows the sight to be raised and lowered as is needed. The windage detent moves it left and right.
What is the Correct Sight Height?
If you’re off in elevation and you’re not sure by how much you need to raise the rear sight (if applicable) or what the height of the new front sight should be, there’s a formula for that.
FORMULA: CALCULATING SIGHT CORRECTION
(How much you’re off X Sight radius) / Distance to target = Sight correction needed
This formula applies to both pistol and rifle sights
Tips:
- The factors need to be in the same measuring system, and in this case, inches.
- Sight radius must be known. This is the distance between the front and rear sight.
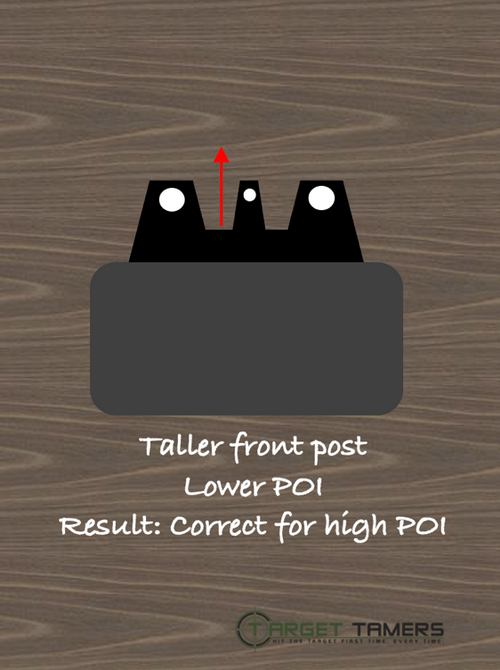
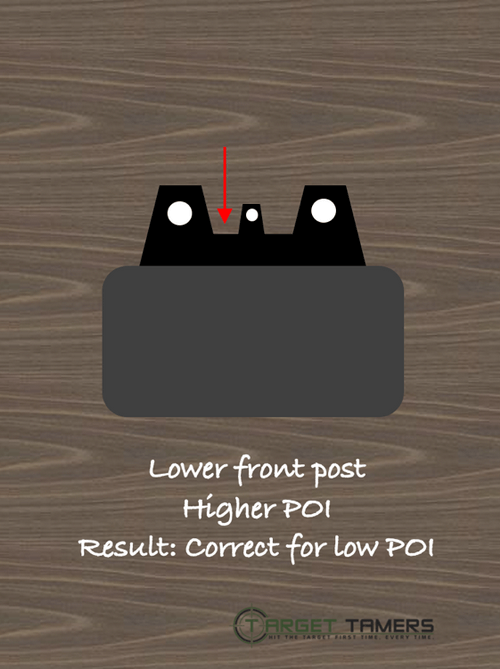
- Remember: Raise the front post higher to lower the POI. Bring the front post down to raise the POI.
Example 1:
- How much you’re off (POI): 2” low of POA
- Sight radius: 6.49” (Glock 17)
- Distance to target: 360” (10 yards)
- (2” X 6.49”) / 360” = 0.036” sight correction needed
Since the POI is low, the goal is to bring the next POI up to match the POA. The front post needs to be shortened (made lower) by 0.036” to bring the POI up 2” at 10 yards. Adjust sight height if possible or file down the front post.
Example 2:
- How much you’re off (POI): 3” high of POA
- Sight radius: 6.49” (Glock 17)
- Distance to target: 360” (10 yards)
- (3” X 6.49”) / 360” (10 yards) = 0.05” sight correction needed.
Since the POI is high, the goal is to bring the next POI down to match the POA. The front post needs to be taller by 0.05” to bring the POI down 3” at 10 yards. Adjust sight height if possible. If not, you will need a replacement sight.
How do you know what the new front sight height should be?
On pistols, using example 1, if we opted for a sight replacement, take the blade height and subtract 0.036” for the grand total of the new sight height. Using example 2, take the blade height and add 0.05” for the grand total of the new sight height.
What is the Best Zero Distance for Pistol Iron Sights?
Popular zero distances for pistol iron sights are between 5-50 yards. The primary consideration is target size and where the POI will be over the range the pistol is intended to be used. Choose the zero distance where irons can be used with no need to hold over or under with accurate groups of 3-4”.
10 and 25 yards seems to be the preferred zeroing distance for self-defense and law enforcement pistols.
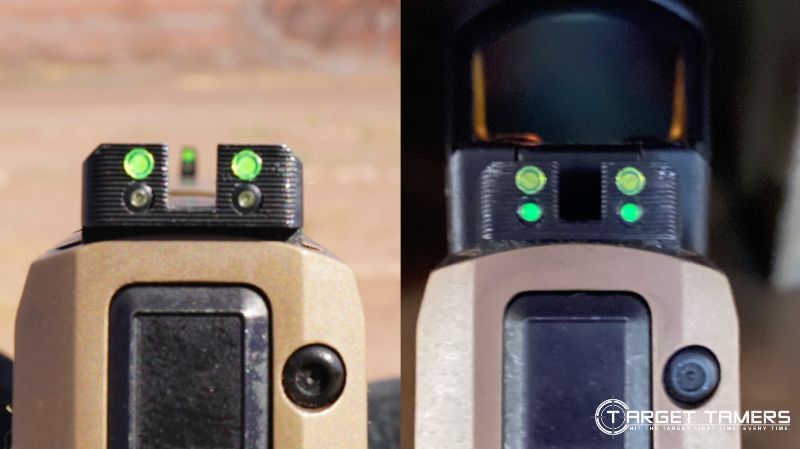
How to Use Pistol Iron Sights with a Red Dot Sight?
Pistol irons are always in position ready for use. When mounting a red dot sight, there may be concerns about what the relationship is between the dot and the irons since everything is visible in the FOV simultaneously. The general rule is that iron sights are an independent sighting system.
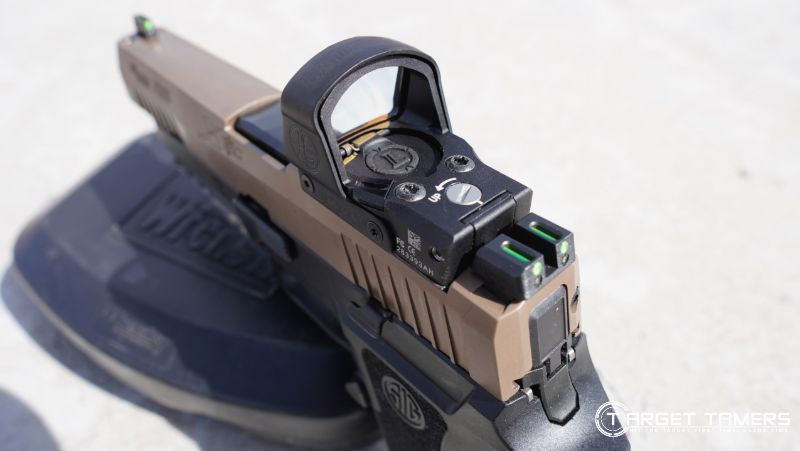
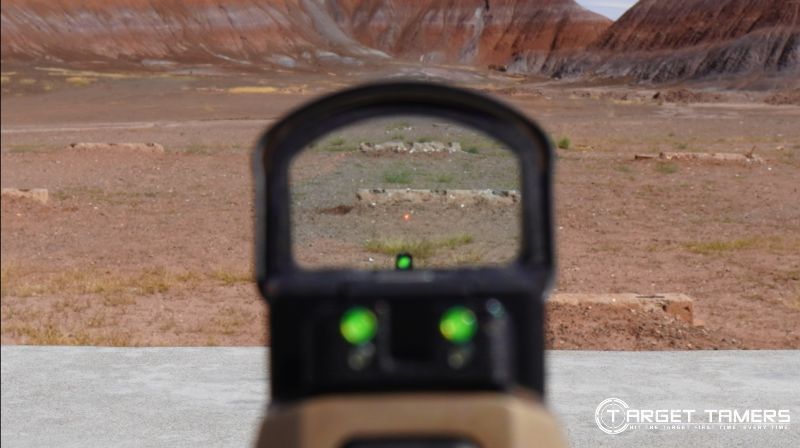
Keep it that way. When your red dot is on and working, use it. When it’s not, revert to your irons. You can learn about the pros and cons of each system in a range of scenarios in our iron sights vs red dot article.
| Product | Footprint | Price Range |
|---|---|---|
| Trijicon RMR Type 2 | Trijicon RMR | Under $500 |
| Vortex Venom | Docter/Noblex | Under $250 |
| Burris FastFire 3 | Docter/Noblex | Under $250 |
| Leupold DeltaPoint Pro | Leupold DPP (Shield RMS/SMS) | Under $500 |
How to Sight-in AR-15 Iron Sights?

1. Set Up Target at Close-Range Distance
Setting up a sight-in target at 25 yards is the typical starting distance. If you’re sighting-in for a longer distance, starting off at close-range will get you on paper and make for smaller adjustments by the time you get to distance. This can minimize frustration when you sight-in for, say, 100 yards.
2. Set Up Solid Shooting Rest
Sighting-in from a supported position will help to reasonably remove some user error. Place the handguard on the shooting rest making sure you haven’t laid the barrel end on it. Some advanced shooters will sight-in from the position they intend to use it.
Example: bench rest competition shooters may very well sight-in from the bench with their rest. If you shoot match from prone, sight-in in that same position.
3. Flip Up the Sights & Shoot
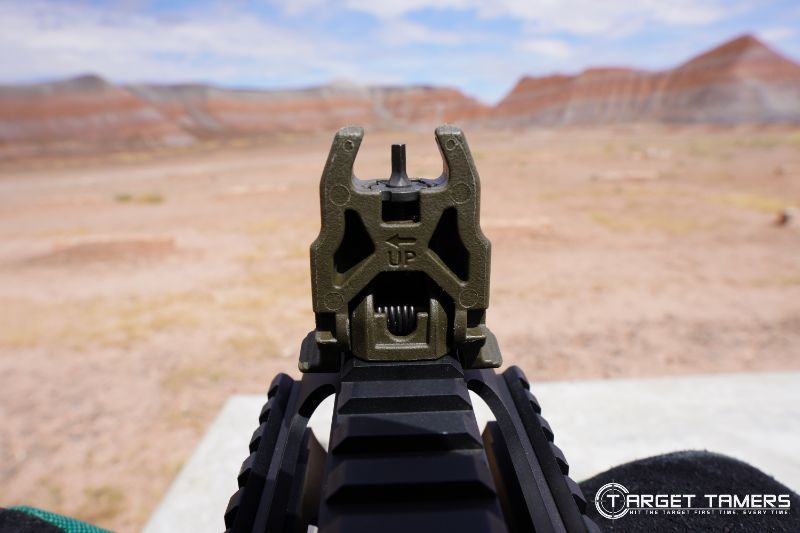
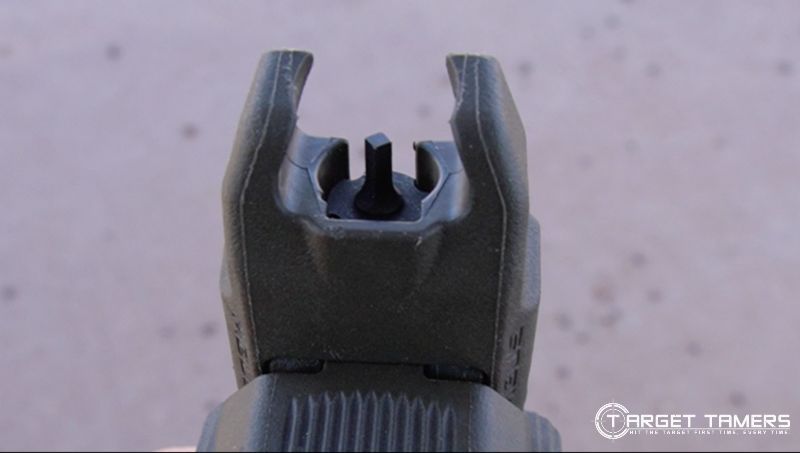
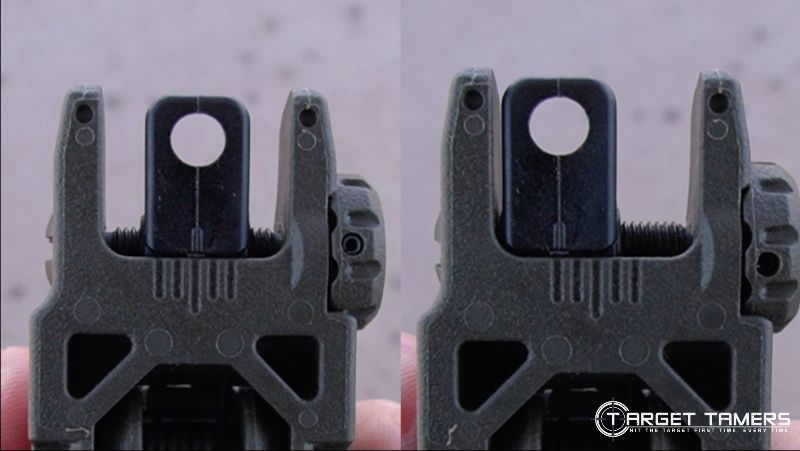
Flip up the sights. Make sure the rear sight is set to its mid-point. Aim the sights by aligning the front post inside the center of the rear aperture. Shoot a 5-shot group down range. Note: make sure to sight-in with the ammo that you intend to use the AR-15 for!
4. Observe the POI
Observe the POI and group pattern. Calculate the adjustments required to move the POI to the POA. Make the adjustments (instructions and formulas for this are below). If shots are spread wide, you may need to address human contribution to the spread (lining up sights, trigger control, loose mounting, inconsistent cheek weld, etc.).
5. Shoot Another Group
Shoot another group to confirm your irons are sighted-in, i.e., the POI matches the POA. If you’re still off, calculate the adjustments needed and shoot another group. Repeat as necessary.
6. Repeat for Longer Distances

Repeat steps 4 and 5 for the desired sight-in distance.
How to Make AR-15 Iron Sight Adjustments?
Adjusting iron sights will vary depending on the design. Some are fixed and others adjustable, while some combinations will have a fixed front and an adjustable rear sight. Many AR-15 back-up irons will have a front sight that is adjustable for elevation and the rear sight adjustable for windage.
You will need to verify three things when it comes to adjustments:
- What type of AR iron sights you have.
- Confirm which direction the POI shifts when making an adjustment:
- Front sights: UP/clockwise, DOWN/counterclockwise.
- Rear sights: RIGHT/clockwise, LEFT/counterclockwise.
- What the value is for each adjustment, i.e., each click.
Example:
- Front sight: 1 7/8” at 100 yards. (This is the same as 1.875 MOA.)
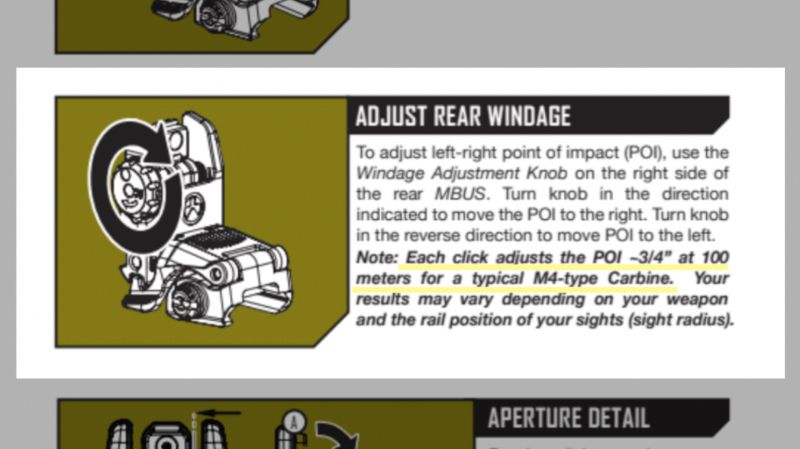
- Rear sight: ¾” at 100 yards. (This is the same as 0.75 MOA.)
These numbers are applicable to typical M4-type carbines. (MOA values will vary depending on your rifle.)
Adjustment Formulas:
| FORMULAS |
|---|
| 1. CALCULATING 1 MOA (at any known distance – rounded values) |
| Target distance / 100 = 1 MOA for that distance |
| 2. CALCULATING MOA CORRECTION |
| POI distance (how much you’re off) / 1 MOA for target distance = MOA correction needed |
| 3. CALCULATING CLICKS NEEDED |
| MOA Correction needed / MOA adjustment value of iron sight = Clicks needed |
What does this example look like on paper?
Iron sight values:
- Front sight (elevation): 1.25 MOA
- Rear sight (windage): 0.5 MOA
Do the math:
| Formula 1 | 25 yards to target / 100 = 0.25” (1 MOA) |
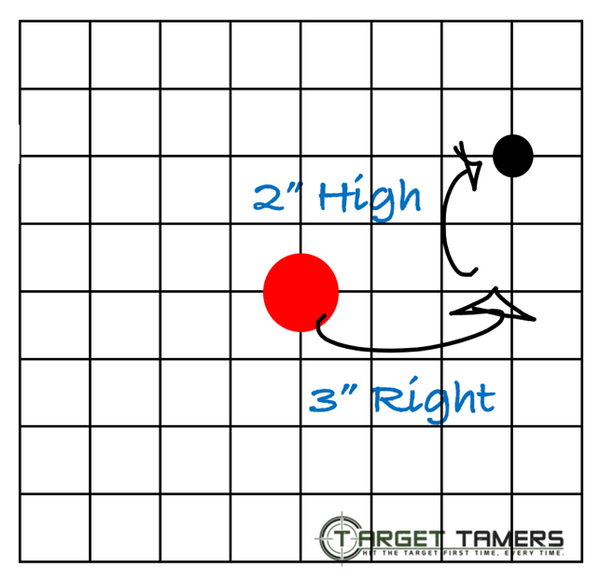
| Elevation | Windage | |
| Formula 2 | 2” HIGH / 0.25” = 8 MOA to correct | 3” RIGHT / 0.25” = 12 MOA to correct |
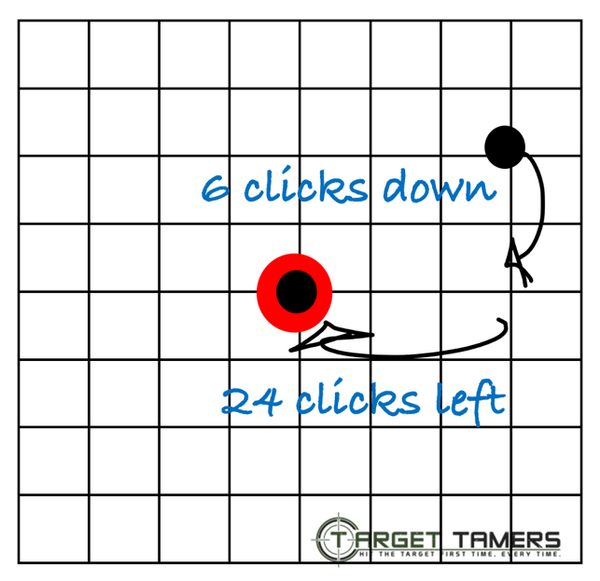
| Formula 3 | 8 MOA / 1.25 MOA = 6 clicks DOWN (round to nearest whole number) | 12 MOA / 0.5 MOA = 24 clicks LEFT |
Make the adjustments on the iron sights:
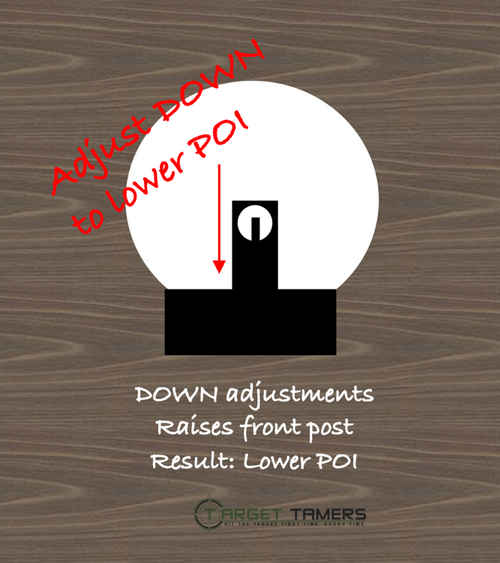
Front sight: Since the shot was high, we need the POI to come down. With the tool needed, rotate the front post to make 6 clicks in the DOWN direction. You will notice that the front post is getting taller (coming up higher) as you make down rotations.
Rear sight: The rear sight moves left and right. Since the shot was too far to the right, we need the POI to come left. Rotate the windage knob 24 clicks in the LEFT direction. You will notice that the aperture within the sight physically starts to move left – in the same direction.
The result?
Done!
Tips:
- The manufacturers may provide the MOA values in the instructions/manual according to the firearm platform.
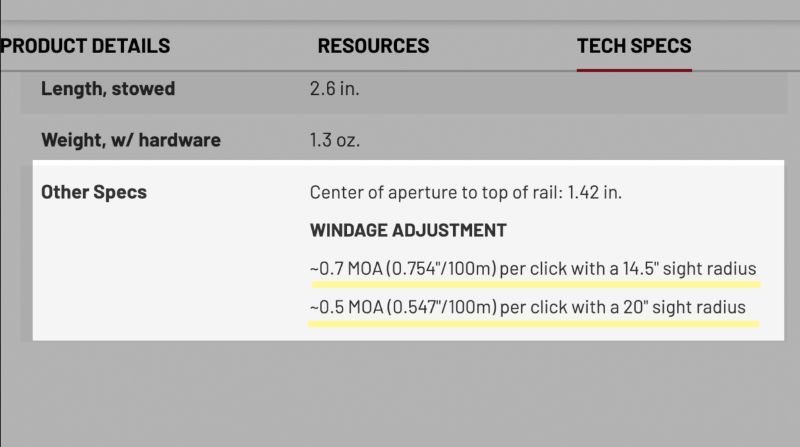
- The MOA values will be different depending on the barrel length and the sight radius (distance between the front and rear iron sights).
- Adjustments may prove to be coarse depending on a number of factors. Point is, you may very well not get it perfect. It may take trial and error to figure out what your adjustment values are.
What is the Best Zero Distance for AR Iron Sights?
The best zero distance for AR iron sights is the one that is most appropriate for the application that also determines the range of distances that will be covered. The best zero distances for sighting in AR-15 iron sights are 25, 50, and 100 yards, though a 50-yard zero seems to be favored.
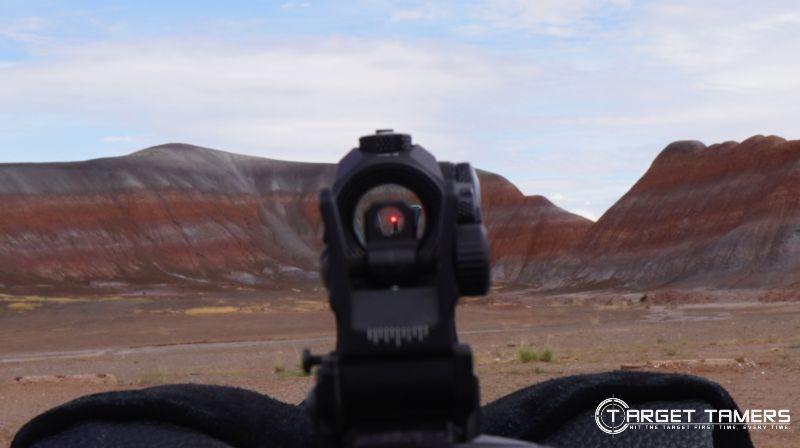
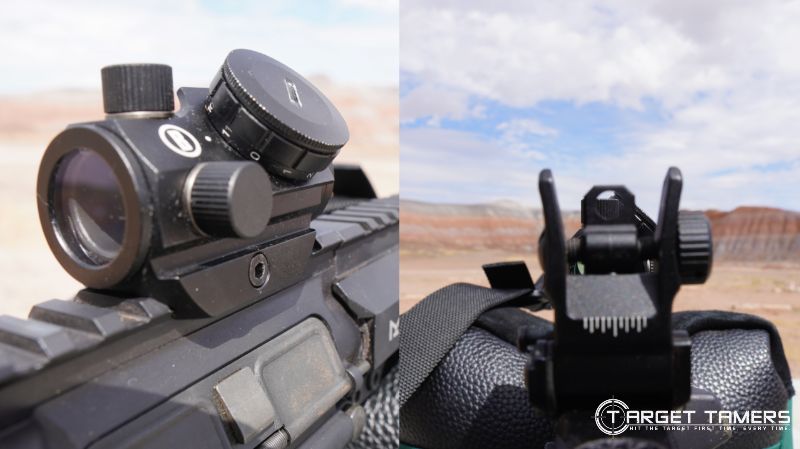
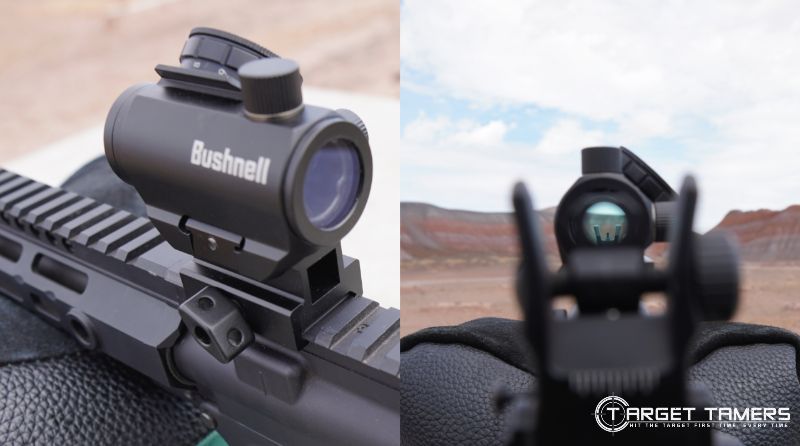
How to Use AR Iron Sights with a Red Dot Sight?
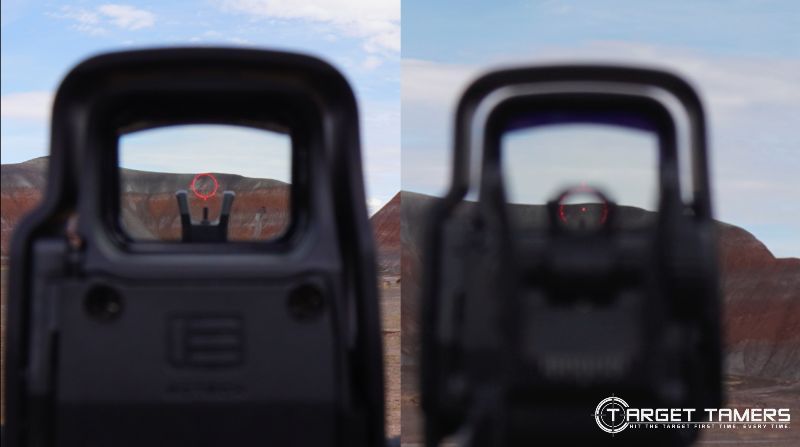
Keep iron sights as an independent sighting system. Though they may be co-witnessed with a RDS, it just means that they’re ready and visible should the RDS fail. AR-15 flip-up sights can be pushed down to keep the FOV unobstructed – out of sight, out of mind, but are ready for use when flipped up.
| Product | Mount | Price Range |
|---|---|---|
| Sig Sauer Romeo MSR | Absolute co-witness | Under $100 |
| Sig Sauer Romeo 5 | Absolute co-witness | Under $150 |
| Holosun HS510C | QD absolute co-witness | Under $350 |
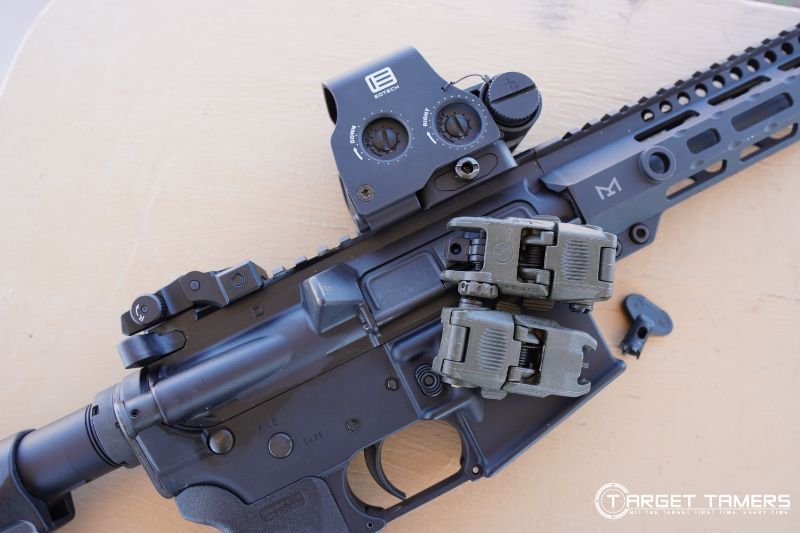
| EOTech EXPS3 (Holographic) | QD lower 1/3 co-witness | Under $700 |
What does “FORS” Mean?
FORS stands for “Front Opposite, Rear Same.” It implies that the front sight moves in the opposite direction while the rear sight moves in the same direction you want the POI to go. Understanding what is physically happening to the iron sights can help with the how-to of making adjustments.
Elevation: “Front Opposite”
What is happening to the front post?
POI happens in the opposite direction in relation to the height of the front post.
Pistol sights: Taller height front posts lower the POI. Shorter height front posts raise the POI.
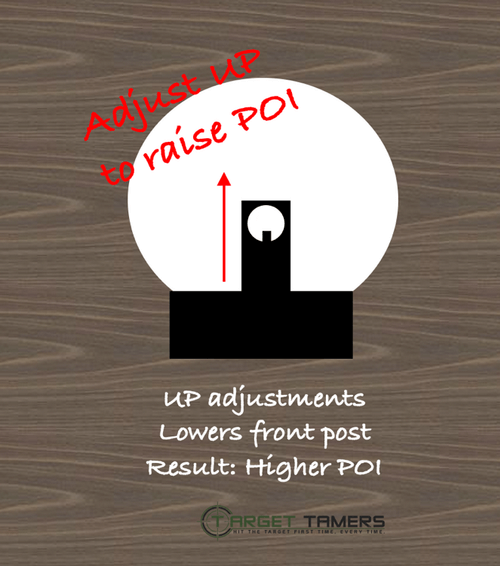
AR-15 sights: A DOWN adjustment brings the POI DOWN and brings the front post UP inside the sight. UP adjustments bring the POI UP and puts the front post DOWN inside the sight.
Tip:
- If you have a rear sight with a height elevation adjustment, you will need to raise or lower the height of the iron sight to make up and down adjustments. Some of these types of rear sights will have a baseline that you need to set it to before sighting-in.
Windage: “Rear Same”
What is happening to the rear sight?
POI happens in the same direction in relation to the sideways movement of the rear sight.
Pistol sights: Adjustments (adjustable sights) or pushes (dovetail sights) move the POI in the same direction. Moving the rear sight left moves POI left. Moving the rear sight right moves the POI right.
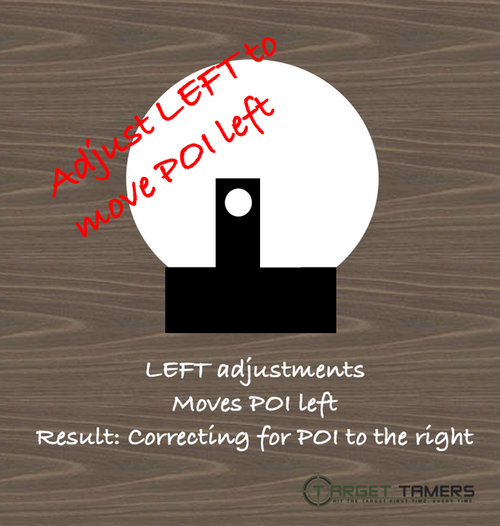
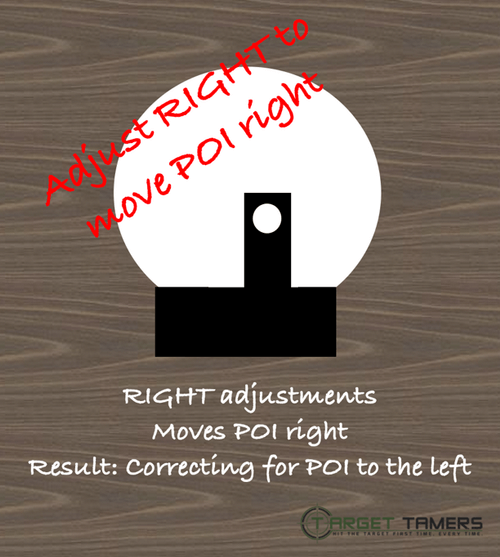
AR-15 sights: LEFT adjustments bring the POI to the LEFT as the aperture also moves to the LEFT. RIGHT adjustments bring the POI to the RIGHT as the aperture also moves to the RIGHT.
Tip:
- FORS is a quick way to remember that you can zero your iron sights if you’re not sure of the iron sight adjustment values. It’s different to wild guesses adjusting here and there before you figure out what is happening between the iron sights and your POI. If you don’t know the values, just remember FORS and you’ll get on point eventually.
Iron Sights Beginner’s Guide
Before you can start the process of sighting-in your irons, what type of sights do you have? They are not universal, and some types allow for adjustment while others must be replaced to serve the intended purpose.
Types of Iron Sights
The Basics
Open Sights
Standard iron sights. Consists of a front post/blade or bead and rear sight with a notch or gap allowing for front post visibility and alignment between the rear posts.
Aperture Sights
Consists of a front post/blade or bead with a rear sight that incorporates a peep sight/aperture to align the front sight inside it.
Fixed or Adjustable?
Fixed Sights
These types of sights do not allow for adjustments. These sights are seen on both pistols and rifles. They are reliable and mechanically sound as there are no moving components. They are recommended for use if irons are the primary sighting system.
Adjustable Sights
Adjustable sights allow for elevation and windage adjustments to be made for precision accuracy. Each movement or click makes an adjustment either in the up, down, left, and right directions to change the POI.
Adjustable sights are available for both pistols and rifles. There can be concerns regarding loose moving parts affecting durability integrity and accuracy.
Iron Sight Visibility
Night Sights
Night sights are iron sights are made for high visibility in low light and dark conditions. These days, tritium tubes are incorporated allowing you to see a visible glowing dot to align the posts - iron sights. They do not appear to glow in normal daylight conditions.
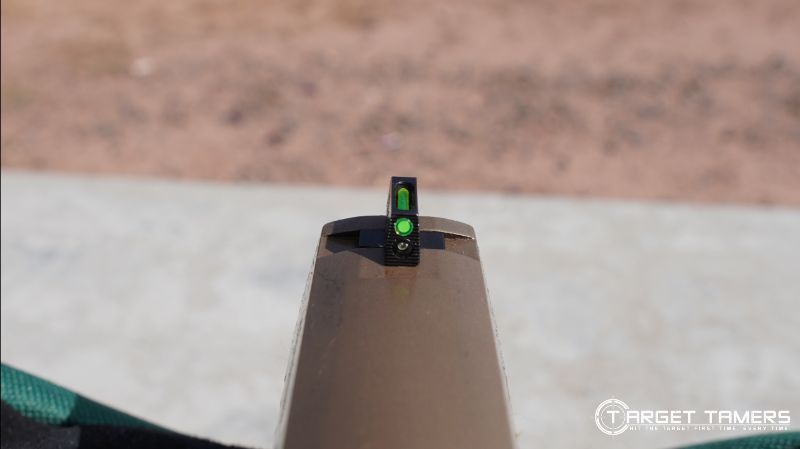
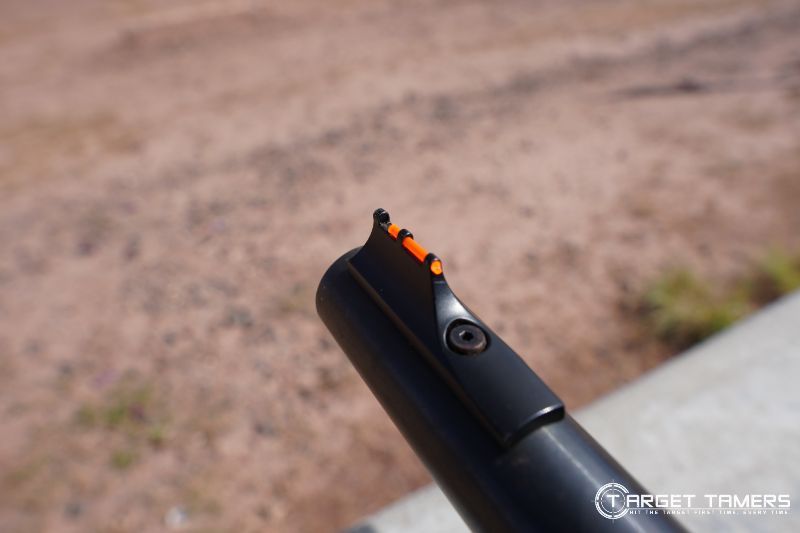
Fiber Optic Sights
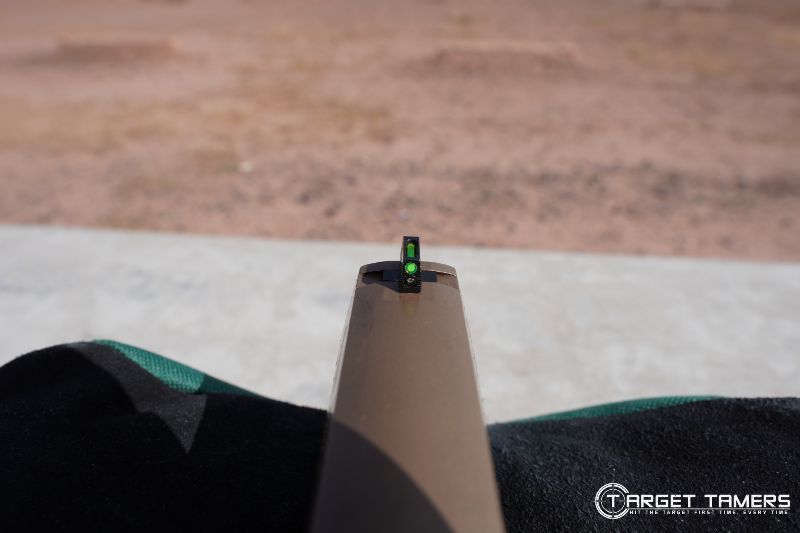
Fiber optic iron sights have acrylic fiber optic tubes that provide high dot visibility in daytime and bright conditions. These can be in made with different colors, i.e., green, red, orange.
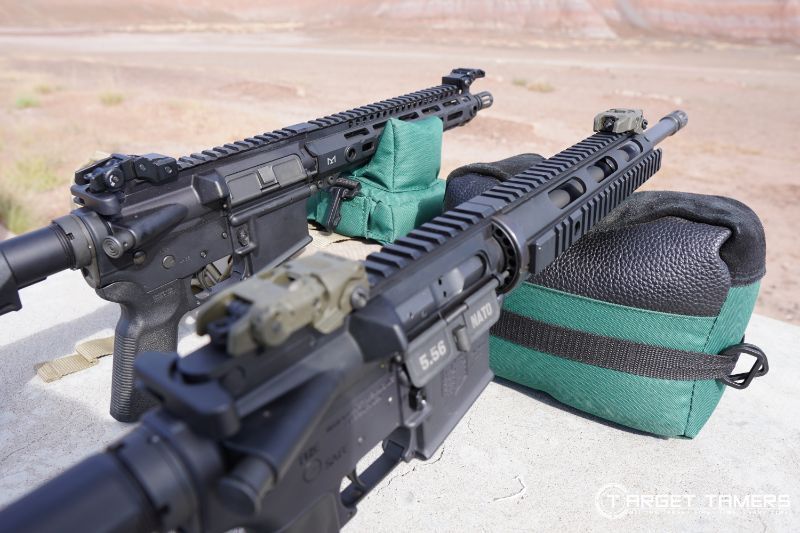
AR-15 Iron Sight Designs
Flip-up Sights
Most seen on MSR (Modern Sporting Rifles). A spring mechanism allows them to be conveniently pushed down and flipped up. These are most known as back-up iron sights (BUIS) intended for use when red dot sight failure occurs. They are recommended for use as a secondary sighting system.
Same Plane Sights
For use with MSR/AR-15 platforms. The front sight is mounted to the end of the rail on the handguard. The rear sight also sits on the same plane as it is mounted on the rail towards the charging handle. This category typically indicates sight height and mounting positions.
Gas Block Sights
For use with MSR/AR-15 platforms. A type of sight that is mounted to the gas block that is lower than the upper receiver. The rear sight is mounted to the rail on the upper receiver. The front sight is taller than a rear sight to make up for the difference. This category typically indicates sight height and mounting positions.
Tip:
- Iron sights can incorporate many of these visibility and design elements. As such, you will see that any given pair of irons will fit multiple categories in this list.
For example: Flip-up sights can be adjustable with the rear sight having both large and small apertures. Another example: Open sights on a pistol can be fixed but have both night and fiber optic sights – it makes for a lot of dots but provides dual-purpose benefits.
| Product | Type | Price Range |
|---|---|---|
| Ameriglo Set | Tritium tall suppressor for Glock | Under $100 |
| Trijicon Night Sights | Tritium dots dovetail for Glock | Under $120 |
| Tacticon Armament | Flip-up adjustable for AR-15 | Under $50 |
| Magpul MBUS | Flip-up adjustable rear for AR-15 | Under $60 |
| Magpul MBUS | Flip-up adjustable front for AR-15 | Under $40 |
Where to Mount Iron Sights?
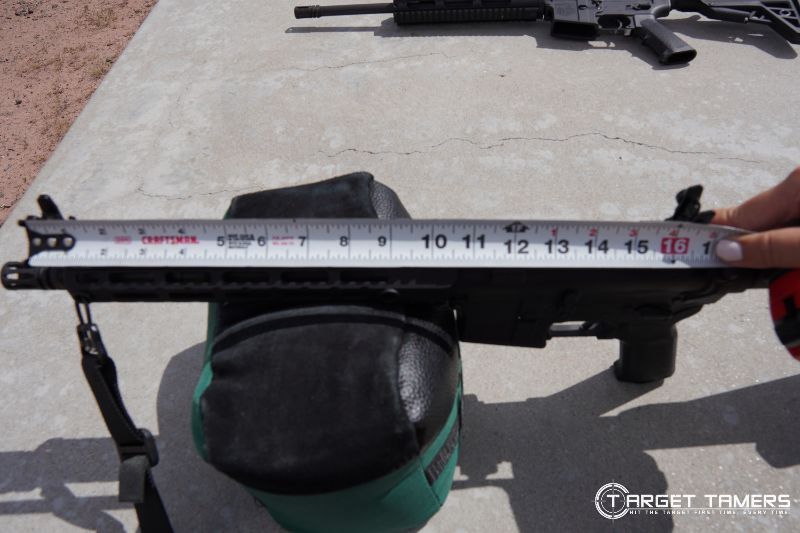
Iron sights sit perpendicular to the bore axis. Pistols have pre-slotted spots. On an AR-15, the rear sight will go as far back towards the charging handle as possible especially if scopes, red dots, or magnifiers will be added. The front sight sits as far forward on the end of the rail as possible.
Sight radii will play a part, and this means measuring the distance between the front sight and the rear sight. They are different between pistols, rifles, and AR-15 style firearms.
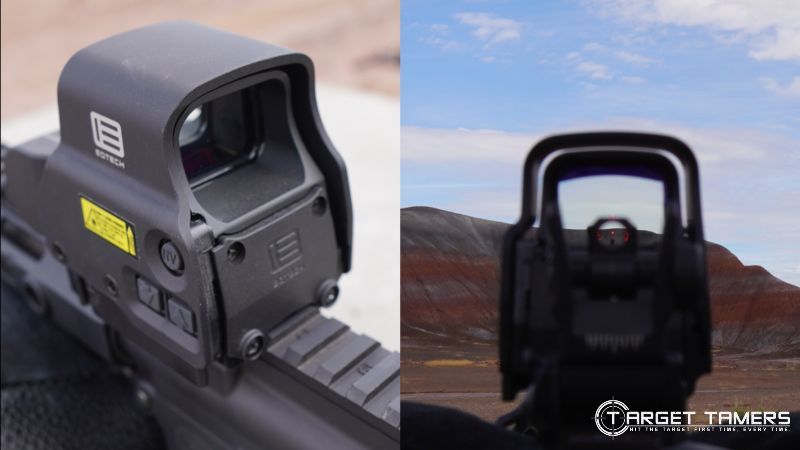
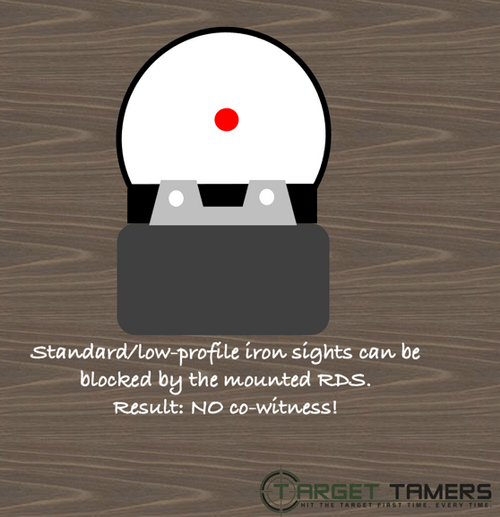
What is Co-Witness?
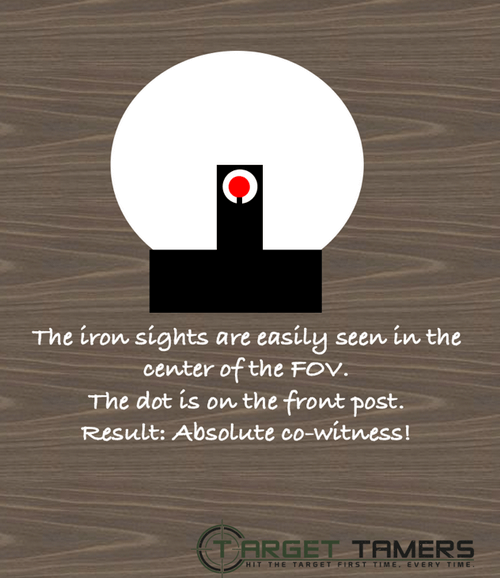
Co-witness describes the relationship between iron sights and a red dot sight. Though it seems like they should be zeroed together, it’s recommended to keep each sighting system independent. To co-witness means that you can still see your irons through the FOV of the RDS in case of red dot failure.
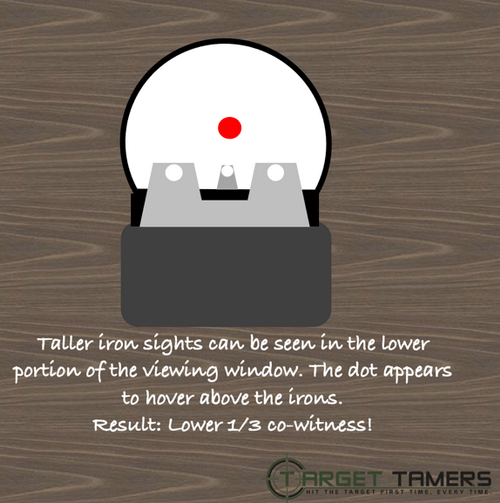
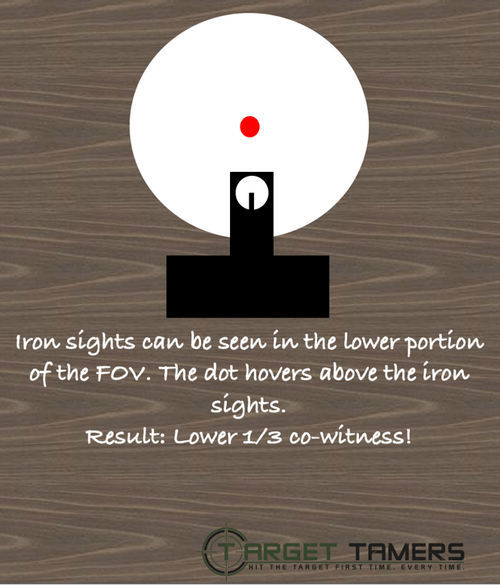
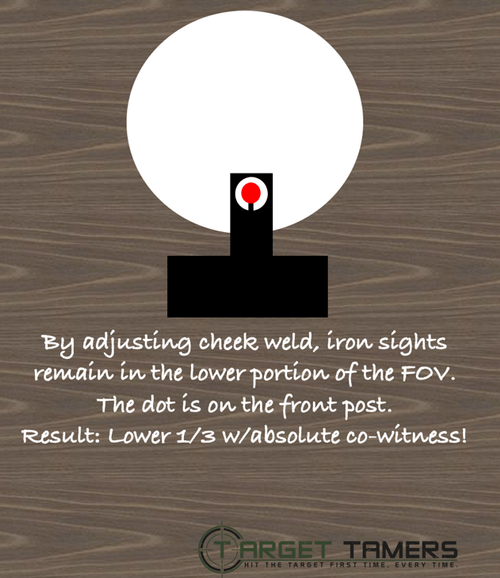
There are three types of co-witnesses:
- Lower 1/3
- Lower 1/3 with an absolute
- Absolute
These co-witnesses describe both the relationship of the dot and the iron sights while also describing the co-witness height.
Co-Witness Heights
The co-witness is determined by the mounting height of the red dot sight. This includes the thickness of the RDS mounting plate needed and the milling depth on the slide of a handgun. Also, the mounting height of the RDS on an AR-15.
Pistol Iron Sight Height & Co-Witnessing
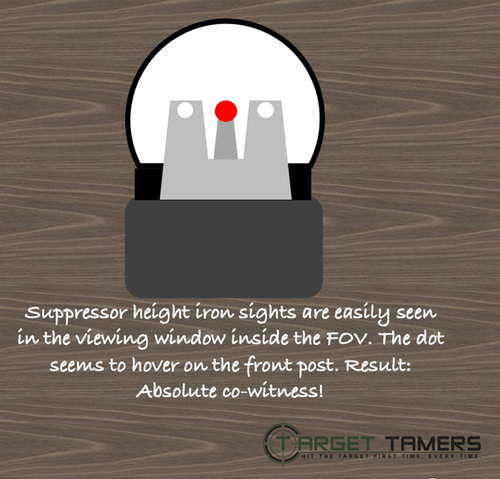
AR-15 Mounting Heights & Co-Witnessing
FAQ's
MBUS stands for Magpul Back-up Sights. The front sight is adjustable for elevation while the rear sight is adjustable for windage. They fit Picatinny rails and are intended for use on AR-15/M16 rifles.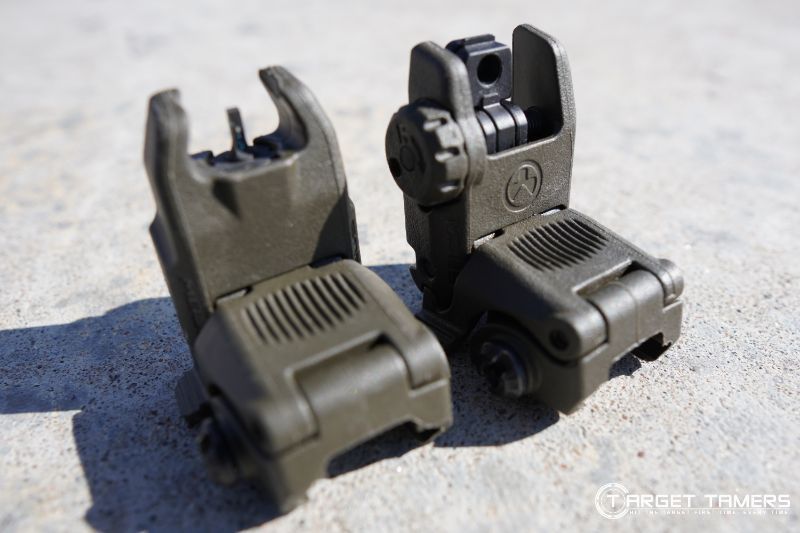
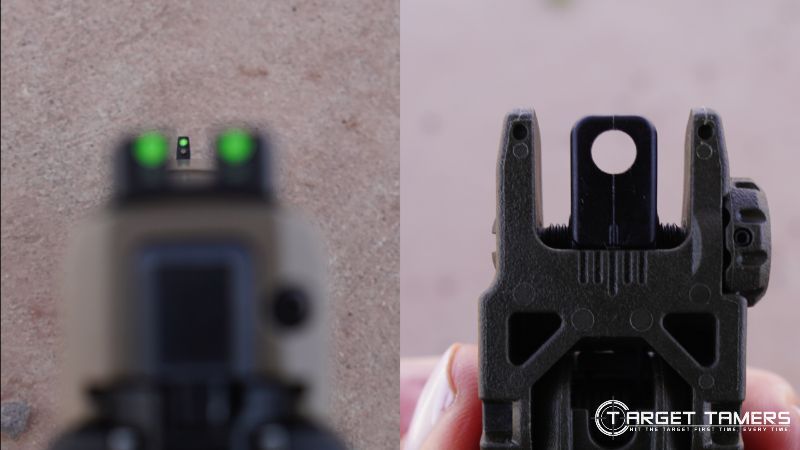
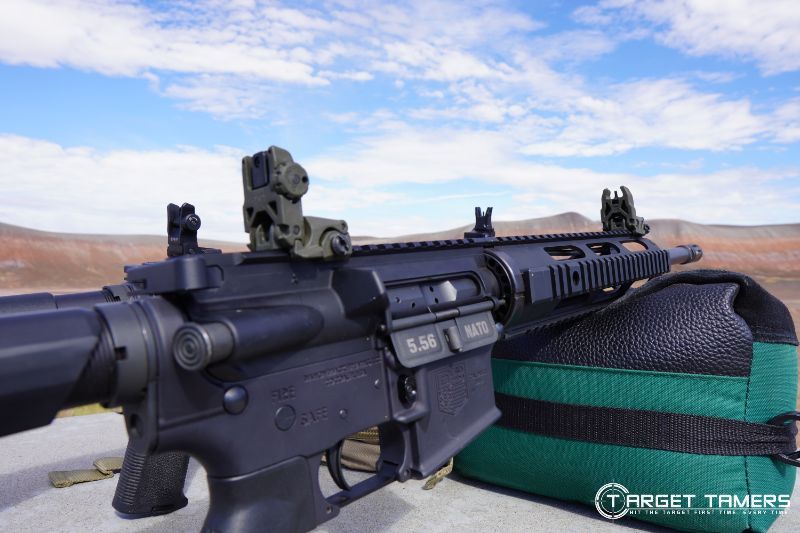
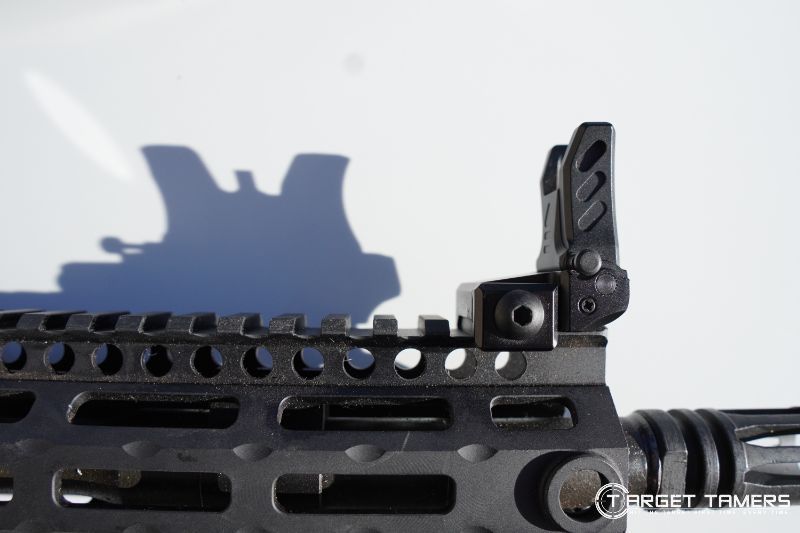
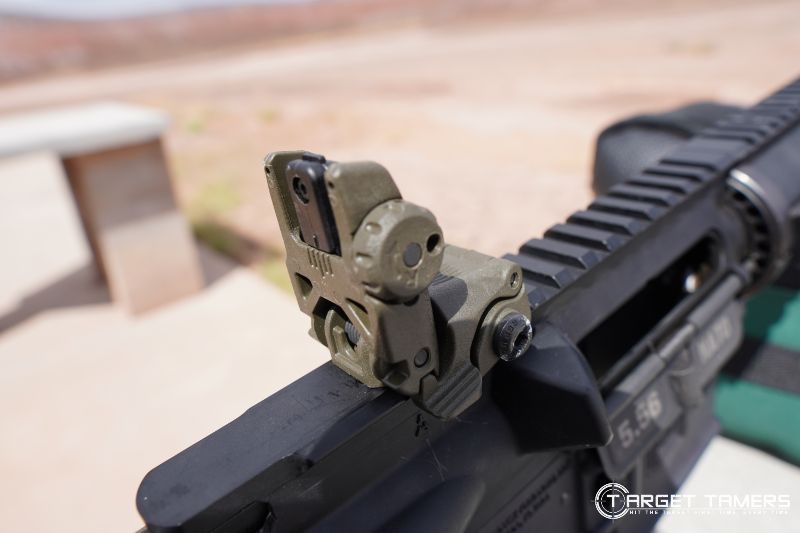
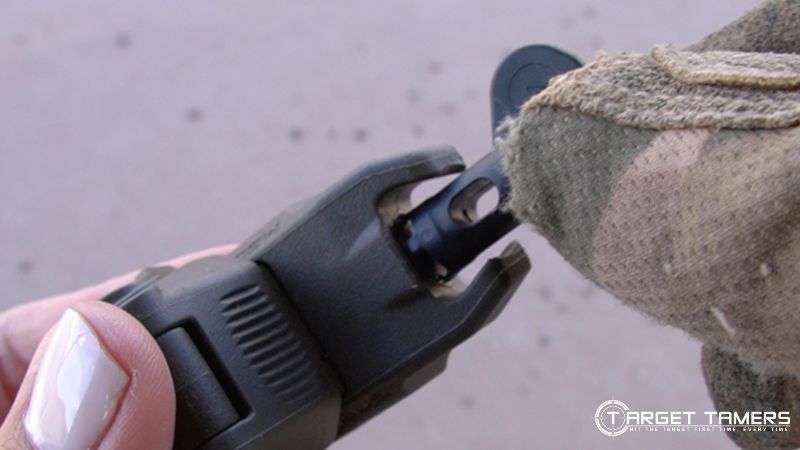
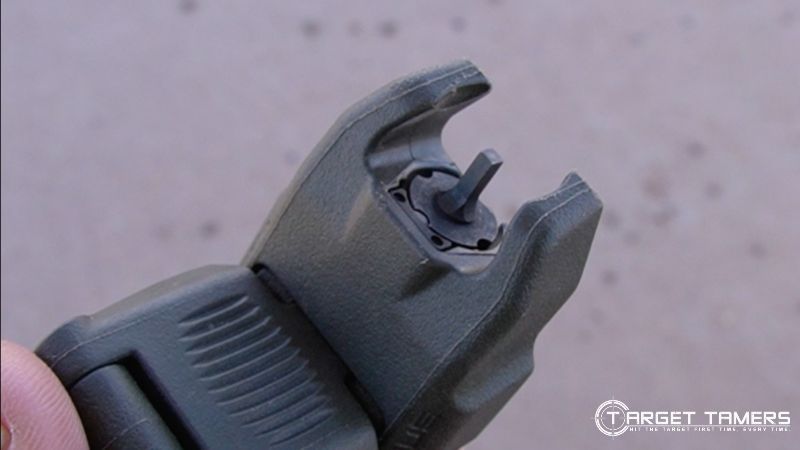
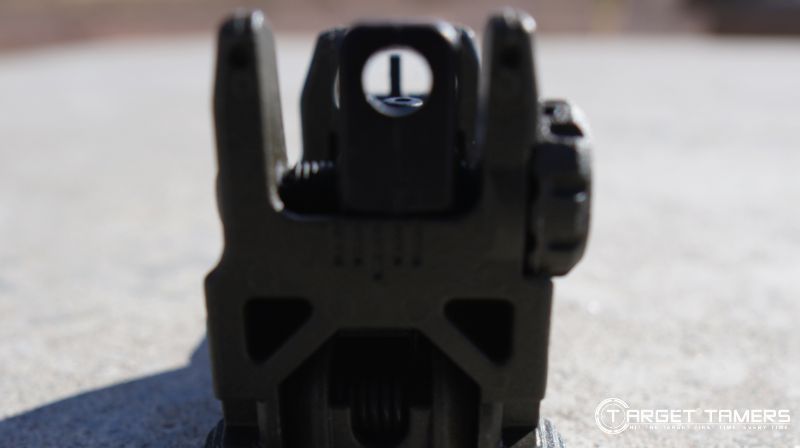
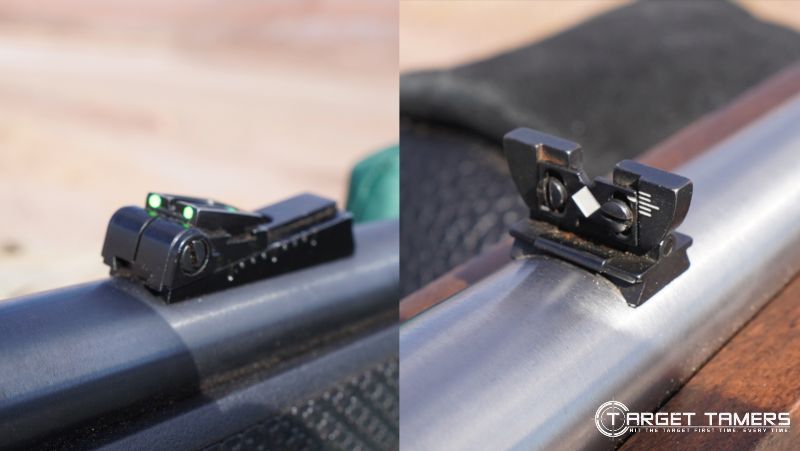
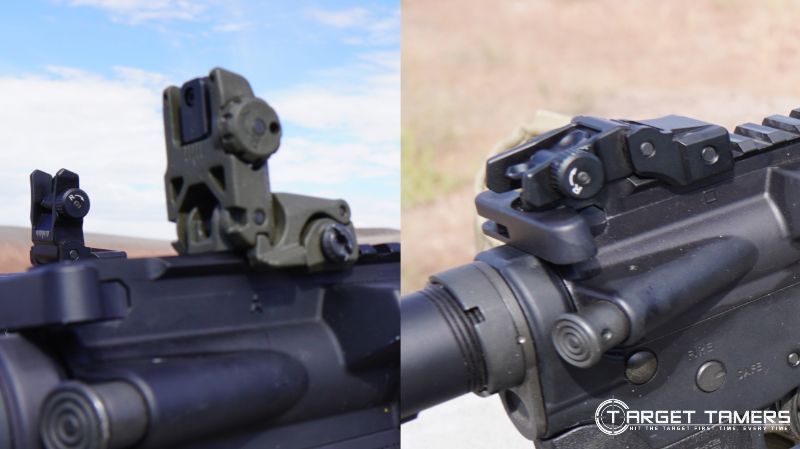
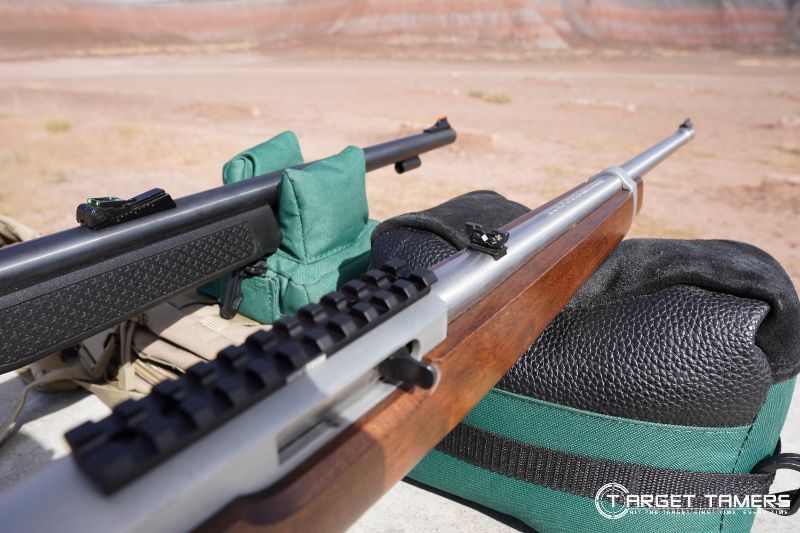
BUIS stands for Back-up Iron Sights. Various types of iron sights can fall into this category, but it specifically indicates that the iron sights are a secondary sighting system available for use when the RDS fails.
Below - BUIS sights. Left: rear sight. Right: front sight.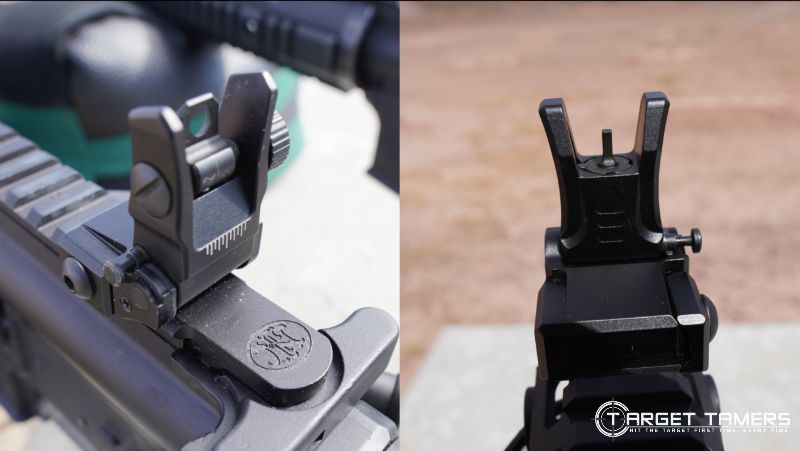
Using a laser boresight to align iron sights can be done though it's not a substitute for a zero. Irons may be factory-zeroed (doesn’t mean they’re perfect) but should be good enough to get on paper. Like setting a mechanical zero to the irons before sighting-in, it's not mandatory but can be done.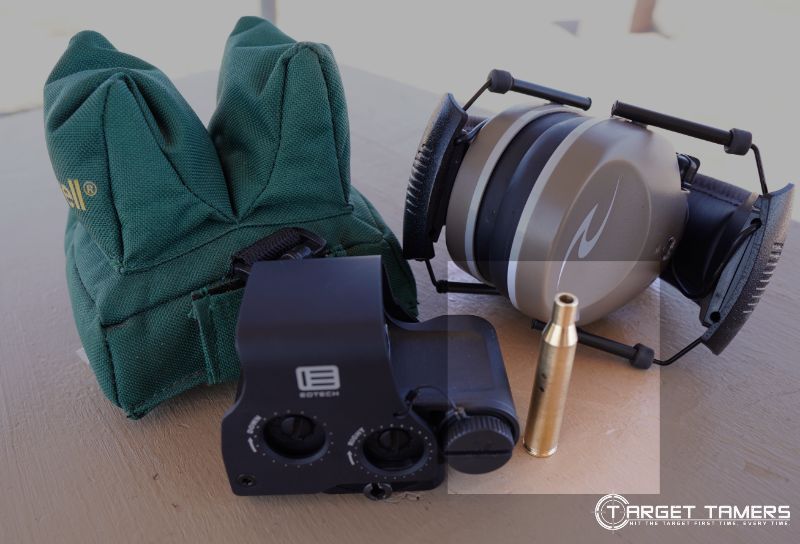
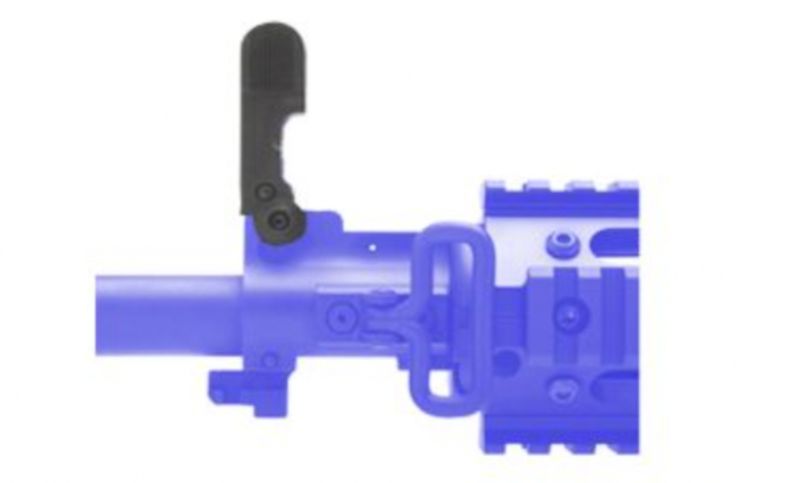
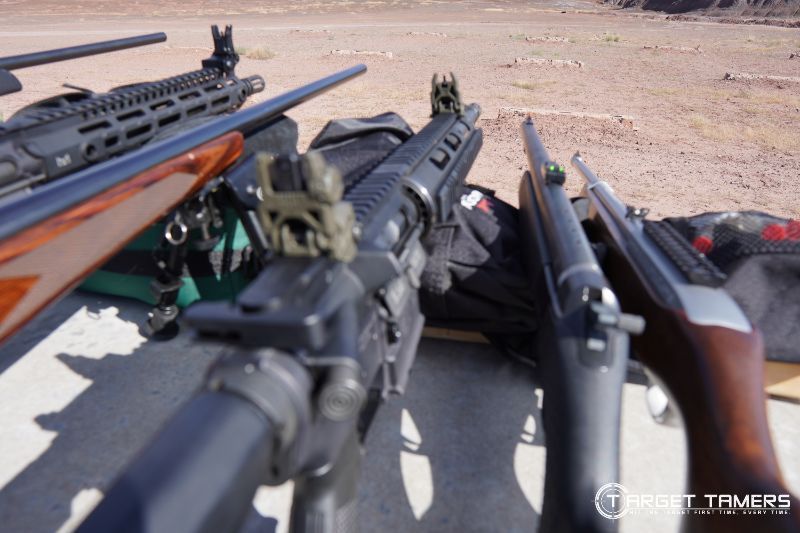
In general, 45-degree iron sights may save rail space and will eliminate the need for a quick release mount for the primary optic when a co-witness is not achievable. Offset irons are practical solutions for shooters with various needs.
Even though they are not in line with the optic, they provide CQB advantages when sitting alongside a magnified riflescope or serve as the back-up sighting system when the RDS fails.
Below: Vortex Strike Eagle LPVO with offset sights (illustrative only)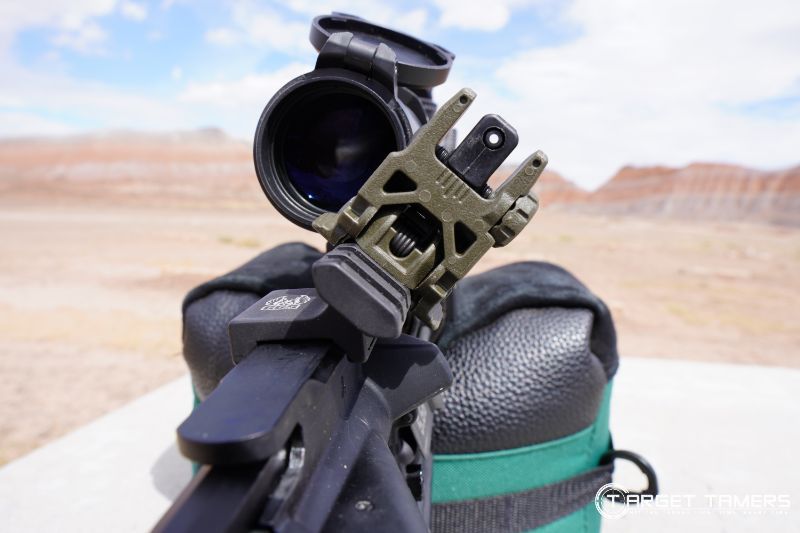
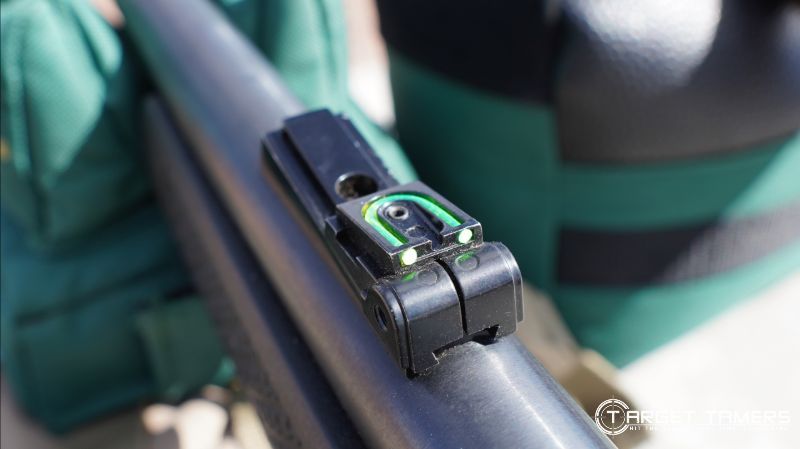
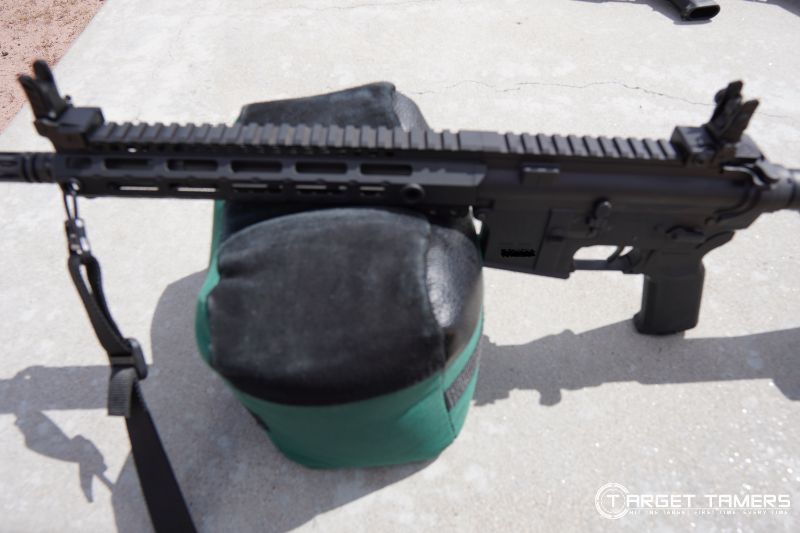
Overall, flip-up sights are convenient and accurate. Many flip-up irons have both elevation and windage adjustments that can make zeroing in a lot easier. However, not all flip-ups will have elevation adjustments, so that must be considered.
The concern is mostly due to build quality since there are more moving parts. Not all flip-up sights are made equal.
Iron Sight Pros & Cons
Pros:
- Cheaper than riflescopes
- Lightweight/compact
- Extremely durable
- No batteries or power required
- No glass to cause glare, reflections, break, etc.
- Accurate to as far as you can effectively use it
- Can be co-witnessed with red dot sights
- Flip-up designs can be pushed down
- Sight visibility for day and night use (fiber optic, tritium, etc.)
- Iron sights may be a stock inclusion with firearm
Cons:
- Not as easily adjustable
- No magnification
- Can be difficult to see and align, i.e., aging eyes
- Too small apertures for low light conditions
- Must have consistent cheek weld for precision iron sight alignment
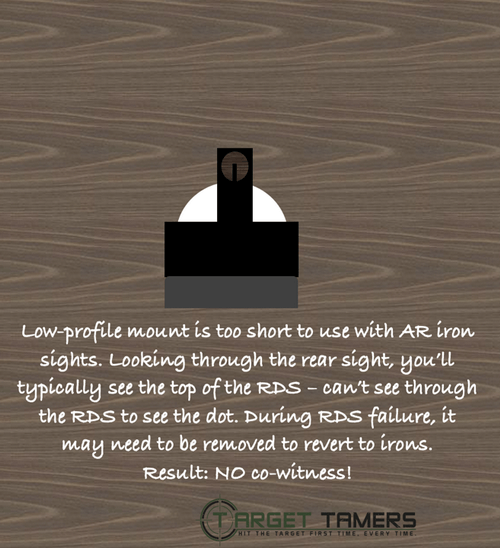
- Can block a significant portion of the viewing window through RDS
Get Your Sights on Iron Sights!
Unless you started out using iron sights, it can be very intimidating to have to learn how to sight-in irons after the fact.
Though it can be unnerving to figure all this out, nothing is really known until you send live rounds down range.
Don’t get too obsessed with shooting groups. There’s a lot you’re adding to the equation that you can control and remedy, and a heck of a lot more to learn about your firearm and iron sights yet.
Take your time. Follow safety firearm and range regulations. Have fun and be safe.
Further Reading