Have you just purchased your first bow sight and you need to sight it in?
What are the right sight marks for you?
What is the best way to sight-in your bow?
The only way to find out is to get out there and start somewhere, and we'll show you where that is.
We’ll discuss common distances used to set your pins as well as our favorite way to sight in your bow.
What Distances to Sight in Pins on Your Bow?
What is the best distance to sight in your bow? You'll find various answers here and there according to the preferences of the person providing the advice. We'll lead you straight as the best distances for you will depend on a few things:
- Draw weight/bow speed
- Type of bow hunting
- Personal preference for maximum shooting distances
All these factors will be addressed as we discuss the most commonly used new sight marks for many bow shooters.

Top Pin Setting
The most common top pin setting for both timber and the open fields is 20 yards.
These days, most compound bow are fast enough to see very little difference in arrow trajectory between 10-20 yards. When this is the case, the first pin is usually set at 20 yards that also serves as a sight pin for 10-25 yard distances. You may be a few inches high when using the 20-yard pin for a 10-yard shot, and you may be a few inches low for a 25-yard shot.
To enable accurate and precise shots using your 20-yard pin this way, you'll have to know how your bow, arrows, and bow sight pins setup will perform. Get to shooting off some arrows!
Do you have a 5-inch difference or more? Do you need to start with a 10-yard pin instead? If you're shooting from a tree stand, you just might. You must also know the positions and kill-zone sizes of your game if you're a hunter.
Low poundage bows that includes 40lb draw weights will require a top pin that should be set for 10 or 15 yards. It's about shot placement that includes getting close enough to your target with it in a position to take an ethical shot.
Factors to think about:
- How fast is your bow?
- Where and what are you shooting?
- Become proficient with setup to predict how it performs between 10-25 yards.
- See instructions for your bow sight if there is a recommended top pin distance.
5-Yard Distance Increments
You may see some shooters with sight marks in 5-yard increments. An example includes: 15, 20, 25, 30, 35, and 40 and other similar variations. Again, personal preference is the rule here.
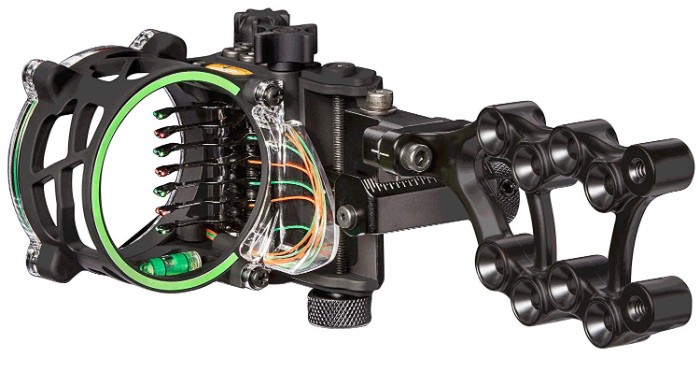
Consistent 5-yard increments are usually seen on sights that have 5 to 7 or more pins, and there are both pros and cons to this pin setup.
Advantages include less gap shooting arrows, pin for every reasonable distance, and smaller yardage increments for confident shooting.
However, the disadvantages can outweigh the benefits. When increments are small, and you have a generally fast bow, the pins will be stacked very close together. It's likely you will choose the wrong pin to shoot with.
Pins too close together can also block out a significant amount of the target. The more pins you have, the more it clutters your field of view.

10-Yard Distance Increments
Even 10-yard distances are the most common and versatile setup for hunters for many types of prey in the field. It may start with a 20-yard pin and continue from there, or it may start with a 15 or 25-yard pin and follow suit.
10-yard increments allow enough space between the pins to adequately see the target and to appropriately shoot the gaps when necessary. However, difficulty in achieving accuracy and precision at ranges further than 50 yards increases especially when you gap shoot. When you extend your pins out to longer distances, arrow drop, user error, and form issues are magnified.
Holding over or holding under isn't so easy to do when you're cold, hungry, tired, or you're pumping with adrenaline due to the 10-point buck that just came into view 30 or so odd yards away. It may now be helpful to split the distance in 5-yard increments for the bottom pins such as 20, 30, 40, 45, and 50 or 20, 30, 35, 40, and 45. Find the variation that works for your bow setup and your shooting style.
Think about:
- How many pins should be in your 10-yard increment setup?
- What maximum distance are you comfortable and skilled enough at to make an ethical shot?
The more pins you have, the further you can shoot out in practice whether you realistically take shots out this far in the field. Practicing at 60 and 70 yards can make your 20-40 yard groupings tighter and easier to make. However, it does clutter your sight picture and it may encourage you to take shots you shouldn't in the field.
Where is the Middle Ground?
The middle ground is more about having the right number of pins for your setup. There's no need to clutter your sight picture with more pins than you realistically use in the field.
A general rule of thumb is 3 pins for many hunting applications, and 5 pins for Western or long shot hunting. Of course, there are hunters that do very well with a single pin bow sight to eliminate the process of gap shooting altogether. Where do you sit in the single vs multi pin sight debate?
If you're one of those hunters who push your bottom pins down as far as they can go to get them out of the way, but you keep them for the "just in case" moment, a fixed pin with a floater bow sight would serve you better.
Many times, the bow sight manufacturer will recommend in the setup and sighting-in instructions what distance the first pin should be set with and the distance increments for the following pins.
While 10-yard increments are certainly the standard and is a versatile setup, the goal is to find what setup works best for you. You won't know it until you get out there and start practicing.

How to Sight-In a Bow
General Preparation Instructions for Sighting In
- Mount your sight to your bow.
- Be prepared to spread out sighting-in process over a course of several days due to fatigue that can compromise everything from correct form to accuracy.
- Have necessary gear and equipment ready i.e. targets, arrows, appropriate laser rangefinder, etc.
- Safety first: ensure you have the appropriate backstops and area clearance to shoot.
- Start close to the target: 10 yards to get on paper and to reduce adjustment issues later.
- Adjust in small increments at a time.
- Have Allen wrench or required tools to make adjustments to sight.
- We like the "one axis at a time" method of sighting in. This process may incorporate use of leveled tape in the shape of a sideways "T", as a cross, or any target that helps to focus the eye to aim in straight lines.
How to Sight In With a Fixed Pin Bow Sight
- Stand approximately 10 yards away from your T target. Starting with the windage axis (left/right), you will want to aim for the vertical part of the target. Let off 3-5 arrows in a line.
- Examine the arrows position in relation to the vertical line of the T. Being this close to the target, you want to make sure you're as dead-on the center of the line as possible. Margins of error will be magnified when you step back to fine-tune your adjustments at longer distances.
- To make adjustments, follow the arrow. If your arrows are left of the T, make an adjustment to move the entire sight housing If your arrows are right of the T, make an adjustment to move right.
- Repeat this process until your arrows are dead-on center on the vertical line.
- Stand approximately 10 yards away from your T target. If necessary, move the top pin high up towards the top of the housing to leave enough adjustment room for the remaining pins on sights with 5-7 pins. Let off 3-5 arrows in a line using your top pin as an aiming point for the horizontal part of the target to begin adjustments for the elevation axis (up/down).
- Examine the arrows position in relation to the horizontal line of the T. You don't have to be so precise with this at 10 yards. If the arrows are further than 6 inches of the line, follow the arrow to make adjustments by moving the entire sight housing. If your arrows are above the line, make an adjustment to move the sight up. If your arrows are below the line, make an adjustment to move the sight down.
- Repeat this process until your arrows are within 6 inches of the horizontal line.
- Step back to the distance you want to set your first pin for which is likely 20 yards. The top pin is the only pin you can set by moving the entire sight housing at this point in the process. Let off 3-5 arrows aiming with your top pin to hit dead-on the center of the horizontal line as possible. Now is the time to be precise with your adjustments by moving the entire sight housing up or down.
- Once you're hitting dead-on with your 20-yard pin, it's time to sight-in the remaining pins which will all be adjusted individually. Typically, the next pins will be set for 30, 40, and 50 yards, if applicable. Stand at the distance you want to set your next pin for, let off 3-5 arrows using the appropriate pin to aim with and shoot for the horizontal line of the target.
- Examine the arrows in relation to the horizontal line of the T. Be precise in making individual adjustments for the appropriate pin. Again, follow the arrow. When you're successfully hitting the center of the line, it's time to move to the next pin until all remaining pins are set for their distance.
- Go back to 30 yards and let off 3-5 arrows for the vertical line to fine-tune your windage (left/right) axis with any adjustments if needed. You might notice you may be slightly off at 30 yards since variations in accuracy are magnified at longer distances.
- Fine-tune any adjustments by double checking you're consistently hitting the lines at your set pin distances. If you need to make any fine-tuning adjustments to your 20-yard pin at this point, do it by adjusting the individual pin, not by moving the entire sight housing.
How to Sight In a Bow Sight With 1 Pin
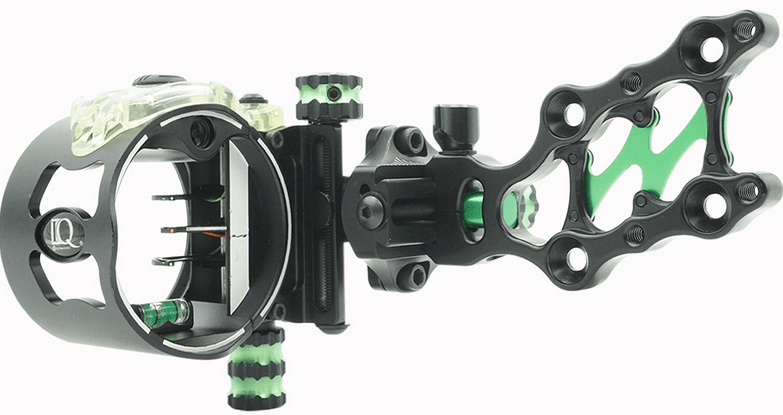
Each manufacturer and model of single-pin sights will have slightly different sighting-in instructions and sight tapes provided. It's important to follow the setup recommended by the manufacturer to achieve maximum potential and accuracy from your sight.
A well-accepted method is the 20/60 setup which we'll explain below.
- Stand approximately 10 yards away from your T target. Starting with the windage axis (left/right), you will want to aim for the vertical part of the target. Let off 3-5 arrows in a line.
- Examine the arrows position in relation to the vertical line of the T. Being this close to the target, you want to make sure you're as dead-on the center of the line as possible since margins of error will be magnified when you step back to fine-tune your adjustments at longer distances.
- To make adjustments, follow the arrow. If your arrows are left of the T, make an adjustment to move the entire sight housing If your arrows are right of the T, make an adjustment to move right.
- Repeat this process until your arrows are dead-on center on the vertical line.
- If you're using calibration tape provided by the manufacturer, go ahead and stick it on your wheel or bar now. Turn the wheel or knob all the way to the top until it stops. Stand 20 yards away from your T target. Let off 3-5 arrows in a line using your pin as an aiming point for the horizontal part of the target to begin adjustments.
- Follow the arrow. If you're low, turn the wheel/knob down in small increments at a time. Repeat this process until your arrows are dead-on center on the horizontal line.
- If using calibration tape, note the reference number the indicator is lined up with as this is your 20-yard mark. If not, use a pencil or marker to mark where your 20-yard mark is.
- Step back in 10 yards at a time to sight-in for 30, 40, and 50 yards. Dial down the wheel/knob each time you move back.
- Finally, get sighted-in at 60 yards and make the adjustments necessary by following the arrow. Take note of the reference number the indicator is lined up with or mark this spot as this is your 60-yard mark. Additionally, fine-tune your windage (left/right) axis now to ensure consistent shots.
- Match the correct sight tape for your markings or number references provided by the manufacturer and apply it to the wheel or bar. Use the sight-tape to double-check you're hitting consistently at the matched distances.
Put it to the Test!
Once you're done sighting-in, it's time to pull out the 3D and 10-ring targets and put your skills to the test. You may be surprised to find your groups are tighter than ever. But, is this the only way to sight in a bow?
Everyone may use a slightly different sighting-in method, the same way they may use different distances to sight in their pins. Some may adjust for both left/right at the same time as they're adjusting for up/down shots. It happens to be the mainstream way of adjusting especially when using traditional 10-ring targets.
Use the system you're most familiar with. Get to know what distances or sight-in method you like best by getting out there and nocking some rounds. Sight in and shoot sharp!
Further Reading


